
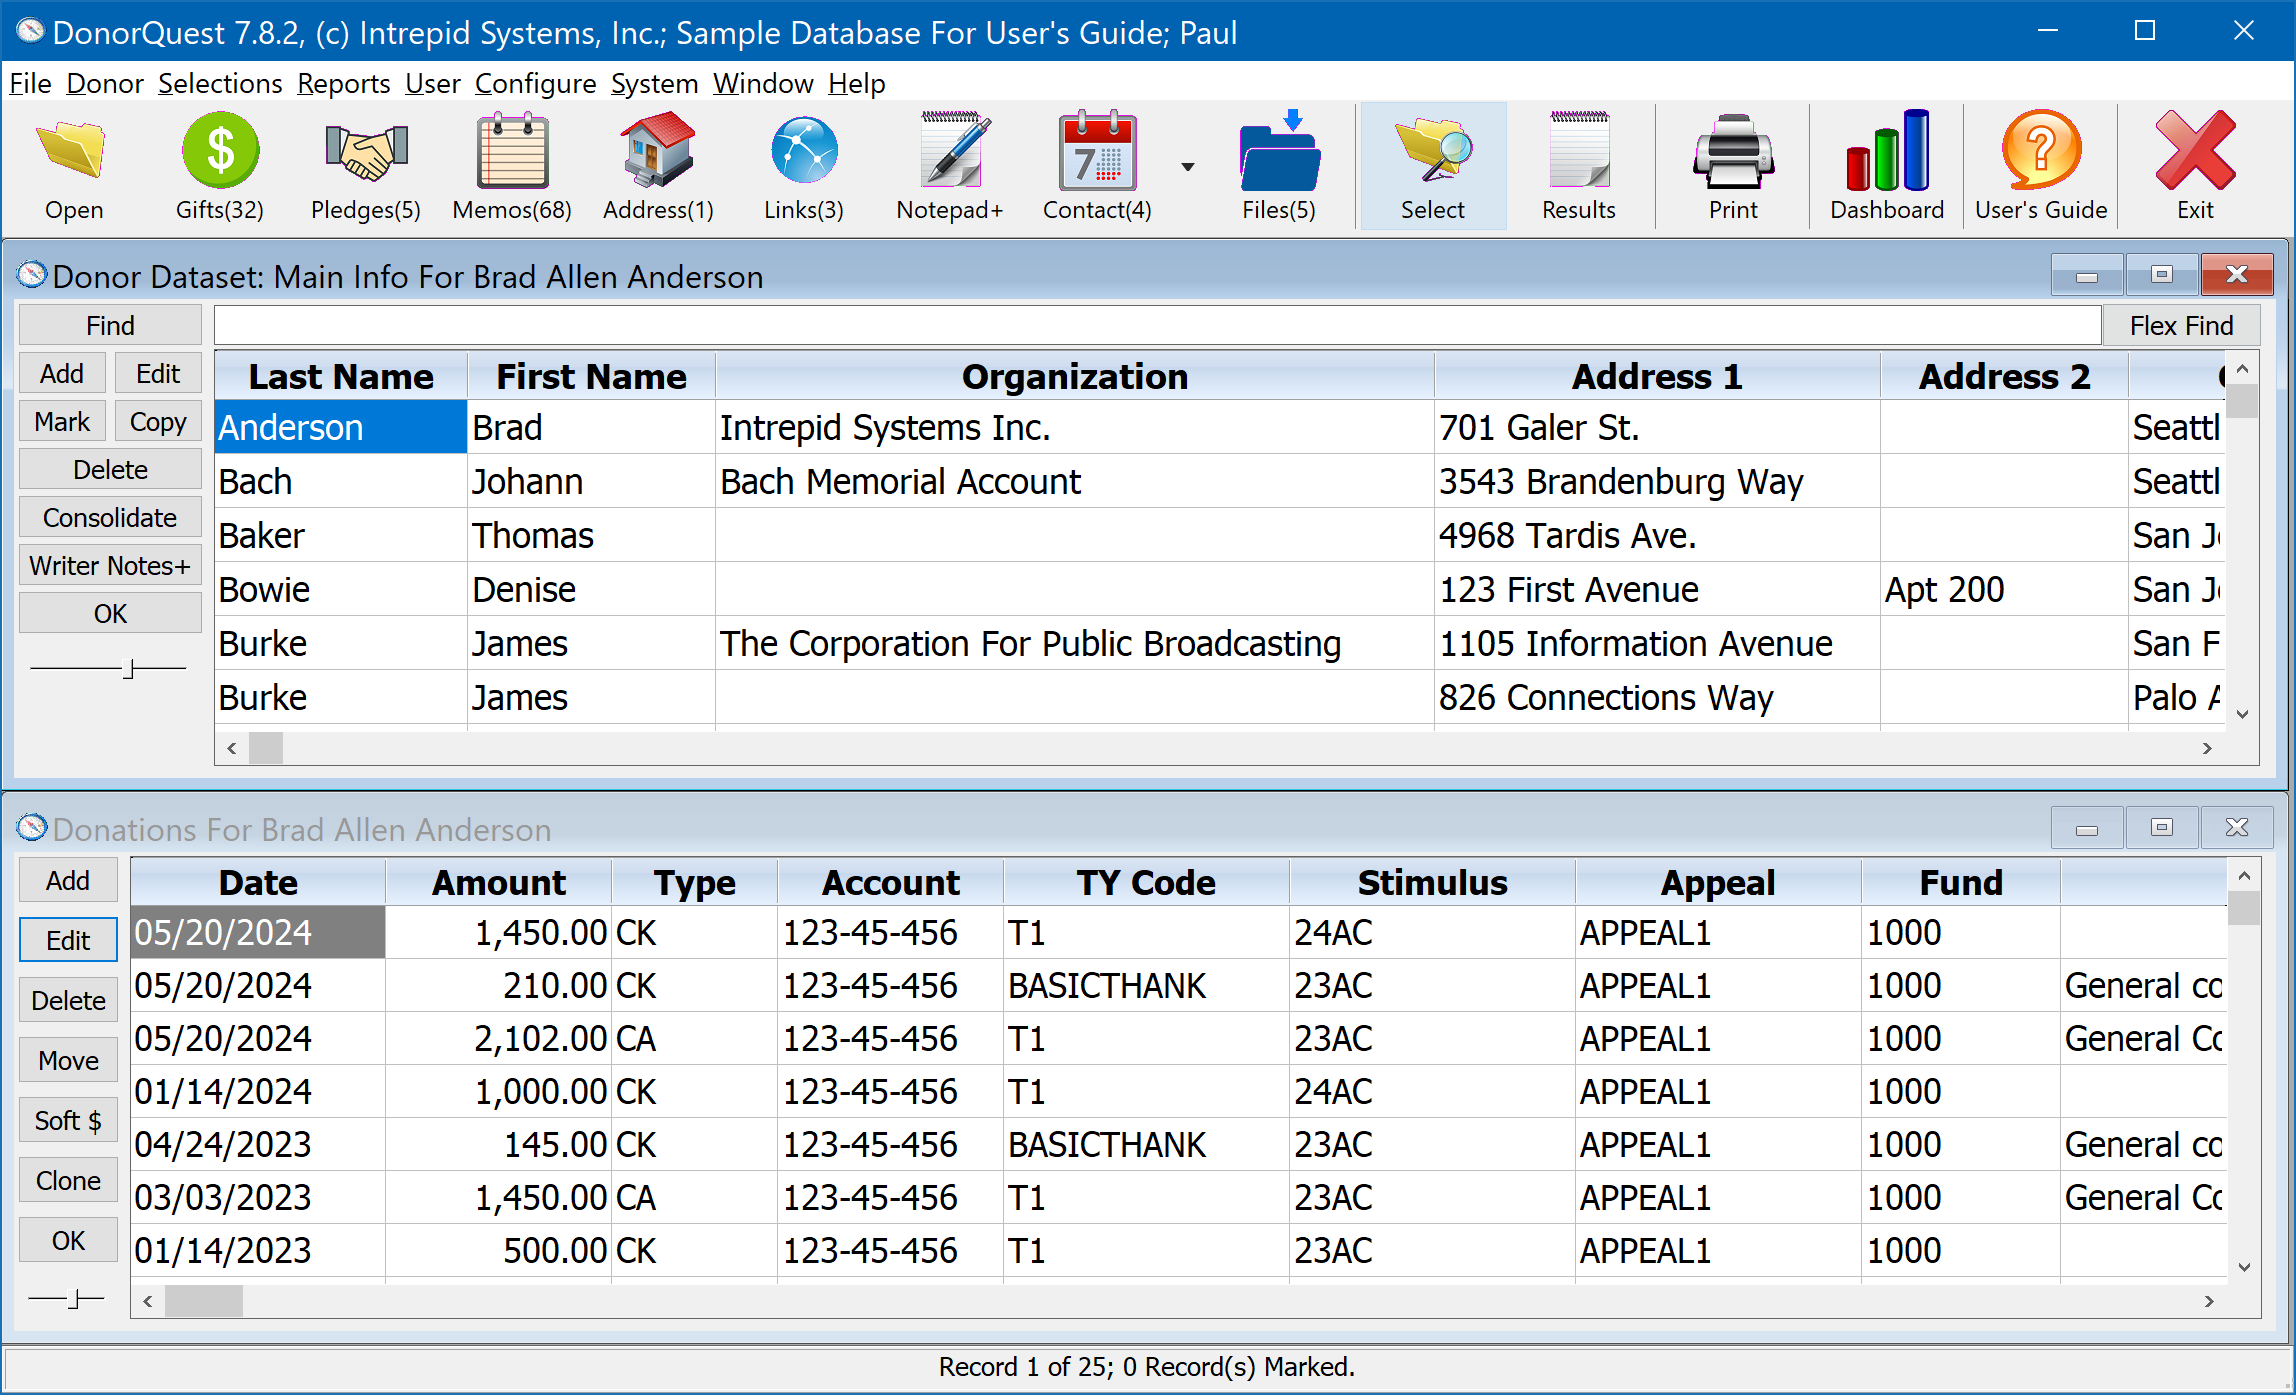
The Open button on the DonorQuest Toolbar opens your main data entry windows (normally the Main Information Datasheet window and the Donations Datasheet window, as shown below). The windows that open, their size, and relative positions may be customized for your account. That way, each time you click the Open button, the windows you use most often will be automatically opened and positioned according to your preference. For example, some users can choose to see the Main Information and Donations each time while others could see the Main Information and Pledges or Contacts.
Datasheet windows in DonorQuest look like basic spreadsheet displays, so those who are familiar with spreadsheet applications will find them to be familiar in appearance and functionality, but they differ slightly from a traditional spreadsheet in that the data they show is heavily protected. Edit access is carefully controlled by the specific rights given to your user account. There are also automatically maintained relationships between the datasheet displays. For example, if you enter a donation which is a pledge payment, the amount paid showing for that pledge on the pledge datasheet will be automatically updated.
To setup those windows you’d like to have open automatically when you click the Open button, do the following. Open the specific windows you wish to have open each time, then organize them exactly where you want them. Next, click on User, Remember Your Open Windows. Now every time you click on the Open Files button, it will open windows according to your preference.
In the following example, DonorQuest is showing the Main Information View and Donation datasheet windows:
Adding a New Donor
Now we will go through the process of adding a new donor account. Click the Add button on the Main Information Datasheet to open the new donor entry window (shown below):
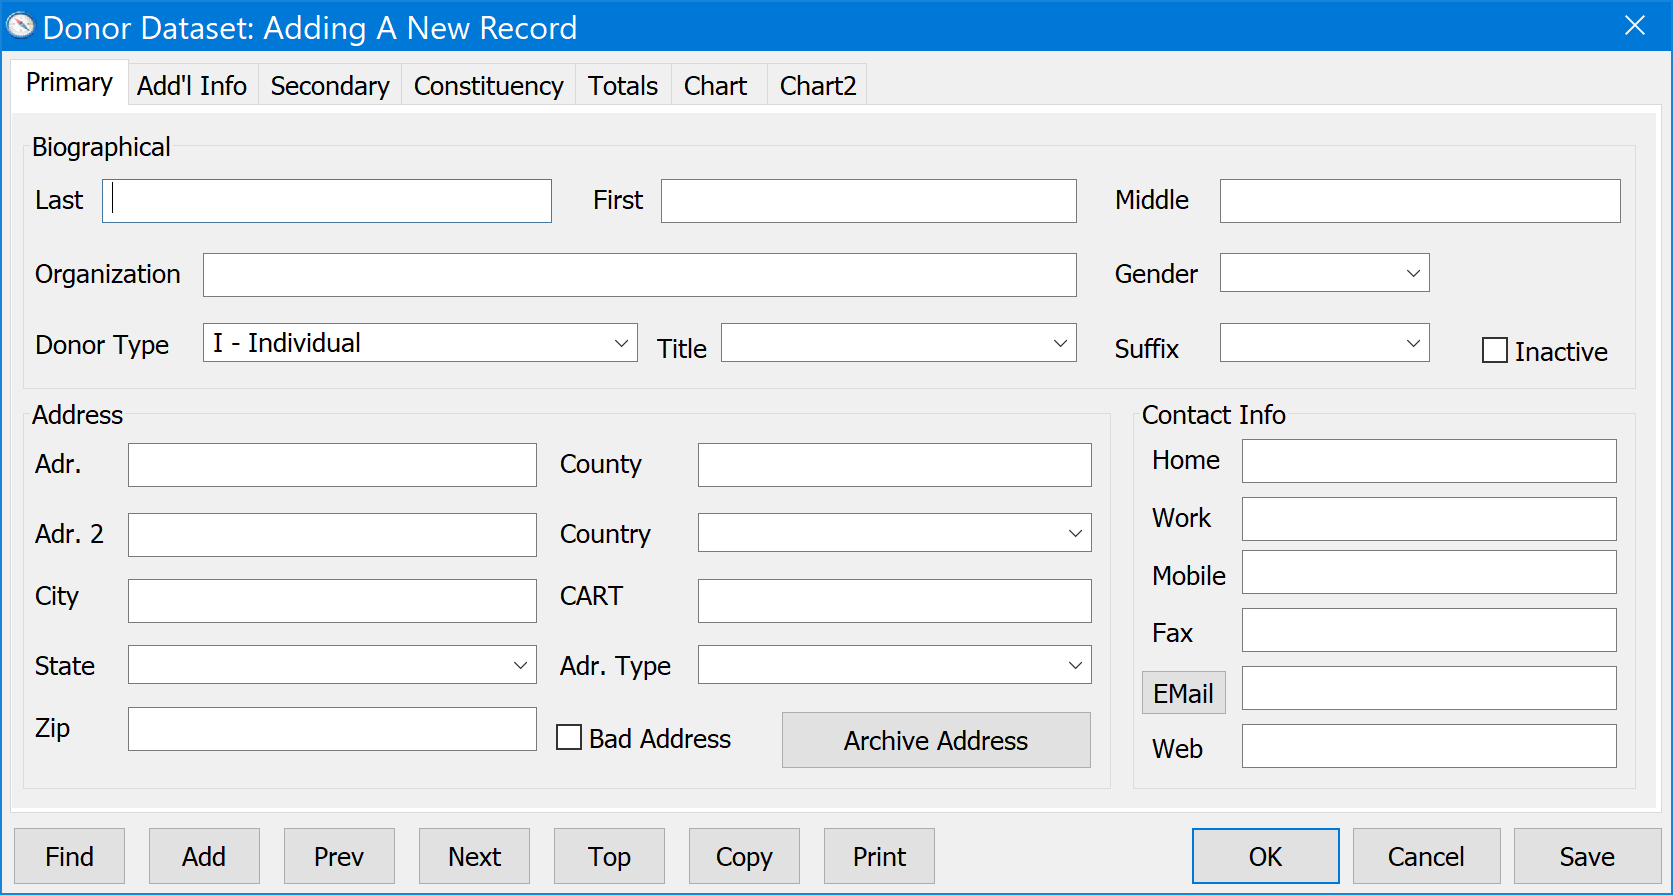
As an example, enter the following information:
Hayward in the Last Name field.
Justin in the First Name field.
1701 Enterprise Way in the first Address Line field.
Without entering the City and State, enter 98109 in the Zip field and press the Tab key on your keyboard. You’ll notice that the City, State, and County are automatically entered for you (if the zip code spans more than one city, you will be shown a menu of the cities to choose from). Click on the Save button. This will save the new record and it will appear with the other names on the Main Information View.
Note: If you are using the sample database provided with the DonorQuest trial version, you should have seen a warning prompt you of a possible duplicate donor. DonorQuest does an automatic duplicate record check when adding new donors. The duplicate check examines the First Name, Last Name, Organization Name, and Address fields, and notifies you if it finds a possible duplicate donor. If it does, it will notify you and give you a choice of saving the record as is, or making additional edit changes before saving it.
For the purposes of this exercise, go ahead and save the duplicate record. We will be using it later when we explore the Duplicate Record selection and consolidation features of DonorQuest.
Navigating Your Database Quickly and Easily
DonorQuest gives you different options for viewing and navigating your database. You can see the datasheet view, the forms, or a combination of the two. For example, orient your DonorQuest windows so that you are able to see the Main Information Datasheet and edit form together like this:
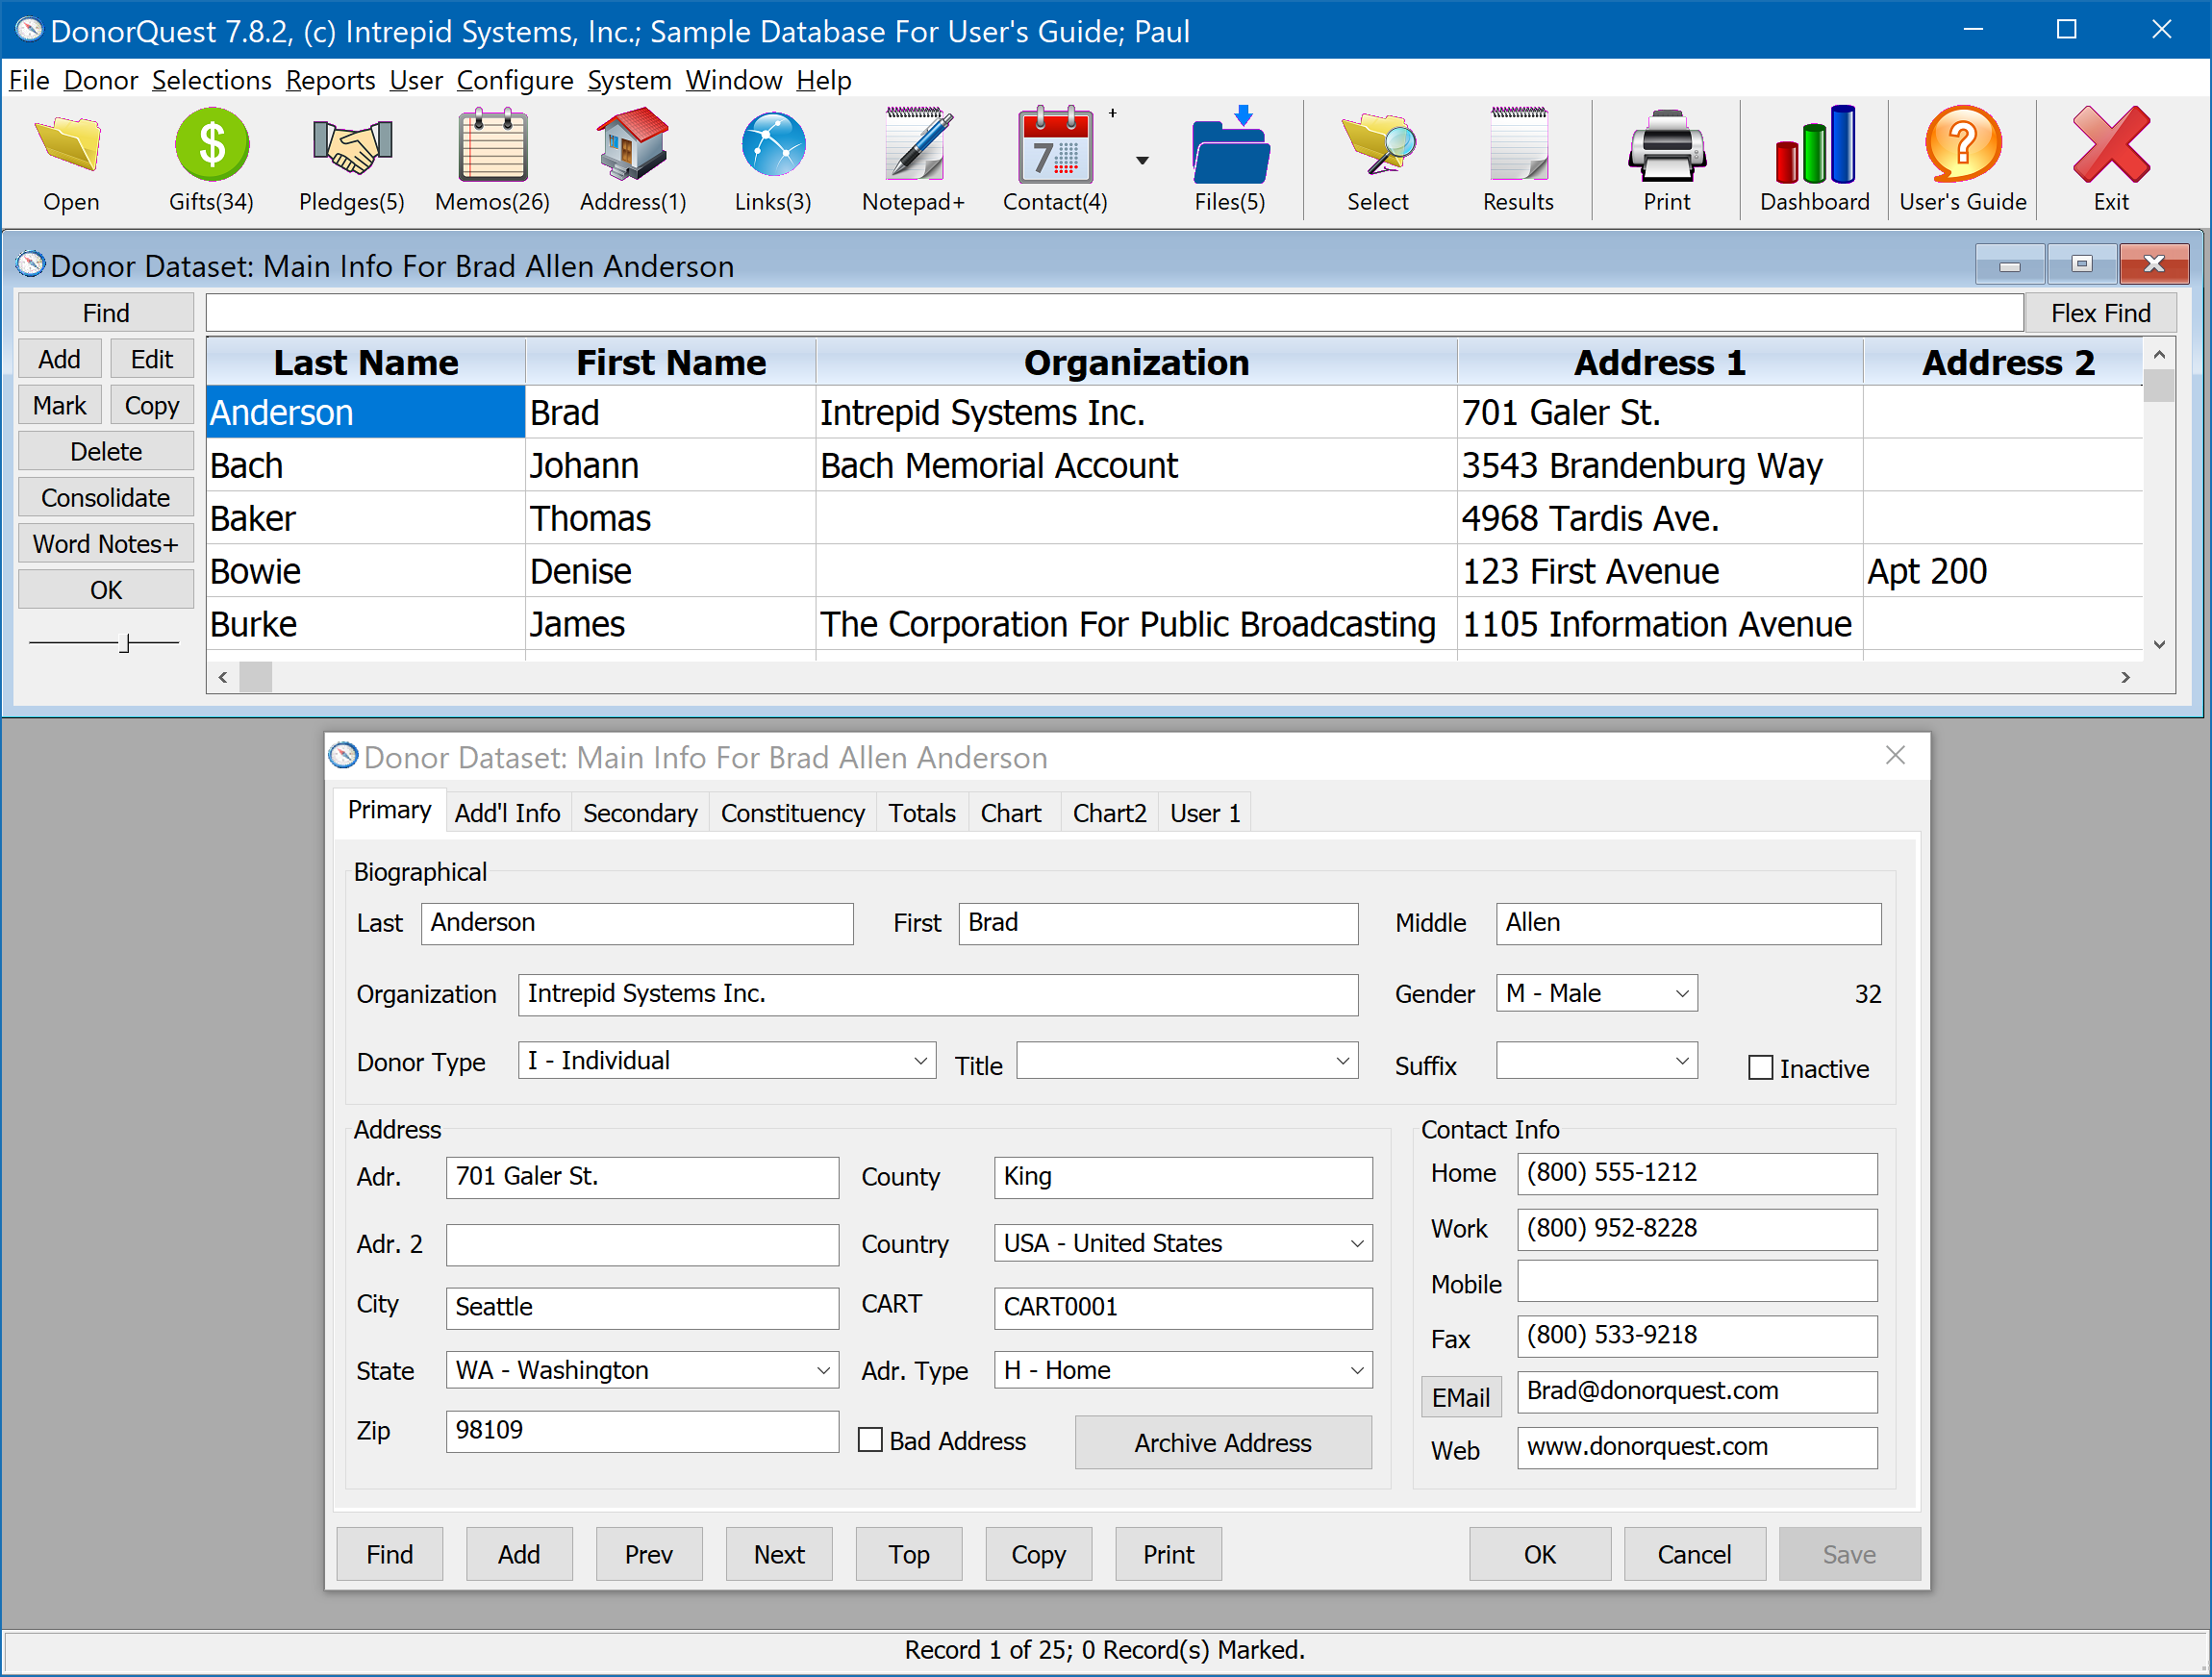
Set focus to the Main Information Datasheet (the spreadsheet display) by clicking on someone's Last Name. You can tell when a datasheet or form has focus because one of the fields will have a deep blue background with white text. In the above example, the Main Information View datasheet has focus because the last name Anderson is shown with the blue highlight. Using your Up and Down arrow keys (or mouse wheel), scroll down through the sample donors in the database. Notice that all donor information updates simultaneously in each window, remaining in sync with the data for the currently highlighted donor. This would be true for any other DonorQuest windows you have open, such as Donations, Pledges, Memos, etc. This allows you to get a big picture of your donors without having to constantly flip through a bunch of tabs. This capability is especially useful on large display screens.
Finding A Donor Record
There are three ways to quickly find donor records. One is the incremental search. With the Last Name column of the Main Information Window highlighted as shown above, begin typing the letters of the last name Hayward. You will see the display update as you type the name, getting closer with each letter you type. You can search this way in other columns as well, such as in the Organization Name column. Before searching a column with the incremental search, you must first order the display by the column by clicking on the title for the column. Then the letters you type will be used for incremental searching within the newly sorted column. Notice that the letters you have typed so far are shown at the bottom of the main DonorQuest program window. You may use the backspace key to remove the most recent character, or the Shift-Backspace key combination to completely clear your search key.
The second way of searching is by using the Find button. When you click on the Find button, the following dialog will appear:
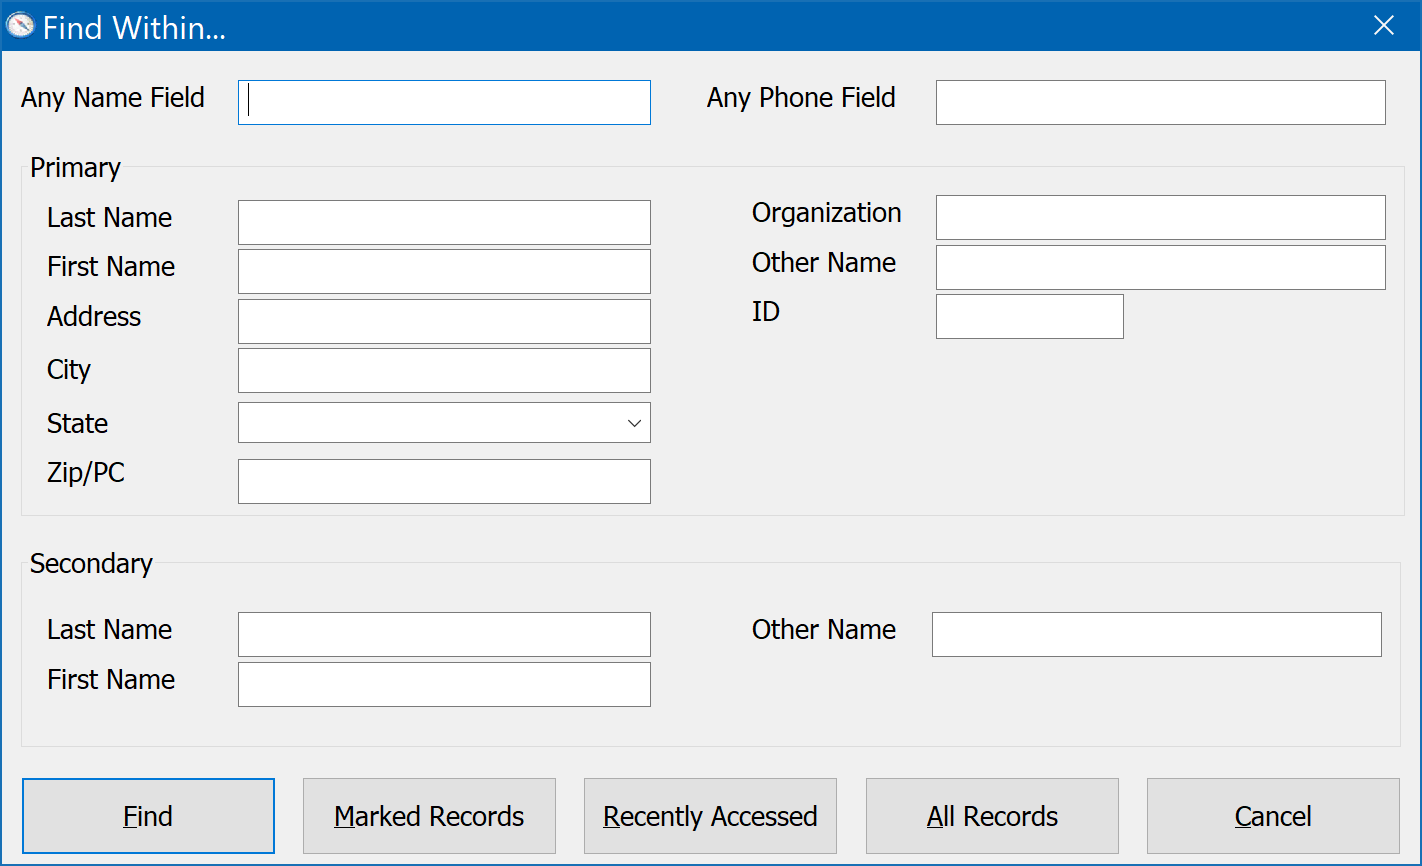
Within the All Names Field, type the three letters hay, then click the Find button. You should see:
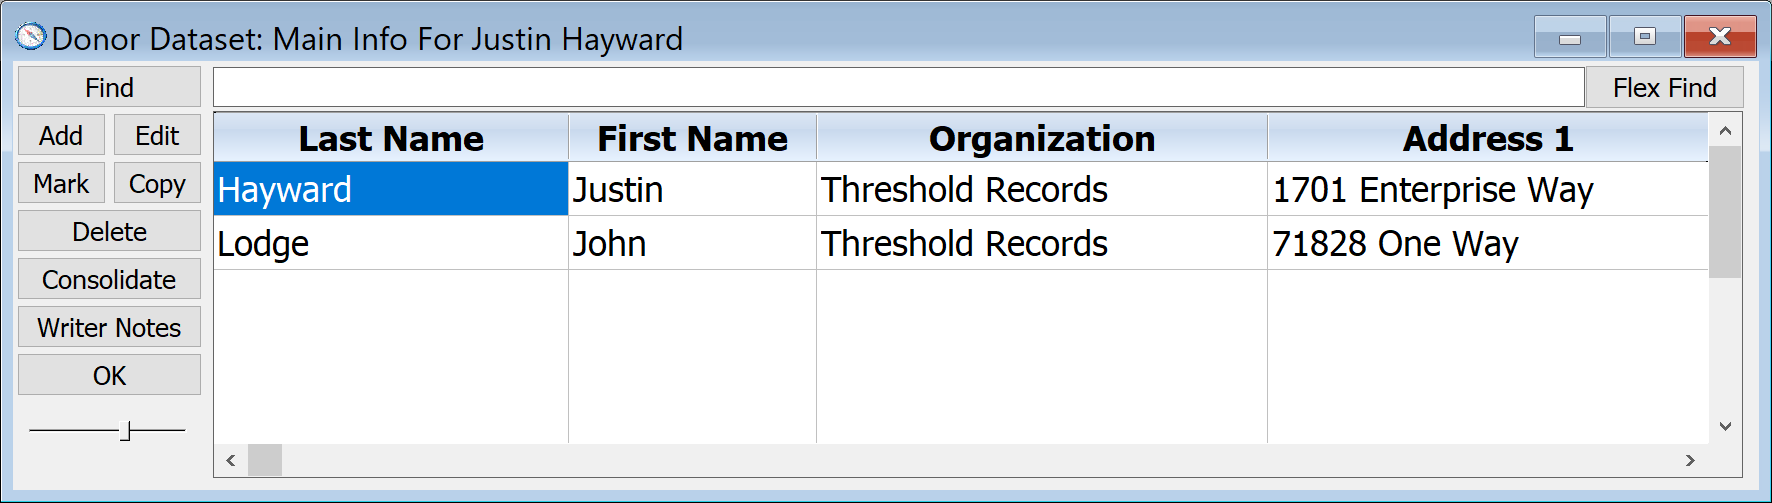
DonorQuest searches across and within all name fields (first name, last name, other name, organization name, etc.) for a word or phrase starting with the letters you have typed. This means that you can type just the first few letters of the word you are looking for and DonorQuest will find it. If no direct matches are found, DonorQuest will next search phonetically. So, even if you happen to miss-spell a name, it is still likely DonorQuest will be able to find the donor record!
In our example search, notice that two names appear in the Main Information Datasheet, Justin Hayward and John Lodge. Justin Hayward's name was found because of the "hay" at the start of his last name. Why is John Lodge's name here? Well, if you scroll over to the right, you'll see Justin Hayward listed in John Lodge's other name field. Since DonorQuest shows you all possible matches to your key name search, you can be sure and get the right donor before proceeding with a donation or other entry.
The Find button allows you to search for donors by any combination of last name, first name, second name, organization name, address, phone, city, state, zip, other name, and ID number. DonorQuest is not case sensitive, which means that it does not matter whether or not you correctly capitalize the name you wish to search for. For example, if you are searching for a donor by the last name of "Hayward", you can enter the name as "hayward" or "HAYWARD" or even "HaYwArD" and the search will yield the same result.
In addition to using the Find button, you can also find donor records using the Incremental Search method. This method allows you to simply start typing the donor's name to locate the actual record. The status window at the bottom of the main DonorQuest window will change to read "Searching by Last Name for:" and it will show letters as you type and get progressively closer to the record you are searching for. Here is an example of searching for a last name of "Hayward" using the incremental search:
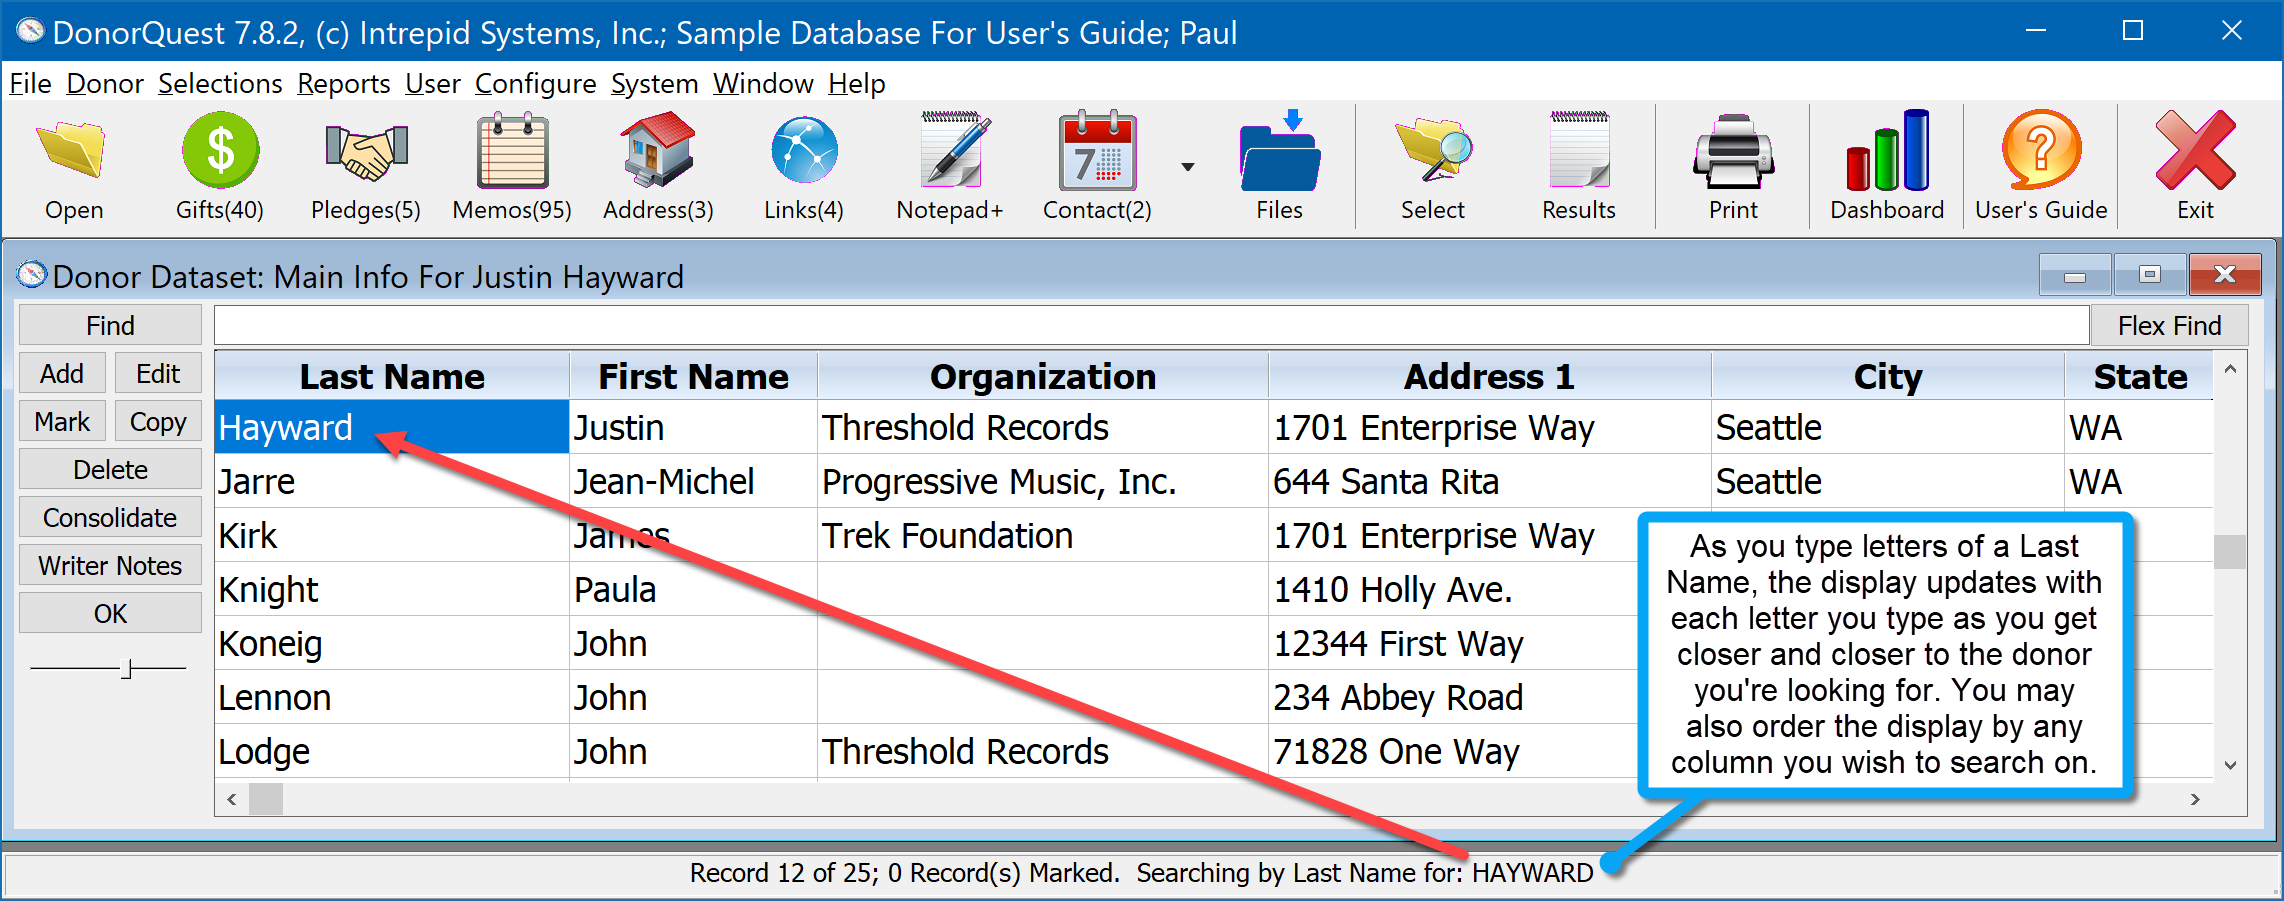
If you are doing an incremental search for a common last name like Smith, you can start typing the letters of the first name after you have typed the last letter of the last name. If you would like to search a different column, such as Organization Name, first click on the title for the column you want to search to order the data by that column. That also tells DonorQuest you want the incremental search to work on that column until you order by a different column. Be sure the blue highlight is showing in the upper (Main Information) window when you are performing an incremental search (or scanning a donation bar code for that matter).
There are two special keyboard keys when doing an incremental search. The Backspace key will remove the last letter you typed and go backwards in the search, and the holding down the Shift key and pressing the Backspace (Shift-Backspace) will clear all the search letters you have typed so far.
The third and most flexible and simplest way of searching is with the Flex Find feature if you have it enabled under User, Change Your Personal Settings. It's a bit like a Google search, providing just one simple search blank, but using very smart methods internally to figure out what you're looking for. You can use partial names with it in any order, a donor ID number, a bit of an address, email address, etc. What's more, you can combine bits and pieces of content across columns, and DonorQuest will search across columns, assembling a display result taking everything you type into consideration. If you are new to DonorQuest, we recommend using the Flex Find as your primary method of searching. The other methods allow more control over which columns are searched, but most of the time you can just let DonorQuest take care of that decision automatically with the Flex Find.
Setting Up Your Data for Streamlined Querying and Reporting
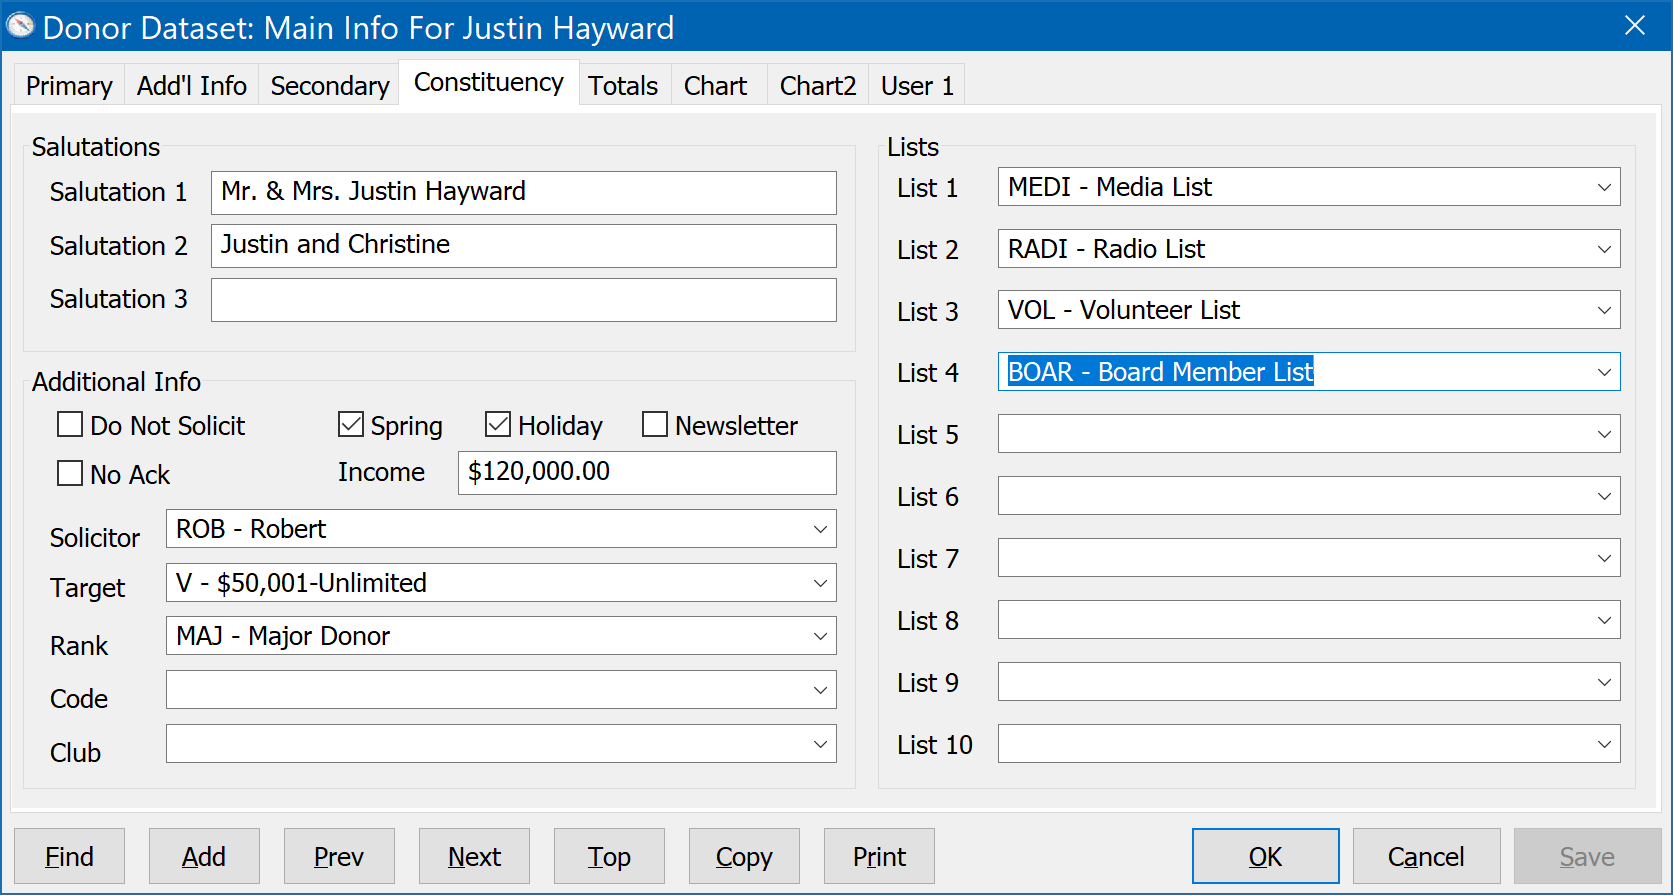
On the Constituency tab of the Main Information Form you will find ten List fields. List fields help you categorize your donors, enabling you to query the database for people who belong to one or more special groups (each defined by you). Here's an example for coding donor Justin Hayward as a Board member:
1.Move your mouse to the List code fields and position your cursor in the first empty List box.
2.Click on the drop-down arrow to the right of the field. This will bring up the Code Assistance window that allows you to select a code from the window.
3.Click on BOAR from the available choices.
4.Finally, click the Save button on the Main Information View to save the change:
If you know a code, you can also simply type it instead of using the drop-down menu. When typing a code, press the tab key after you have entered it so that it can be validated. You may also type a partial code (just the first few letters) and press the down arrow on your keyboard until the correct code appears.
For more details about the buttons on the Main Information form and a description of all the data fields it offers, please refer to the main topic on Entering Donor Information and the Header Table topic.