The Files button on the DonorQuest toolbar allows you to store and retrieve an unlimited number of files of any type (i.e. PDF, Word, Excel, Picture, Sound, Video, etc.) in each donor's record. The files are donor-specific and are shown in a standard DonorQuest datasheet for each donor, just like donations, pledges, contacts, etc. Stored files may be opened in place by double-clicking on them. They may also be downloaded to your workstation, provided you have the stored file download access right turned on for your account in DonorQuest. There are five user rights associated with stored files in DonorQuest - the ability to see the names of stored files, add to stored files, retrieve stored files, view/edit stored files in place (without having to extract and re-add them), and the right to delete stored files. Just as the Donations icon shows the number of donations a donor has, the Files icon shows the number of stored files stored in each donor's account. This allows you to know at a glance whether there are any stored files for the current donor, even when Stored Files window is not visible. When you click on the Files icon, the Stored Files window will open, which looks like this:
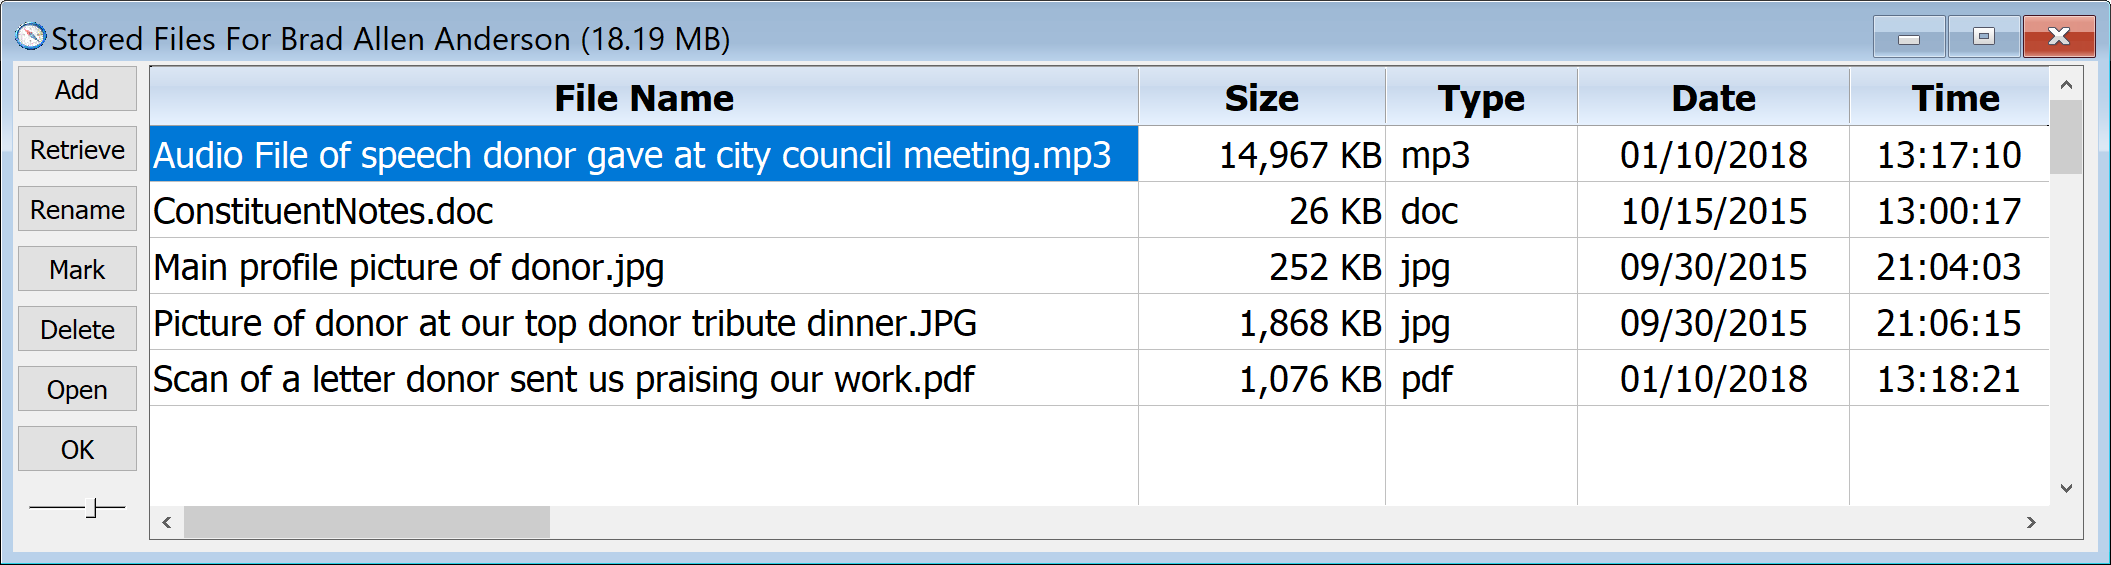
Double-clicking a file name will open it in place. You may also use the Mark button to mark multiple files for retrieval to your workstation (or any folder you have access to), or for deletion, depending on how your user rights are set in DonorQuest.
Adding A New File
Clicking the Add button will open a standard File Open dialog, allowing you to navigate to the file you wish to add. You may add absolutely any type of file. If a file of the same name already exists in the stored files for the current donor, DonorQuest will ask you for confirmation before replacing the existing file. If your system administrator has placed limits on the size of files which may be added, or the combined size of all stored files for each donor account, it is possible you may exceed these limits. If this happens, DonorQuest will notify you that it can not add the file, referencing the specific restriction in the message it displays. If the file you select is added successfully, the Stored Files window will immediately update to show the name and other stats of the added file.
Retrieving A File
Clicking the Retrieve button will open a folder selection dialog, allowing you to select a folder to receive a copy of the currently highlighted file. You may choose any folder to which you have write access (i.e. a folder on your workstation, or a shared folder on your network). If you have used the Mark button to mark one or more files, all of the marked files will be retrieved once you choose the destination folder.
Marking A File
You may mark any number of stored files for the current donor using the Mark button. Marked files will all be processed in a batch when using the Retrieve or Delete buttons. The marked status for files is temporary and the marks will be removed when the Stored Files window is closed, or you move away from the current constituent record.
Deleting A File
The Delete button will permanently delete the current file, or all of the files you have marked using the Mark button. This can not be undone except by restoring from a backup, so delete files with great caution, especially if you have marked several files for deletion. DonorQuest will prompt you before performing the deletion.
Opening A File
The Open button performs the same action as double-clicking a file name - it will attempt to open the file in place, using the appropriate application. For example, if you attempt to open a stored Word document, DonorQuest will first open Word, then direct it to open the document. Note that you will be editing the one copy of the opened file directly, and any changes you make to it will be saved to the one copy maintained in the donor's record by DonorQuest. If you want to use a temporary or offline copy of a stored file, you should retrieve a copy of the file to a folder on your workstation first, then open that copy. You may then choose to add the edited version back. Note that adding a file back will replace the older version if the file has the same name. DonorQuest will prompt you for replacement of an existing file before it does the replacement.
See also: The Stored Files Button.