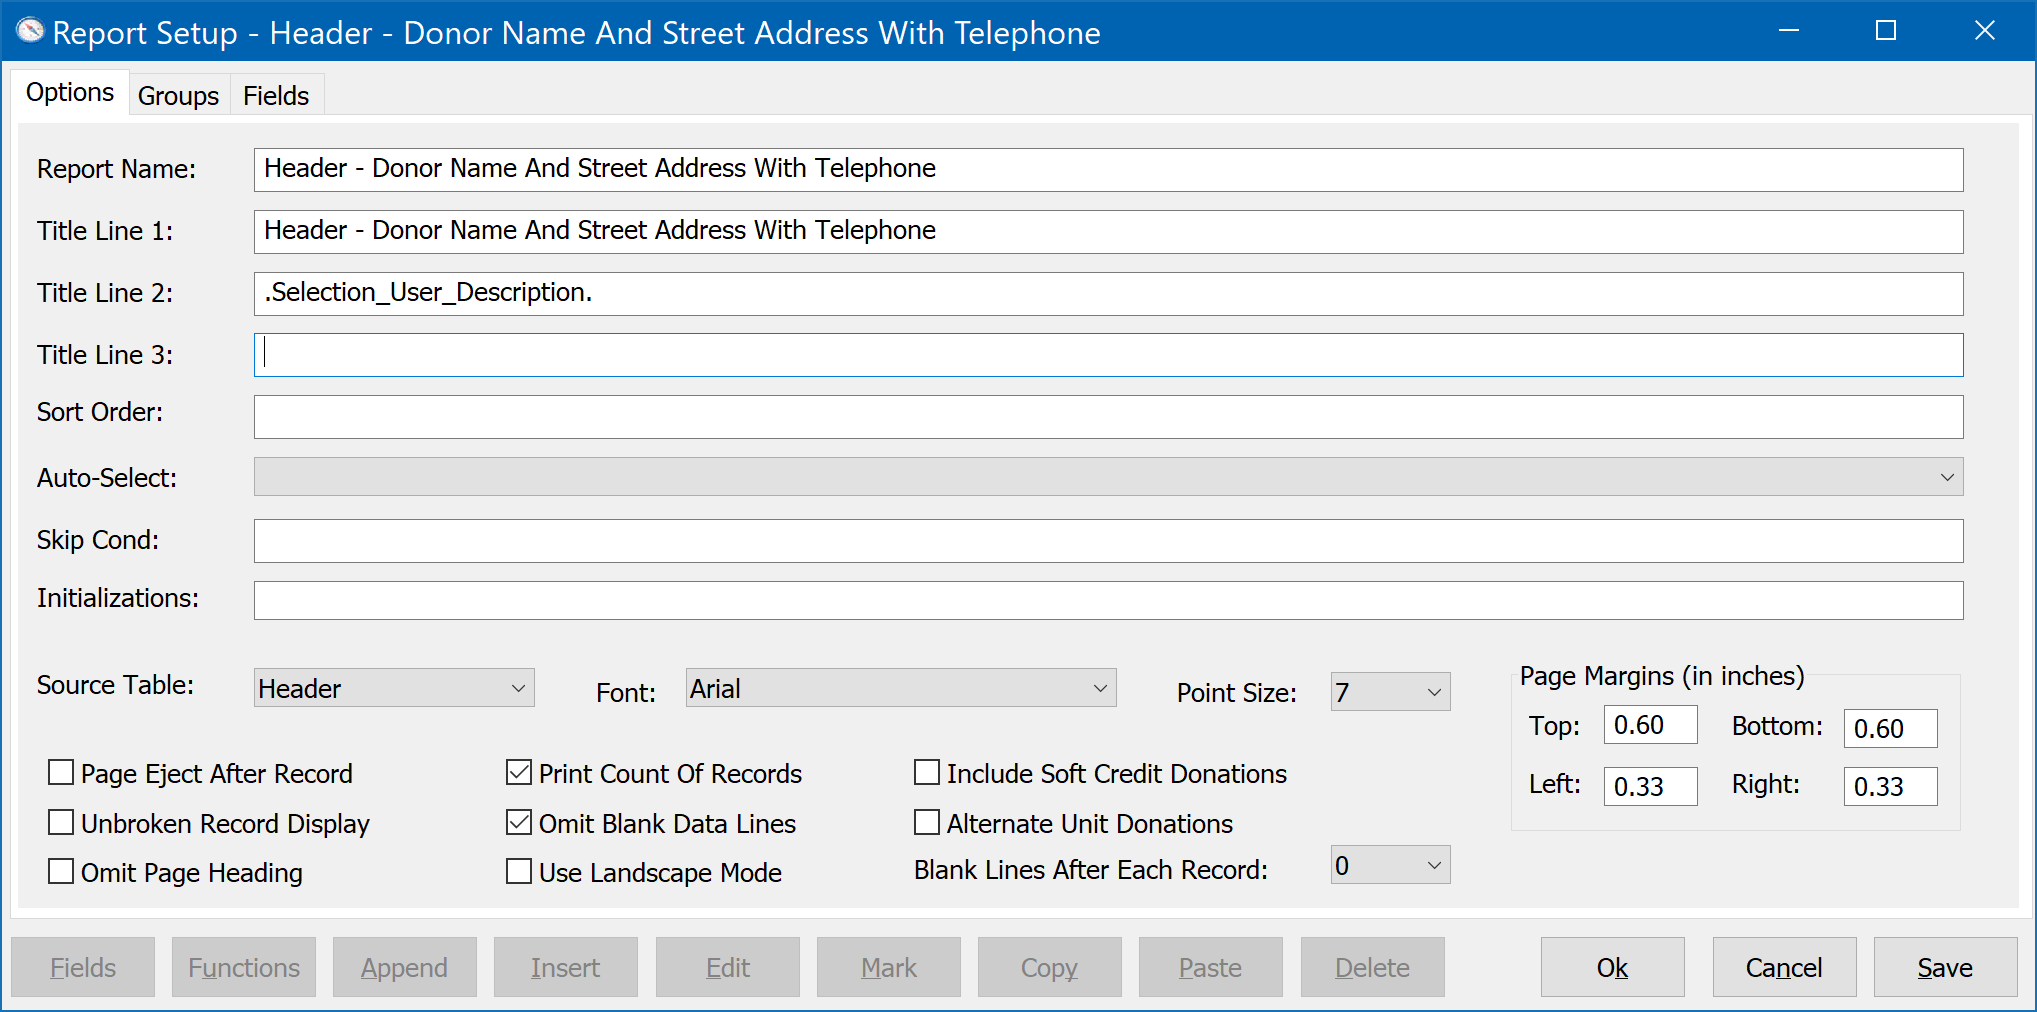
The Options Tab of the Report Setup offers basic formatting options for the report, such as margins and font control. Here is what the Options tab looks like for the sample report layout we created in the previous topic on Creating And Editing Report Layouts:
Report Name
This is the name of the report as it appears on the DonorQuest Report Menu. Generally you should keep the Report Name and the Title Line 1 the same so that given a printout of the report, a user could easily find the report on the Report Menu in order to run it again.
Title Lines 1..3
Each report may have up to three separate lines which appear at the top of each page of the printed report. Normally these lines are literal phrases, but they may also include the special variable ".Selection_User_Description." When printing a selection result with the report, the name given to the selection result will be substituted in the report heading for this variable. An example of this is shown in the Quick Start topic on Creating Selections in which the name we gave a zip code selection is included in the title of the report we used to print the zip code selection.
Sort Order
This is an optional order which can be specified if you want to require that a report always be ordered in a particular way -- by Last Name or Address for example. This will prevent anyone using the report from ordering it on-the-fly in a different way. The Sort Order may be any valid character expression, usually simply the name of a field in DonorQuest, or an expression involving multiple fields. For example, to order by First Name within Last Name, you would use the following expression for the sort order:
.Last_Name. + .First_Name.
You may also apply functions to fields to achieve very special sort orders. Functions can be particularly useful when you want to alphabetize the report on a transformed version of the data within a field or fields. For example, the Descend() function will transform the data of a field such that the report will be alphabetized in descending order by the field to which you apply the Descend() function. While entering a sort expression, you may use the Field Assist and Function Assist buttons for help with entering field and functions names.
The sort expression may also be used to alphabetize a report in special ways that could not be done via the on-the-fly Sort Order option available when printing a report. Using the wealth of functions available in DonorQuest, you could actually alphabetize a report based on information within data fields. For example, using the Get_Token() function, you could alphabetize a report based on the name of streets in the address field, ignoring the numbers which normally precede each street name. The following Get_Token() usage would accomplish this:
Get_Token( .Address., 2, " " )
This usage of Get_Token() takes advantage of the fact most addresses start with a group of characters (letters or numbers) which are followed by a space, and then the street name which is followed by yet another space.
Fields like Last Name, First Name, and Address are character fields. If you wish to mix character fields with other types of fields (such as date or numeric) in a single sort expression, you will have to use the appropriate conversion function to convert fields of date or numeric type to character. For example, to alphabetize donors by donation total, last name, and first name, you would use the following expression:
Str( .Donation_Total., 12, 2 ) + .Last_Name. + .First_Name.
For more information on the Str() and other functions, please refer to the topic on Available Functions.
Auto-Select
The Auto-Select ties into the Pre-Defined and User-Defined selection filters in DonorQuest. These types of selection filters are self-contained, requiring no input from the user. They accomplish a specific filtering action. When you link to one of these for a report layout, the selection is automatically run prior to printing the report, and the result of the selection is then used to print the report.
Skip Condition
The report Skip Condition acts as a mini-filter. It is similar to a selection, but acts directly as the report is printing to filter out unwanted records. As an example, the "Header - Top 10 Donor" report uses it to automatically filter out any constituents which have no giving. This could also have been done with the Auto-Select feature, but it is simpler because the Skip Condition does not require a companion selection definition to be created and always be available for use when the report is run. The Skip Condition is suitable for very simple filter actions which should always be desirable for the report -- even when it is run from a selection result (both the Selection and Skip Condition would apply in that case). For example, you might run the "Header - Top 10 Donor" report for a selection of Header (constituent) records in a certain zip code, but it would still always be true that the report should only consider records with a giving history. The Skip Condition is an expression which must evaluate to true or false.
Initializations
This is a place used to initialize any user-defined variables you may have included in the report. For example, you may have a numeric variable which keeps track of how many report lines have printed so far as the report runs. You would want that variable to be initialized to 1 before the report begins printing. The directives you place in the Initializations blank will always be executed before the report begins printing.
Source Table
While some report layouts are suitable to be printed from any of the seven tables in DonorQuest, most are designed to work with a specific table. By convention, the name of a report should always begin with the name of the table it was designed to focus on. You can see this in the names of most predefined report layouts included with DonorQuest.
Font
This is the font for the report. All parts of the report will be printed using this font.
Point Size
This is the point size which will be used for the body of the report (all the data). DonorQuest will automatically print the column titles and page headings a few points bigger than this and in bold to help them to stand out from the data.
Page Eject After Record
Turn this on if you want a new page to begin after each donor's record is printed. This is normally only used for multi-banded reports, in which the information for a single donor covers many lines and typically takes up most of a page. The predefined report titled, "Header - Complete Information On Each Donor" is an example of a report like this.
Unbroken Record Display
For reports showing multiple gifts per donor (or pledges, memos, etc), DonorQuest will begin a new page if the remaining space on the current page is not enough to show all the information for the current donor without splitting it across pages. If a donor has too much information for a single page (as is often the case for donors with large donation histories), this setting has no effect -- the donor history will have to be spread across multiple pages. If the Page Eject After Record option is turned on, this option also has no effect, since each donor will begin on a new page anyway.
Omit Page Heading
Turn this on if you do not want any report heading printed. This is unusual, but very useful for specialized reports -- such as the, "Header - Envelopes (Using Salutation1)" report which prints mailing addresses directly on envelopes.
Print Count Of Records
This option simply prints a count of the records processed, and a count of the records printed in the report on the last page of the report. The number of records processed may be different than the number of records printed if the Skip Condition results in some records being skipped during printing.
Omit Blank Data Lines
Turn this on for reports which print multiple lines of data for a single donor when there is a possibility one or more of the lines may be blank. For example the, "Header - Envelopes (Using Salutation1)" report includes the Address2 field, which is likely blank for many addresses (it's typically the apartment or suite number). Having the Omit Blank Data Lines option turned on will prevent a blank line from appearing in the middle of the address on an envelope for those addresses which do not have anything in the Address2 field.
Use Landscape Mode
Turn this on for landscape mode printing when you need more horizontal column space. This rotates the printing to give you as much horizontal printing space as possible.
Include Soft Credit Donations
When printing a header-based report which also includes fields from the donations table (such as the "Header - Donation History Report, All Donations" report), DonorQuest will automatically print all hard monetary donations for each donor. Turning this option on will tell DonorQuest to also include all soft credits for each donor coming from other donors. The predefined report titled, "Header - Donation History Report, Soft Credit Donations Received Only" makes use of this option.
Include Alternate Unit Donations
Normally when printing any report involving donation fields, DonorQuest will automatically filter out any non-monetary (Alternate Unit) donations, because mixing money with hours of time or pounds of food donations would not make sense, especially where donation totals are concerned. However, when a report is specifically designed to print donations of hours, pounds, etc., then this option should be turned on. The predefined report titled, "Donations - Donation Detail Report Including Alternate Unit Donations" makes use of this option.
Blank Lines After Each Record
When printing multi-banded header-based reports which may have multiple lines per donor, this setting allows you to control how many blank lines will print between donor records on the same page. This setting is ignored if Page Eject After Record is turned on.
Page Margins
Here you can set the Top, Left, Bottom, and Right page margins. Units are in inches.