In DonorQuest, database queries are called selections. When a selection is run, the result is basically a list of donors, donations, pledges, etc. which meet the conditions you specify in the selection conditions. It's basically a data filter. Selection results are saved in DonorQuest until you delete them so they can be reused. Selections are fundamental to the design of DonorQuest. A selection is the starting point for many things such as printing reports, printing mailing labels, doing data exports, and performing sweeping data changes.
In this Quick Start Guide, we will run a basic selection to illustrate how the selection process will filter data, then allow you to print the resulting filtered data using one of the many DonorQuest report layouts. For a really simple example, we will select the name/address records which have a zip code between 94000 and 95999. Begin by clicking on the Select button of the DonorQuest tool bar. You will see the selection dialog open. Proceed as follows:
1.Enter "Constituents With A Zip Code From 94000 through 95999" for the Selection Name.
2.Click the drop-down arrow under Field Name and choose the Zip field.
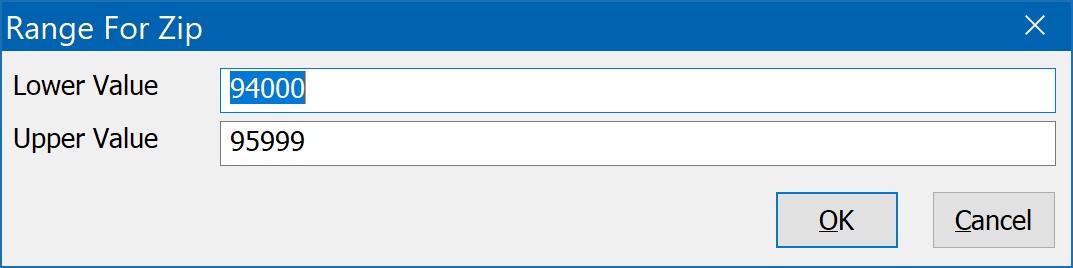
3.Double-Click the Edit Range button, and enter the following:
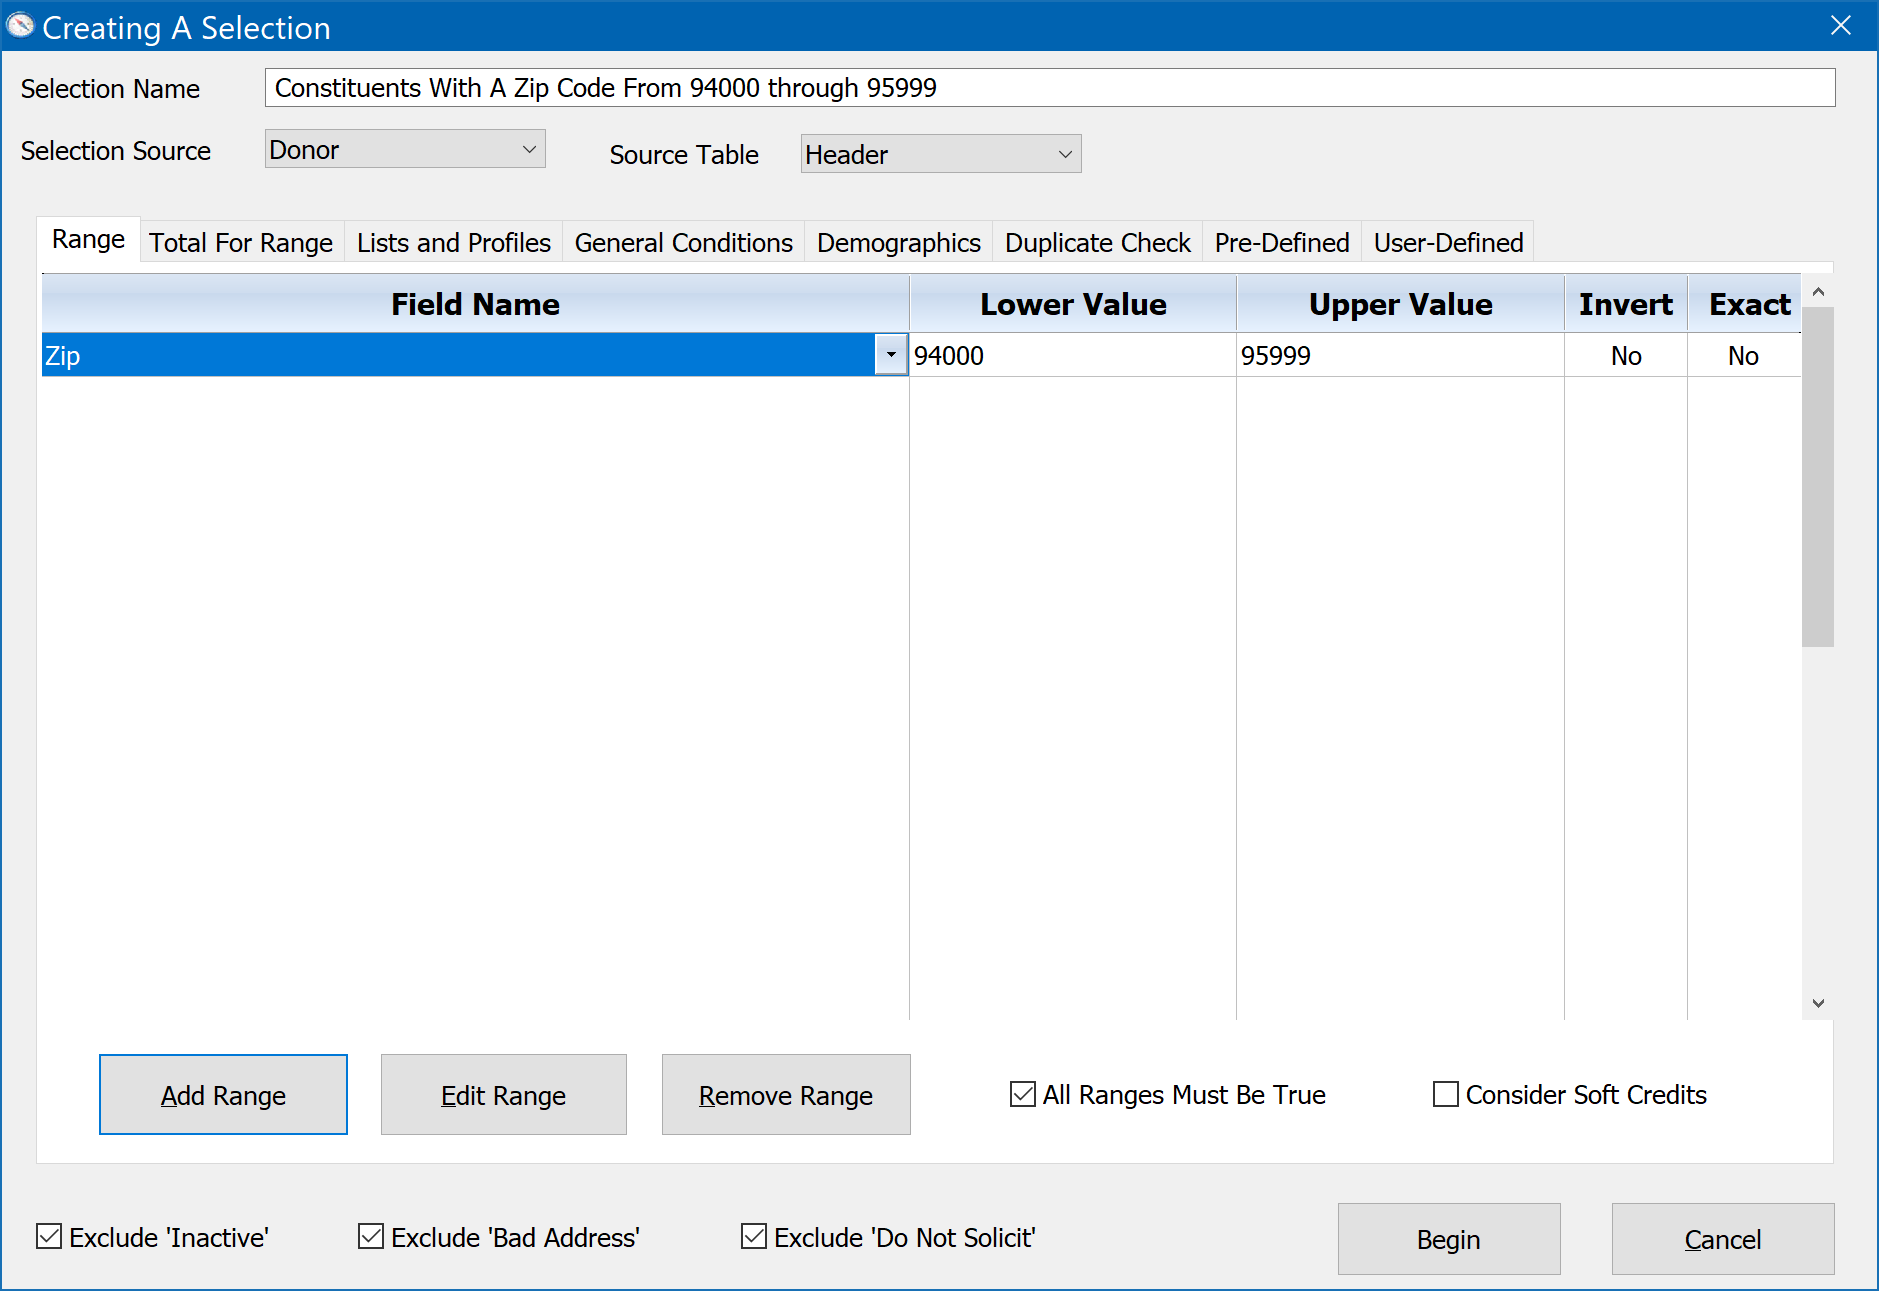
4.Click Ok. The Creating A Selection dialog should look like this:
Finally click the Begin button of the Creating A Selection dialog to run the selection. You will then see a results window which will look like this:
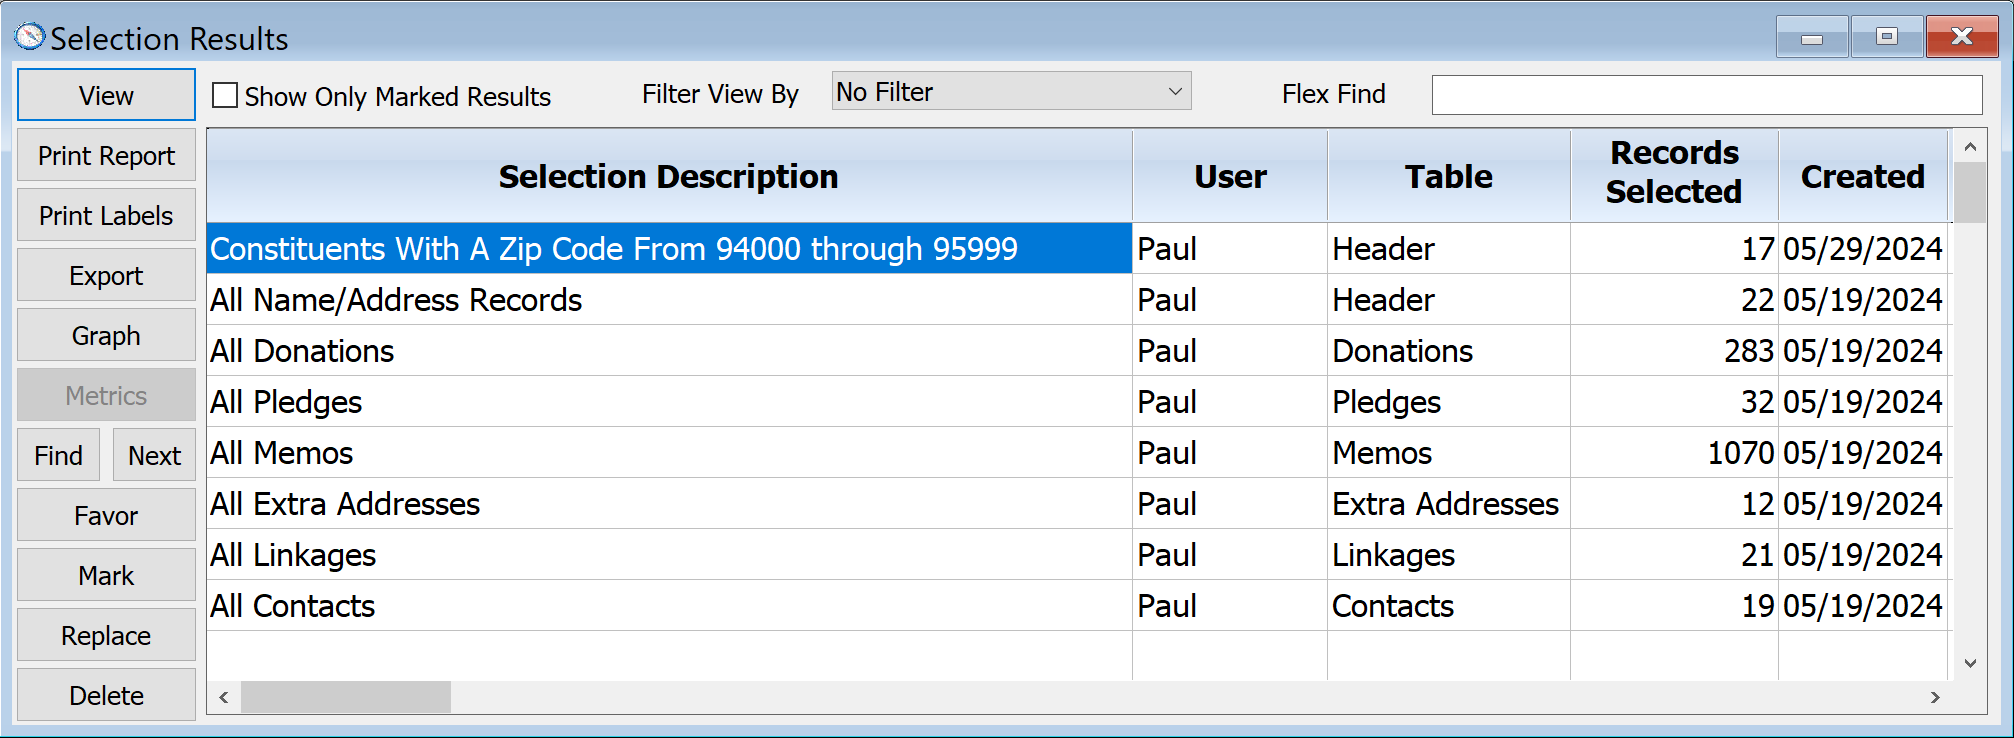
Notice that the selection we created is shown first (with older results shown below it from newest to oldest), and has the name we gave it, "Constituents With A Zip Code From 94000 through 95999." Every selection should be given a meaningful name that will make sense to other DonorQuest users so they may reuse selections created by you. At this point there are many things we could do with the selection, but let's do one of the most common things you would do - print the selection via a report layout. One of the really nice features of DonorQuest is that you can take a single selection, and print it with many different reports. In DonorQuest, a report is just a page layout -- a collection of data fields like Last Name, First Name, Address, etc. The selection controls which donor records will print, and the report layout controls what information you see about the qualified donors who do print (which data columns are shown for them via the report).
Click on the Print Report button of the Selection Results window. You will see the DonorQuest report menu appear. Highlight the report named, "Header - Donor Name And Street Address." Be sure the Printing Options are set to Preview And Optionally Print. It should all look like this:
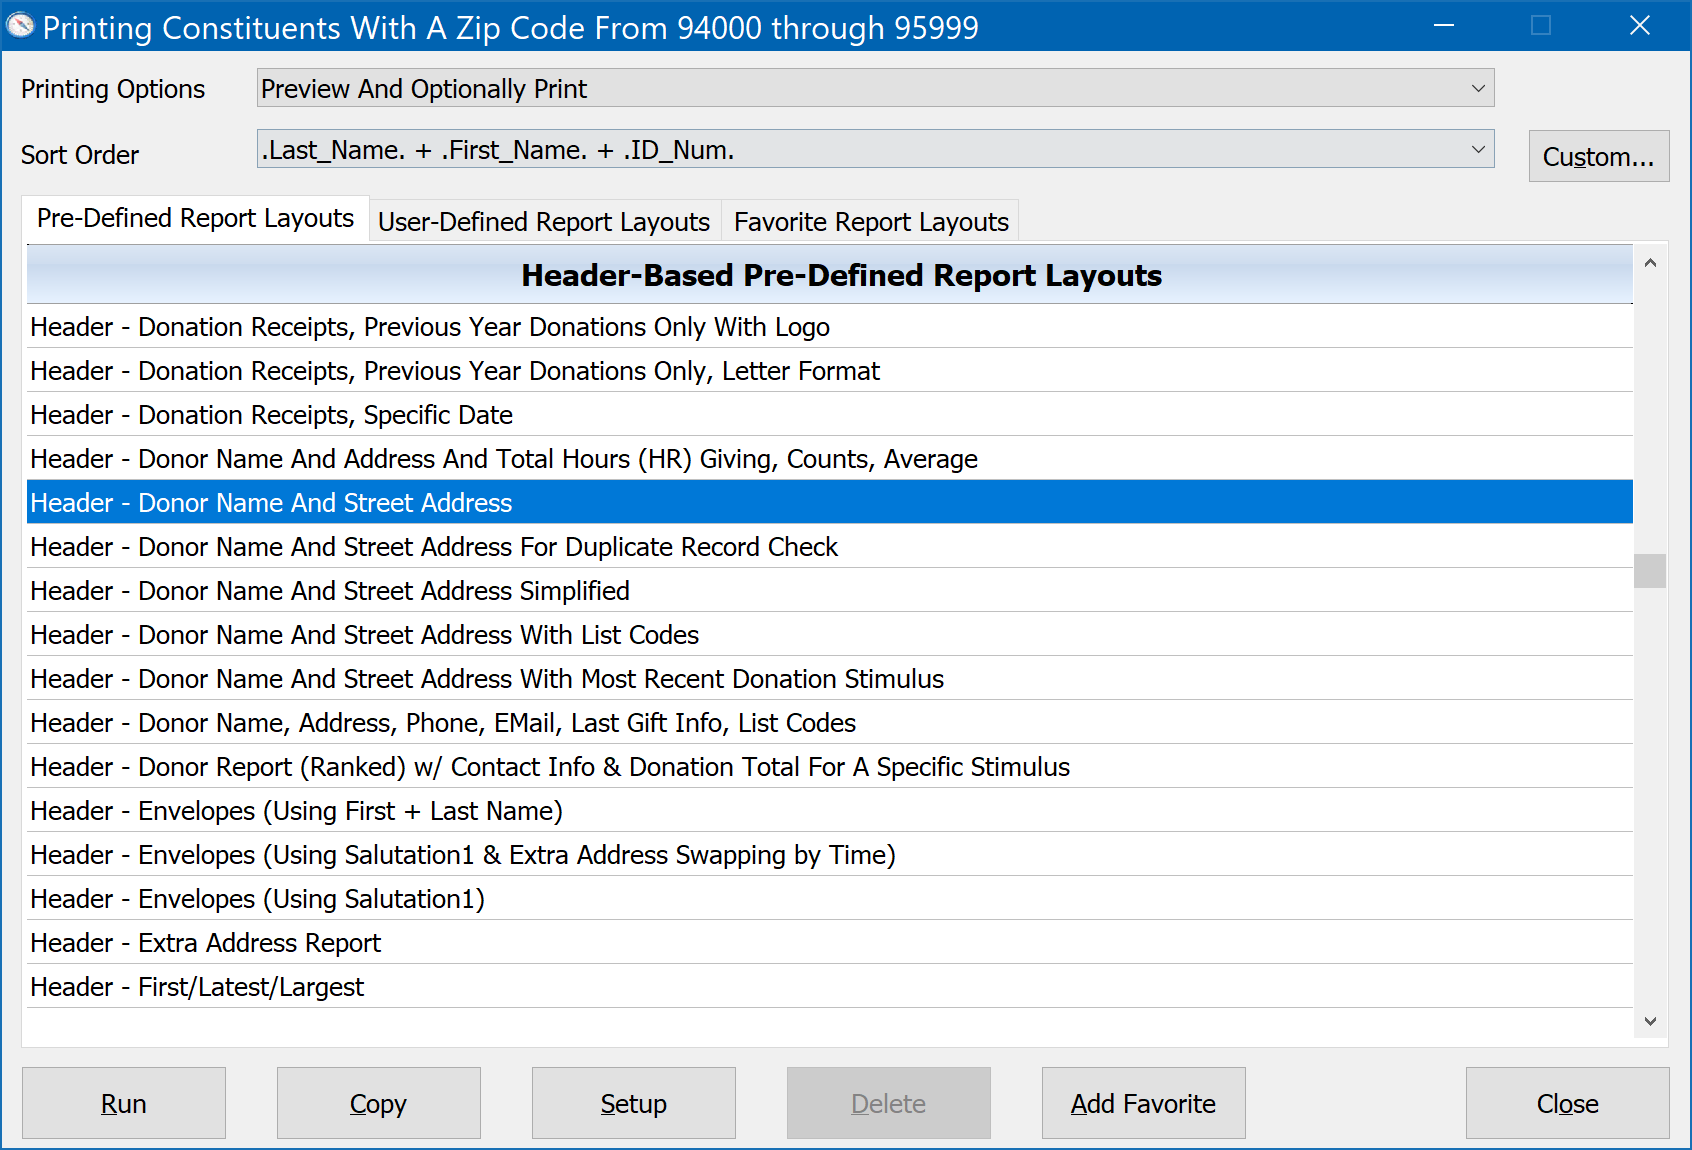
Next click the Run button. You should see the following:
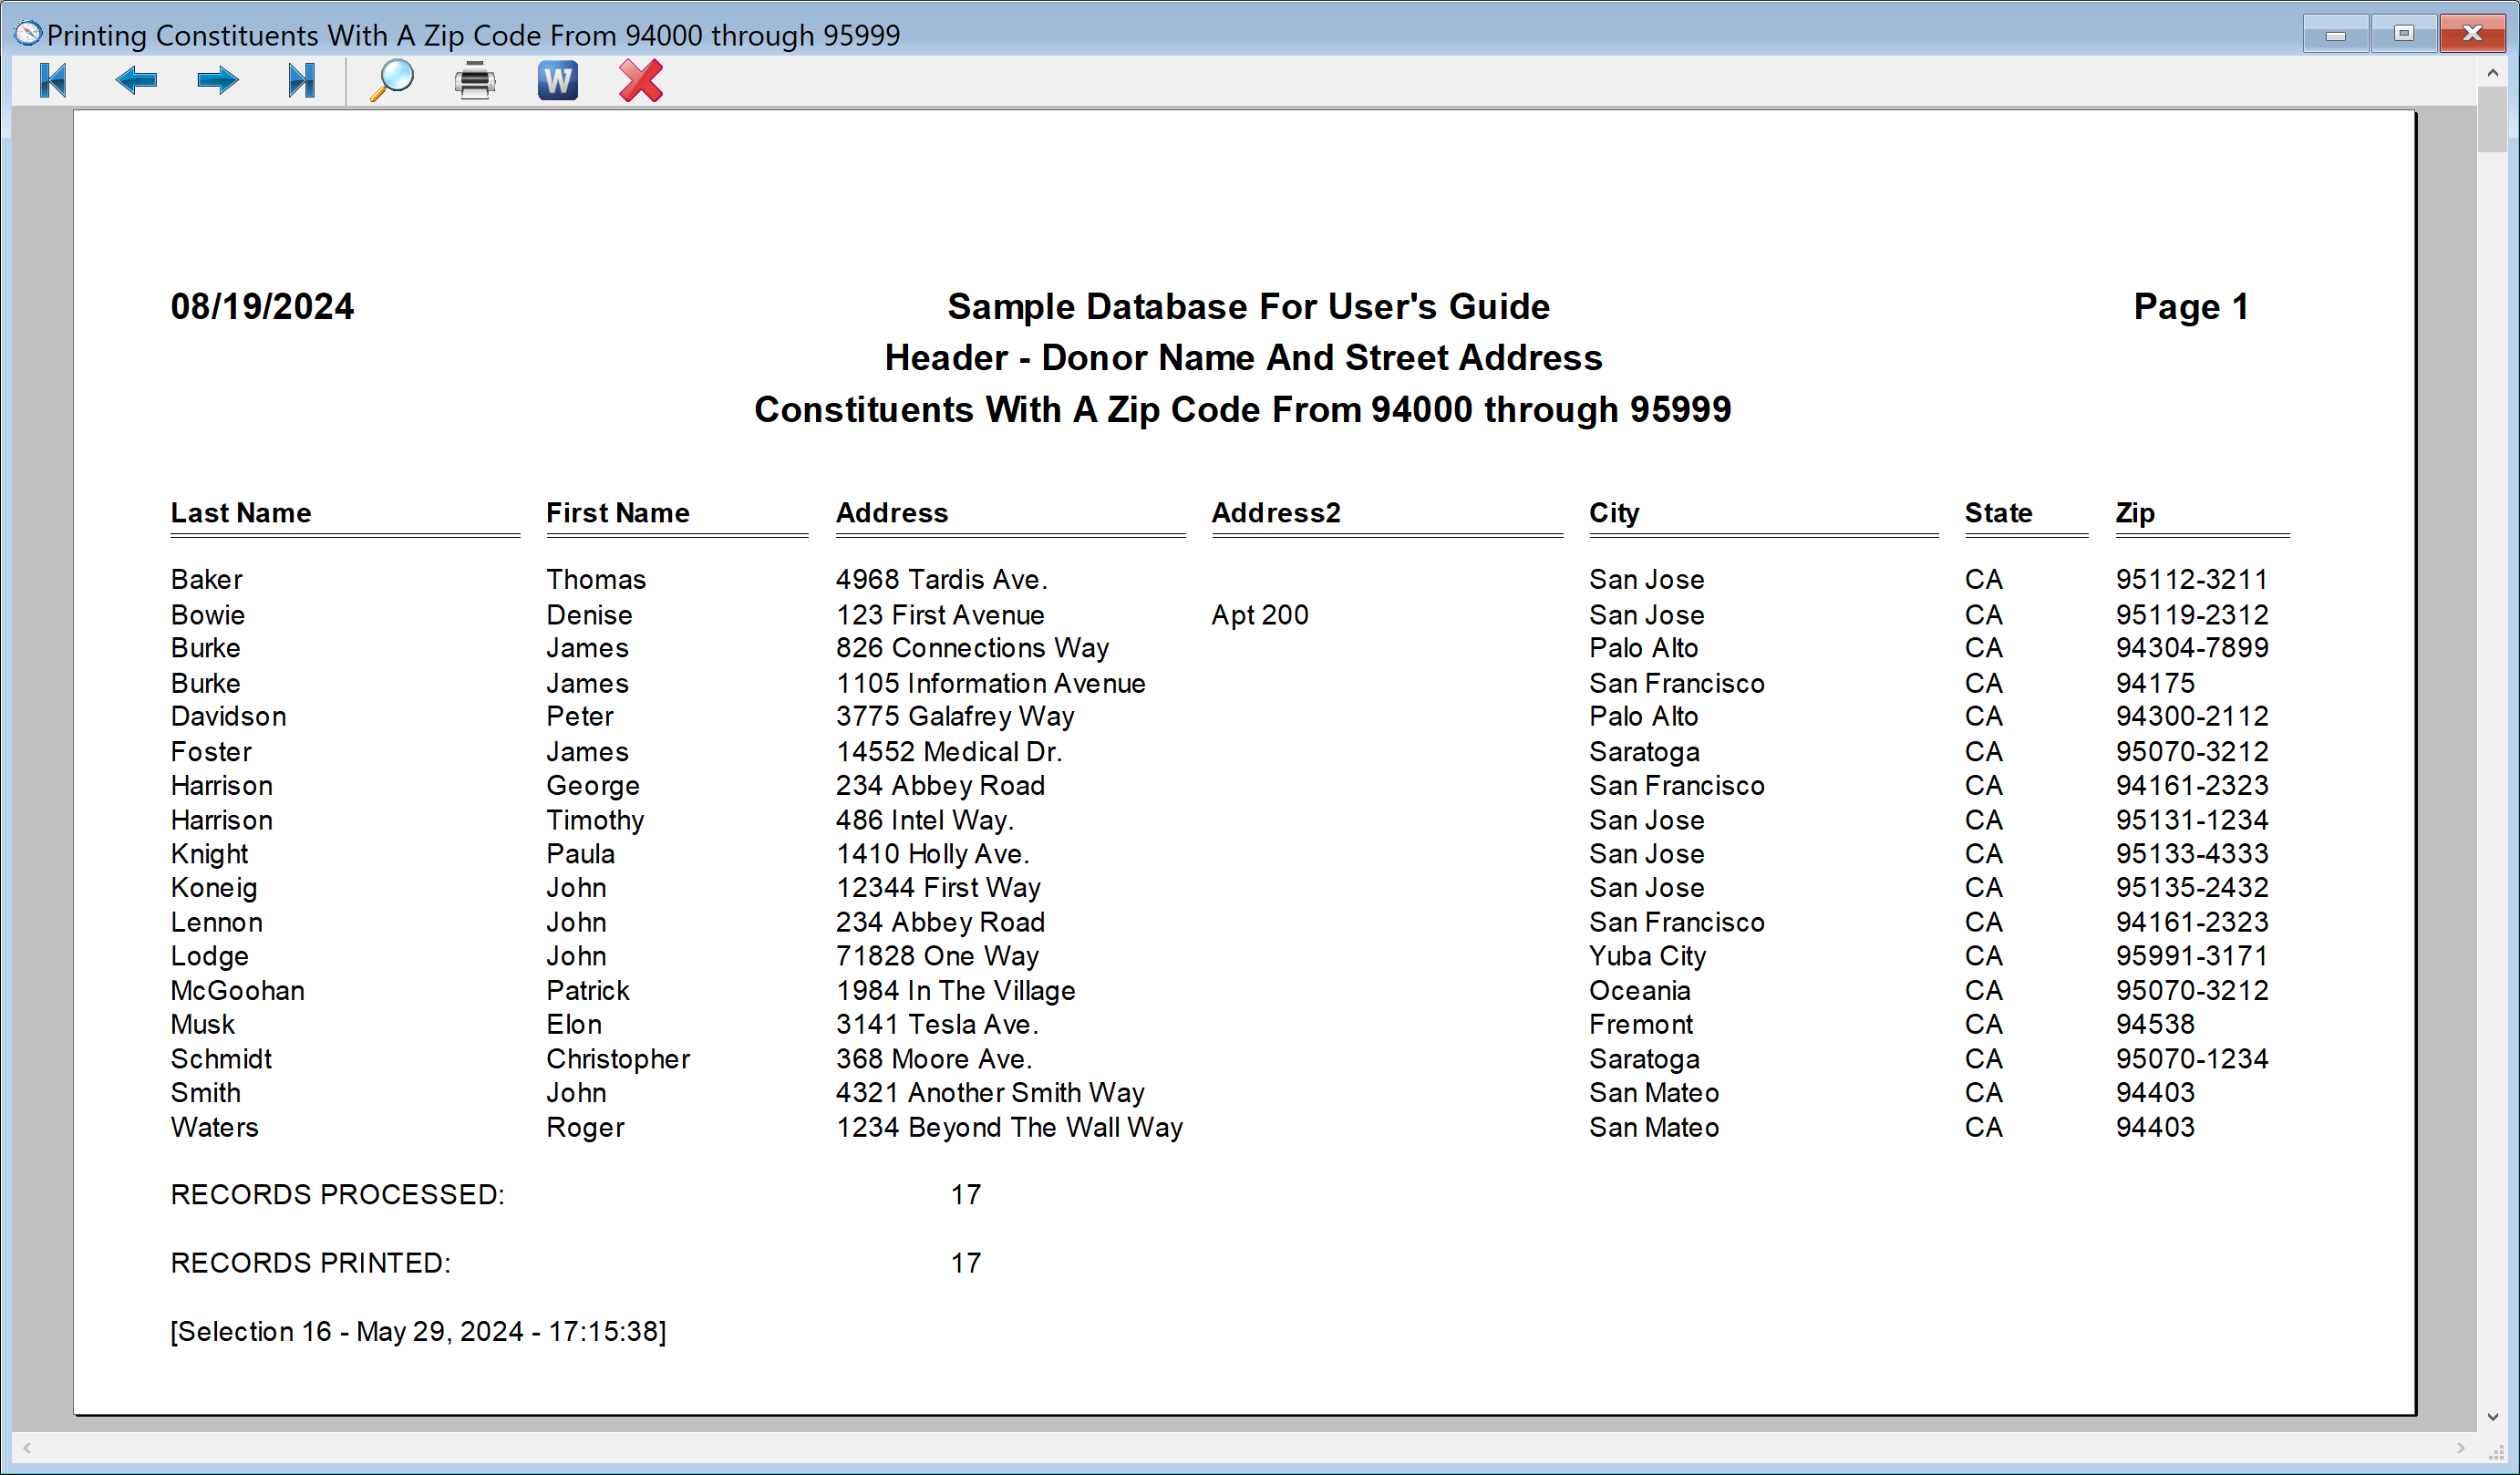
Notice how the name we gave the selection is in the report heading. That's another reason why it's very important to give selections meaningful names, even if you plan to delete them after you are through with them. Notice also how the report is alphabetically ordered by Last and First name. If we want the report in a different order -- such as zip code, then back on the report dialog we could chose a different Sort Order, like this:

Now cancel the report preview. Here comes some of the flexibility we mentioned. Let's say we want to see different information about the same list of people, such as what their giving has been for the past three years. Click on the Results button on the DonorQuest tool bar which looks like this:

This will bring back the list of all selection results created by you and other DonorQuest users. You should see that the selection you created, "Constituents With A Zip Code From 94000 through 95999" is still shown first. With that selection highlighted, click Print Report again. This time highlight the report titled, "Header - 3-Year Comparison Of Year-To-Year Calendar Year Giving, With Donor Totals." Be sure the Printing Options are set to Preview And Optionally Print, and click Run. You should now see:
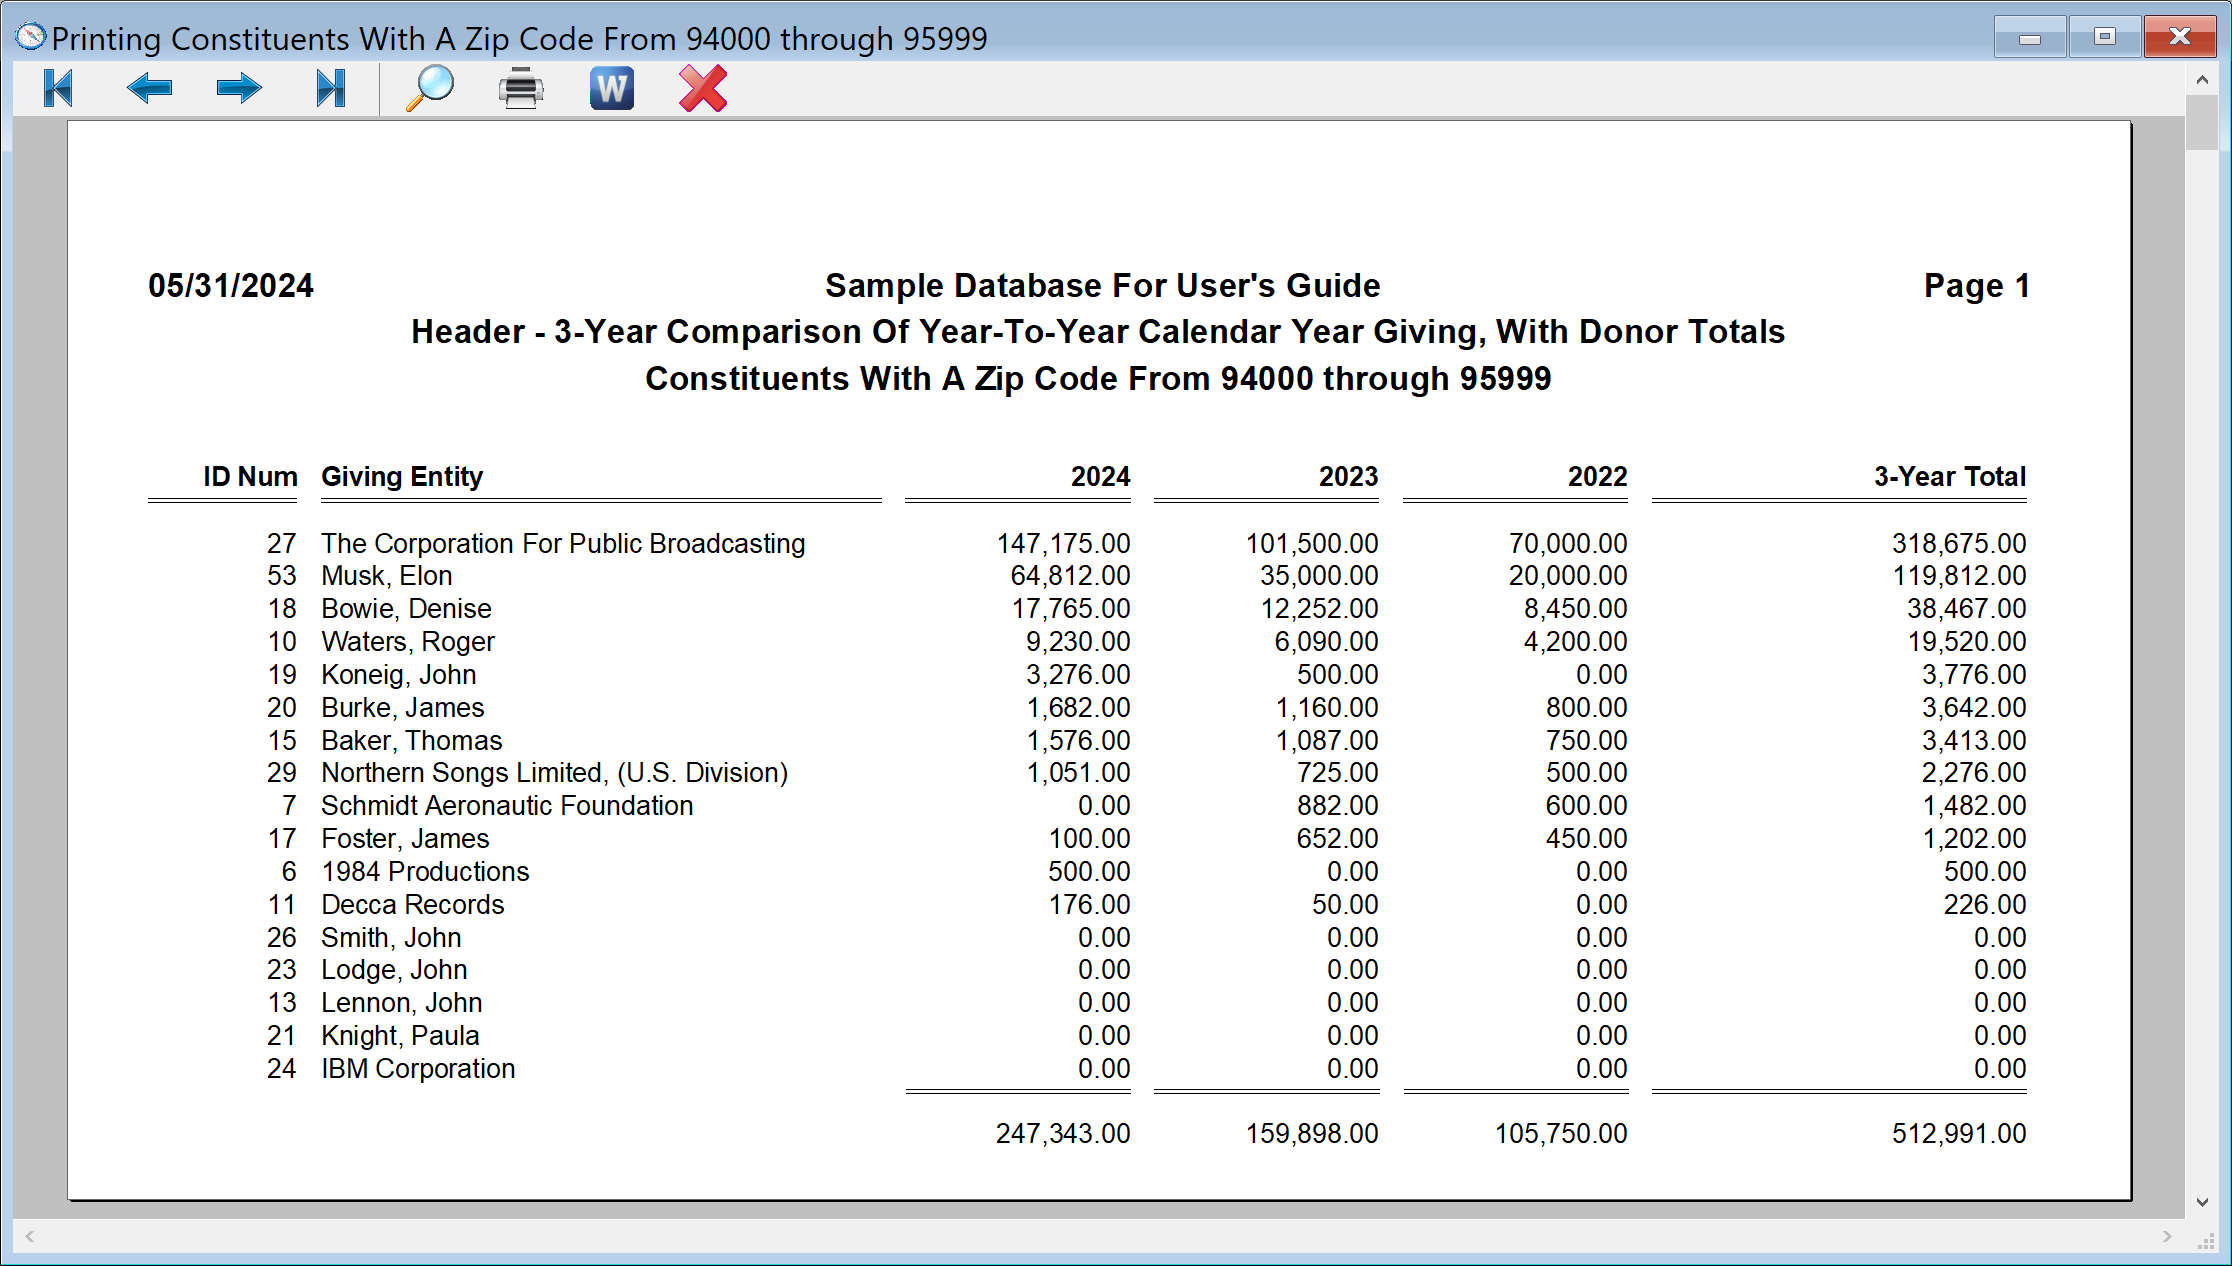
This is the same group of 17 donors who qualified for the zip code selection we ran, but you are now seeing different information about them. Now let's go a step further. Lets say you are only interested in seeing donors from that zip code range who have one or more gifts in 2024. We could create an entirely new selection which has this additional filter condition, or we could add this condition to our existing result. Let's add the extra condition to our existing result. Proceed as follows:
1.Close any report preview you have open.
2.Click on the Results icon.
3.With our existing result, "Constituents With A Zip Code From 94000 Through 95999" highlighted, click on the ReSelect button on the left.
4.You should now see the conditions of our original selection. Change the name to be, "Donors Giving In 2024 with a Zip Code from 94000 through 95999"
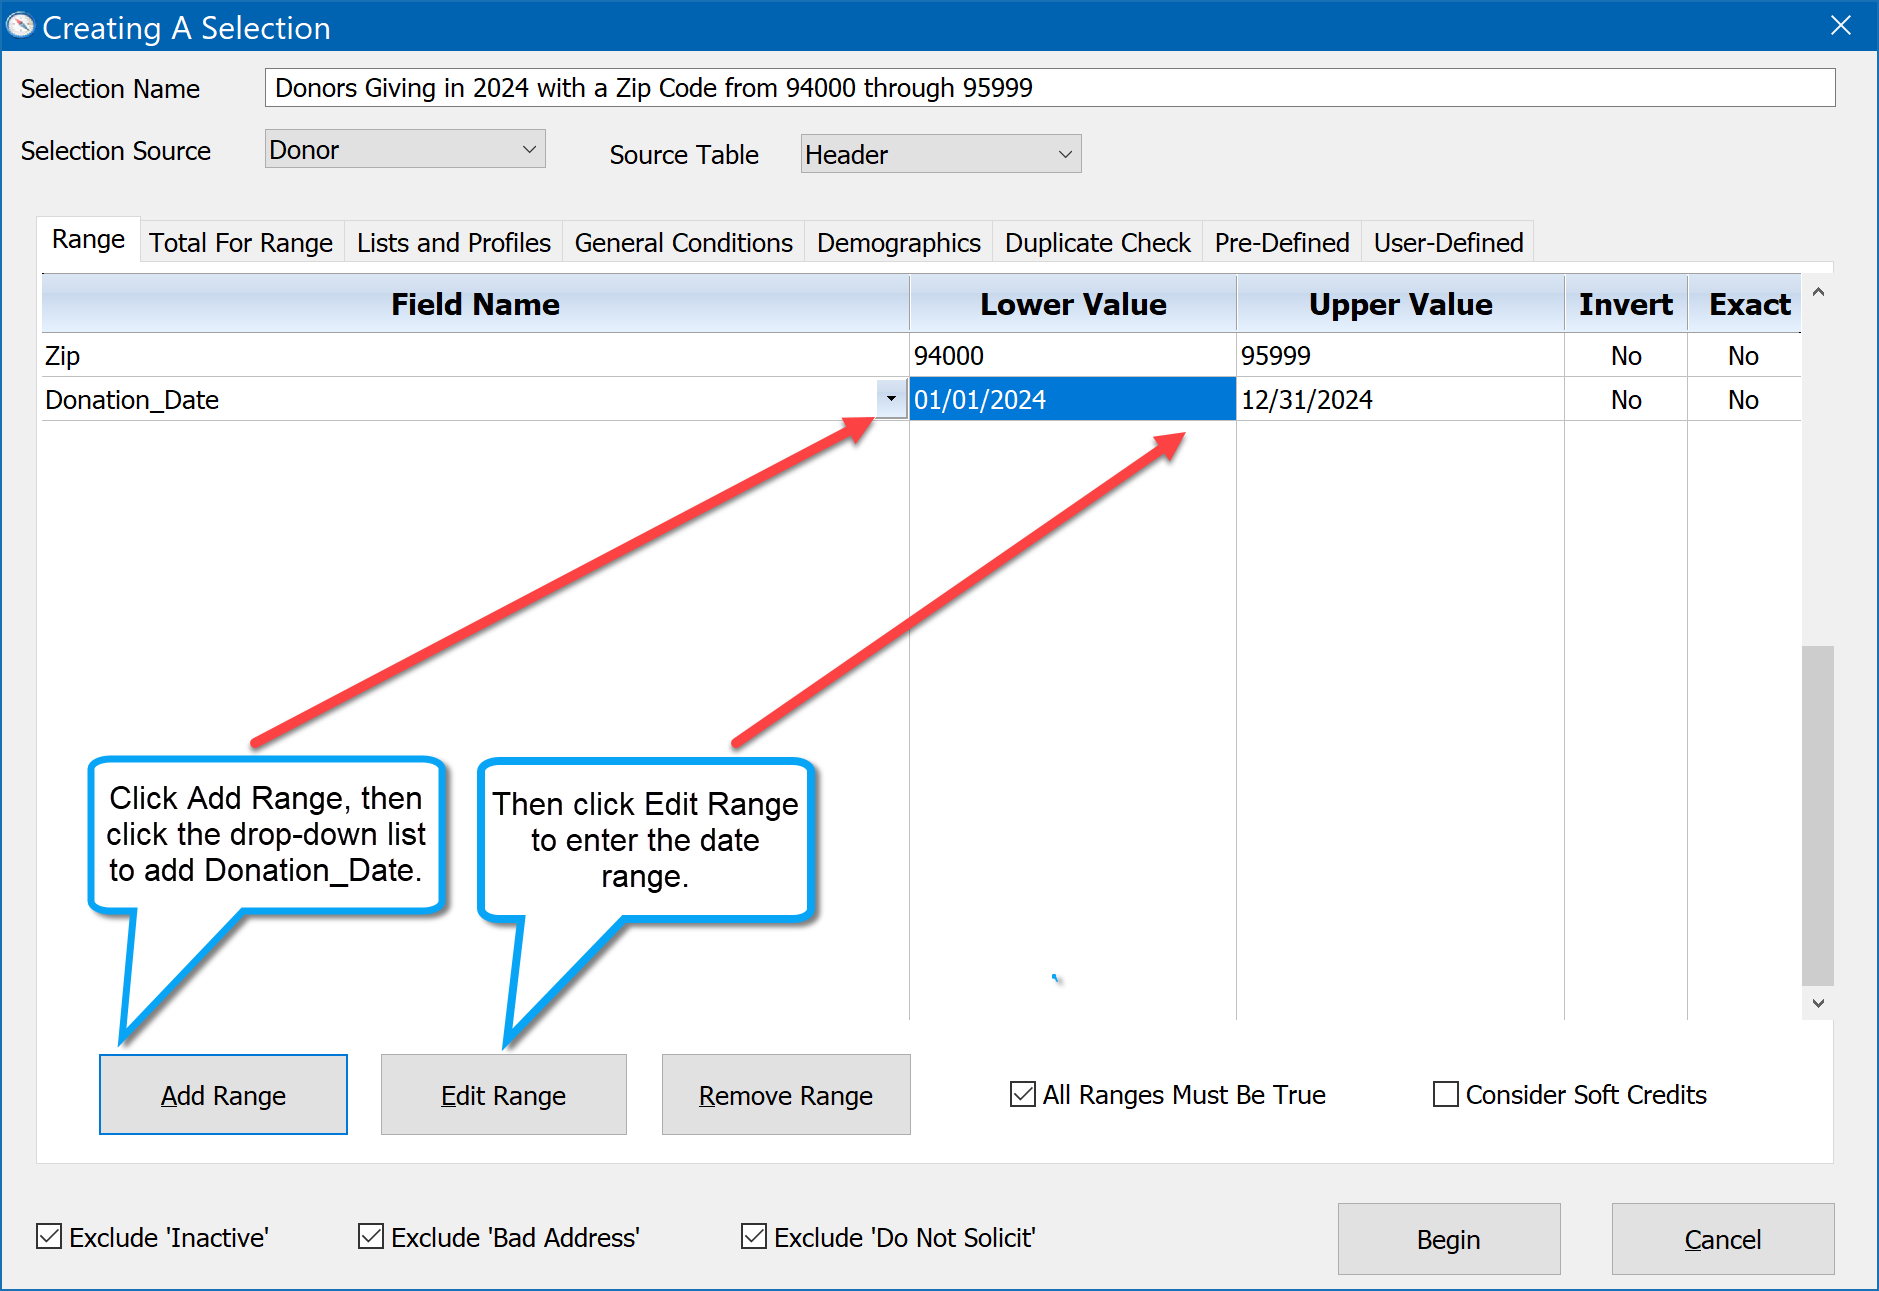
5.Next, click on the Add Range button.
6.Click on the drop-down arrow on the new field row and select Donation_Date.
7.Click the Edit Range button and enter a date range of 01/01/2024 through 12/31/2024 and click Ok. It should all look like this:
With the new donation date range condition added, click Begin. You should now see that with the added condition, the selection result dropped down to 11 records:

Now let's click the Print Report button and see our 11 donors who meet our two conditions of living in zip code range 94000 to 95999, and who have some giving in 2024. Using the same report layout, "Header - 3-Year Comparison Of Year-To-Year Calendar Year Giving, With Donor Totals" we now see:

If we had wanted to keep the original selection as it was, but use it as a starting point for an entirely new selection, we could have instead clicked on the ReSelect New button.
The main topic on Selections covers all the different options available in creating a selection.