Configure, Setup User-Defined Fields...
DonorQuest was designed to accommodate most of the information you need to maintain about each of your donors. However, due to your organization's specific needs you may have a need for custom fields. DonorQuest allows you to create custom fields which in every respect behave like the build-in biographical fields, and will be available for selections, reports, and data exports. When creating a new custom field, you will have control over many aspects of it, including width and data type. Three data types are available: Text, Numeric, and Date. The data type of a field determines how the information it stores is interpreted and ordered on lists. For example, a date field would only store a valid date, and ordering by a date field would always be chronological.
Before adding custom fields to DonorQuest, you should first examine all of the stock fields DonorQuest provides to see if one of them will meet your needs. In particular you should also explore the Memo facility in DonorQuest which provides a simplistic form of text-only user-defined field, and has the advantage of only appearing on a donor's account when used on an as-needed basis. Actual user-defined fields are pre-allocated for all donor records, whether they are used or not, and they will always appear on a donor's record.
Since adding or deleting user-defined fields in DonorQuest will cause structural changes to your DonorQuest database, it is standard precaution to run a backup of your database first in case anything unexpected were to happen during the process which would compromise the database. You can easily backup your DonorQuest files by clicking on System, Run Local Backup.
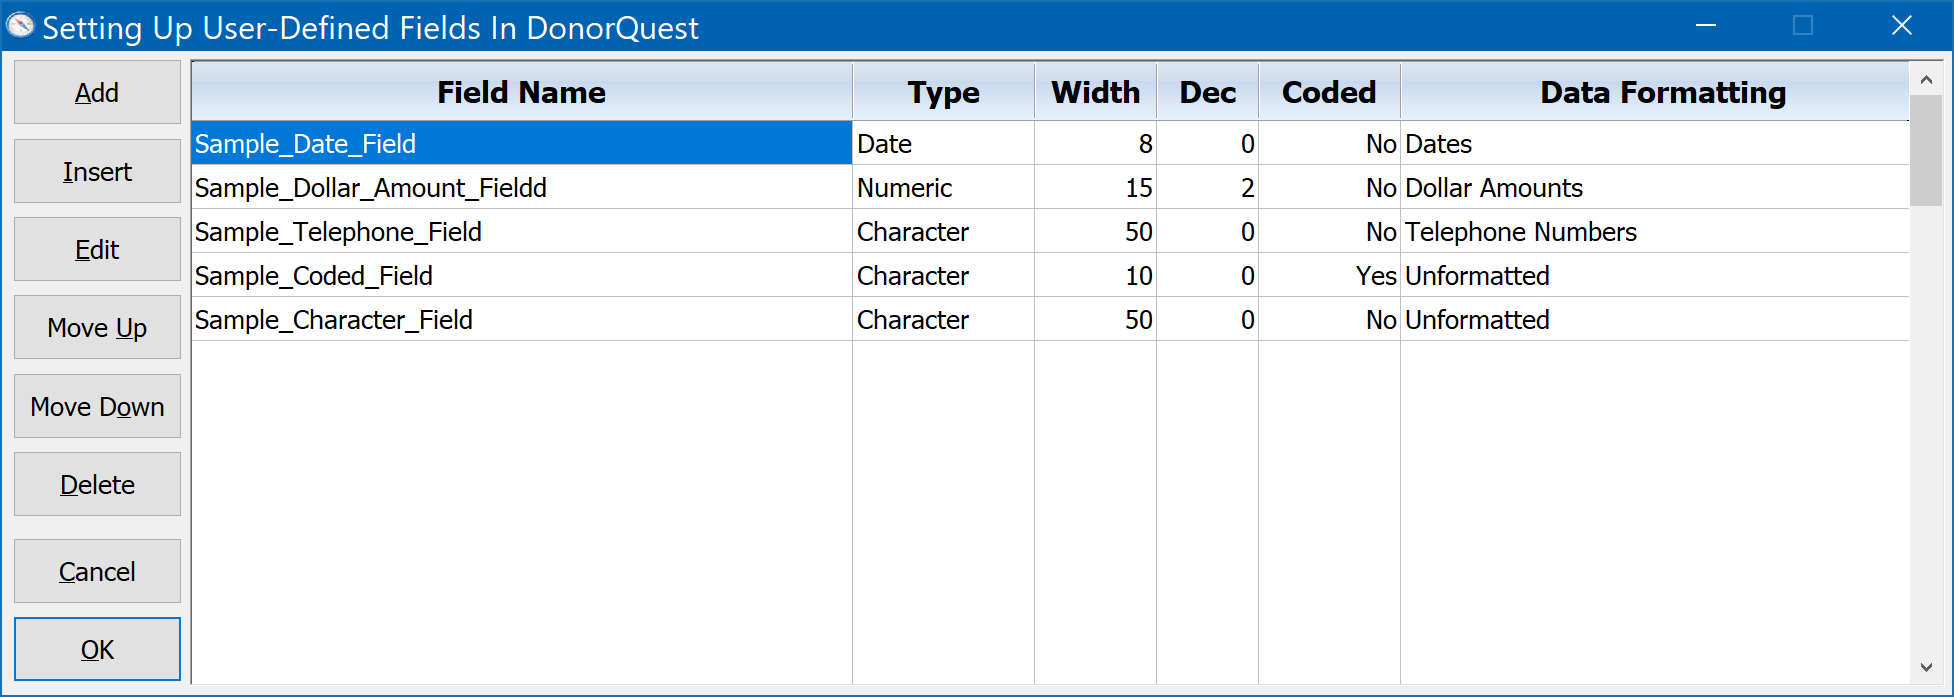
Once you have run a local backup, you may proceed with setting up custom fields by clicking on Configure, Setup User-Defined Fields. Here is an example of what the User-Defined Field setup dialog looks like with some sample fields of various data types defined:
Adding A New Field
To add a new field, click on the Add button (or click the Insert button to add a new field at a specific position relative to the other existing fields). The following form will appear:
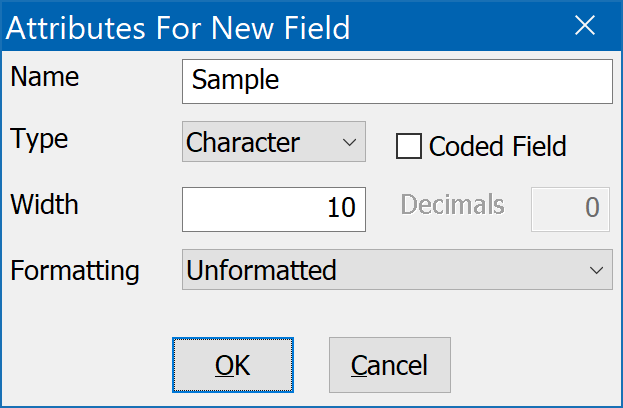
Enter a Name for the field. This is the name that will appear on the data entry form, so be sure that it is descriptive enough for users to know what is meant to be entered in this field. Next choose a Data Type for the field. Your choices are Character, Date, or Numeric. If your field is to contain any alpha-numeric characters (regular text) you should choose Character. If your field is going to be a Date, allowing only valid dates to be stored, choose the date type. And if you are going to be entering only numbers, or if you will be using this field in numeric calculations, you should choose the Numeric data type. If this is going to be a Coded field you should place a check in the Coded Field check box and use Character type. It is best to use codes when possible in order to reduce data entry errors. When you create a coded field you will have the ability to add codes and descriptions that the user will see in a drop-down list to choose from which will be associated with and exclusive to the new field.
Enter the maximum width for the field in the Width box. For example a telephone field should be at least 14 characters to accommodate the basic area code, phone number and formatting. For example, (206) 270-1050 is exactly 14 characters including spaces and parentheses. However, you may want a little extra space for extensions, etc.
If the field is a numeric type, enter the number of Decimals it should have. Typically this would be "2" (without quotes) for dollar values. If you choose a formatting of Dollar Amounts you need to put a value of 2 in Decimals or else the cents will not show up on reports.
Choose any formatting that you'd like to apply to the field. Most fields are unformatted, but you may want to add a telephone field that will format any number that is entered with parentheses and a dash. An example of the result of each of the formatting options appears below, first showing unformatted values, formatting applied, and formatted value:
Unformatted: 2062701050 Telephone Numbers: (206) 270-1050
Unformatted: 100 Dollar Amounts: $100.00
When you have finished specifying the attributes of your new field, click on the Ok button to add it to the list of new fields. When you have finished adding all the new fields you need, click on the Ok button of the Setting Up User-Defined Fields dialog to finalize your new fields. They will now be available in all areas of DonorQuest.
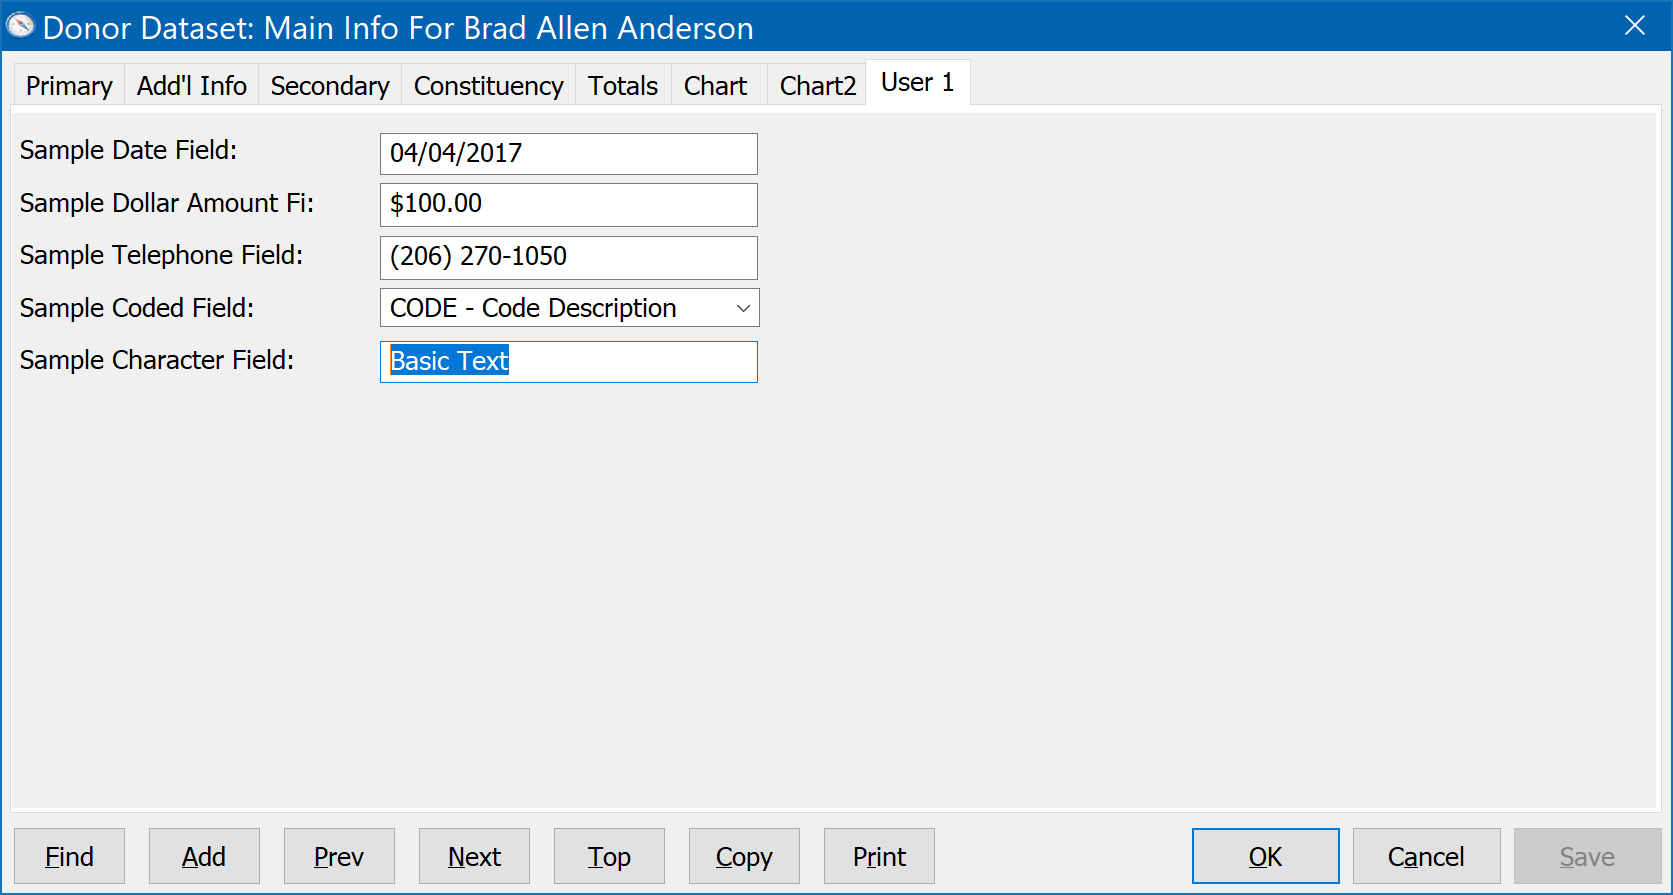
To try out your new fields, open the Main Information Form (Donor, Main Information, then click Edit). You should see a new tab called User1 with your custom fields. If you add more than 22 fields, a User 2 tab will appear, then User 3, and so on. With the user-defined fields added in the above example, the Main Information View dialog would look like this:
Move Up / Move Down Buttons
If you wish to change the position of a field relative to the other existing fields, you may use the Move Up or Move Down buttons. The order of the fields shown in the field setup window is the same order in which they will be presented in the Main Information window, used for data entry. While this provides sufficient control in most cases, DonorQuest does also allow the creation of custom tabs and forms in which fields can be grouped and arranged at any position in a form, much like they are with the build-in tabs.
Deleting A Field
To delete an existing field, first highlight the field you wish to delete in the Setting Up User-Defined Fields dialog, then click the Delete button. This will permanently remove the field from the database if you then click the OK button. If you mistakenly delete a field, you may click the Cancel button, but doing so will also cancel any other pending changes you have made since you opened the Setting Up User-Defined Fields dialog.