
The range selection filter allows you to specify a lower and/or upper range value for any of the fields of DonorQuest, including any custom fields that you may have created. For example, you could express a range of zip codes, a range of telephone area codes, or a range of giving. For the Range filter, ranges of giving can be for total giving for specific years, lifetime total, or for single donation amount and date ranges.
Range values are simply a way of qualifying donors based on the value of one of their fields being between two specified values. For example, a donor with a zip code of 95117 will pass a zip code range test if you were to specify 95000 for the lower zip code range and 96000 for the upper zip code range. Since the comparison of range values is inclusive, the donor with a zip code of 95117 in our example would also pass if you specified 95117 as the lower or upper zip code range value.
The following example will take you through the steps of performing a range selection which will qualify donors based on their zip code. If you are using the evaluation version of DonorQuest, then the sample database provided will have donors in the zip code range used in the example.
Goal
You wish to select all the constituents who have a zip code between 94000 and 95999.
Procedure
1.Click on the Select icon on the DonorQuest toolbar. By default the Range filter tab is active.
2.For the Selection Description enter: Constituents With a Zip Code From 94000 through 95999.
3.Click the drop-down arrow for Field Name and choose Zip.
4.Click the Edit Range Button, and enter the following:
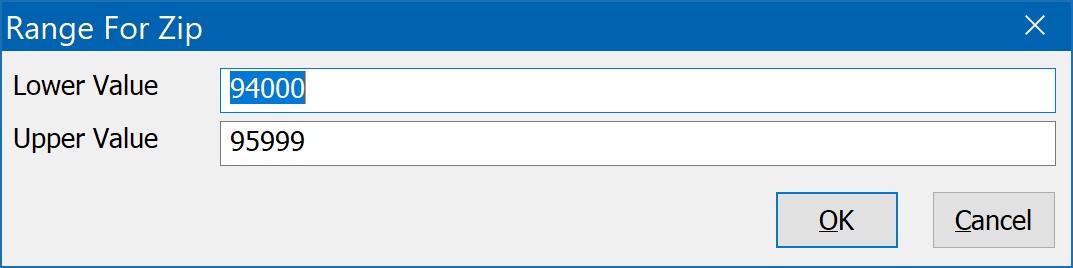
5. Click Ok. The Creating A Selection window should now look like this:
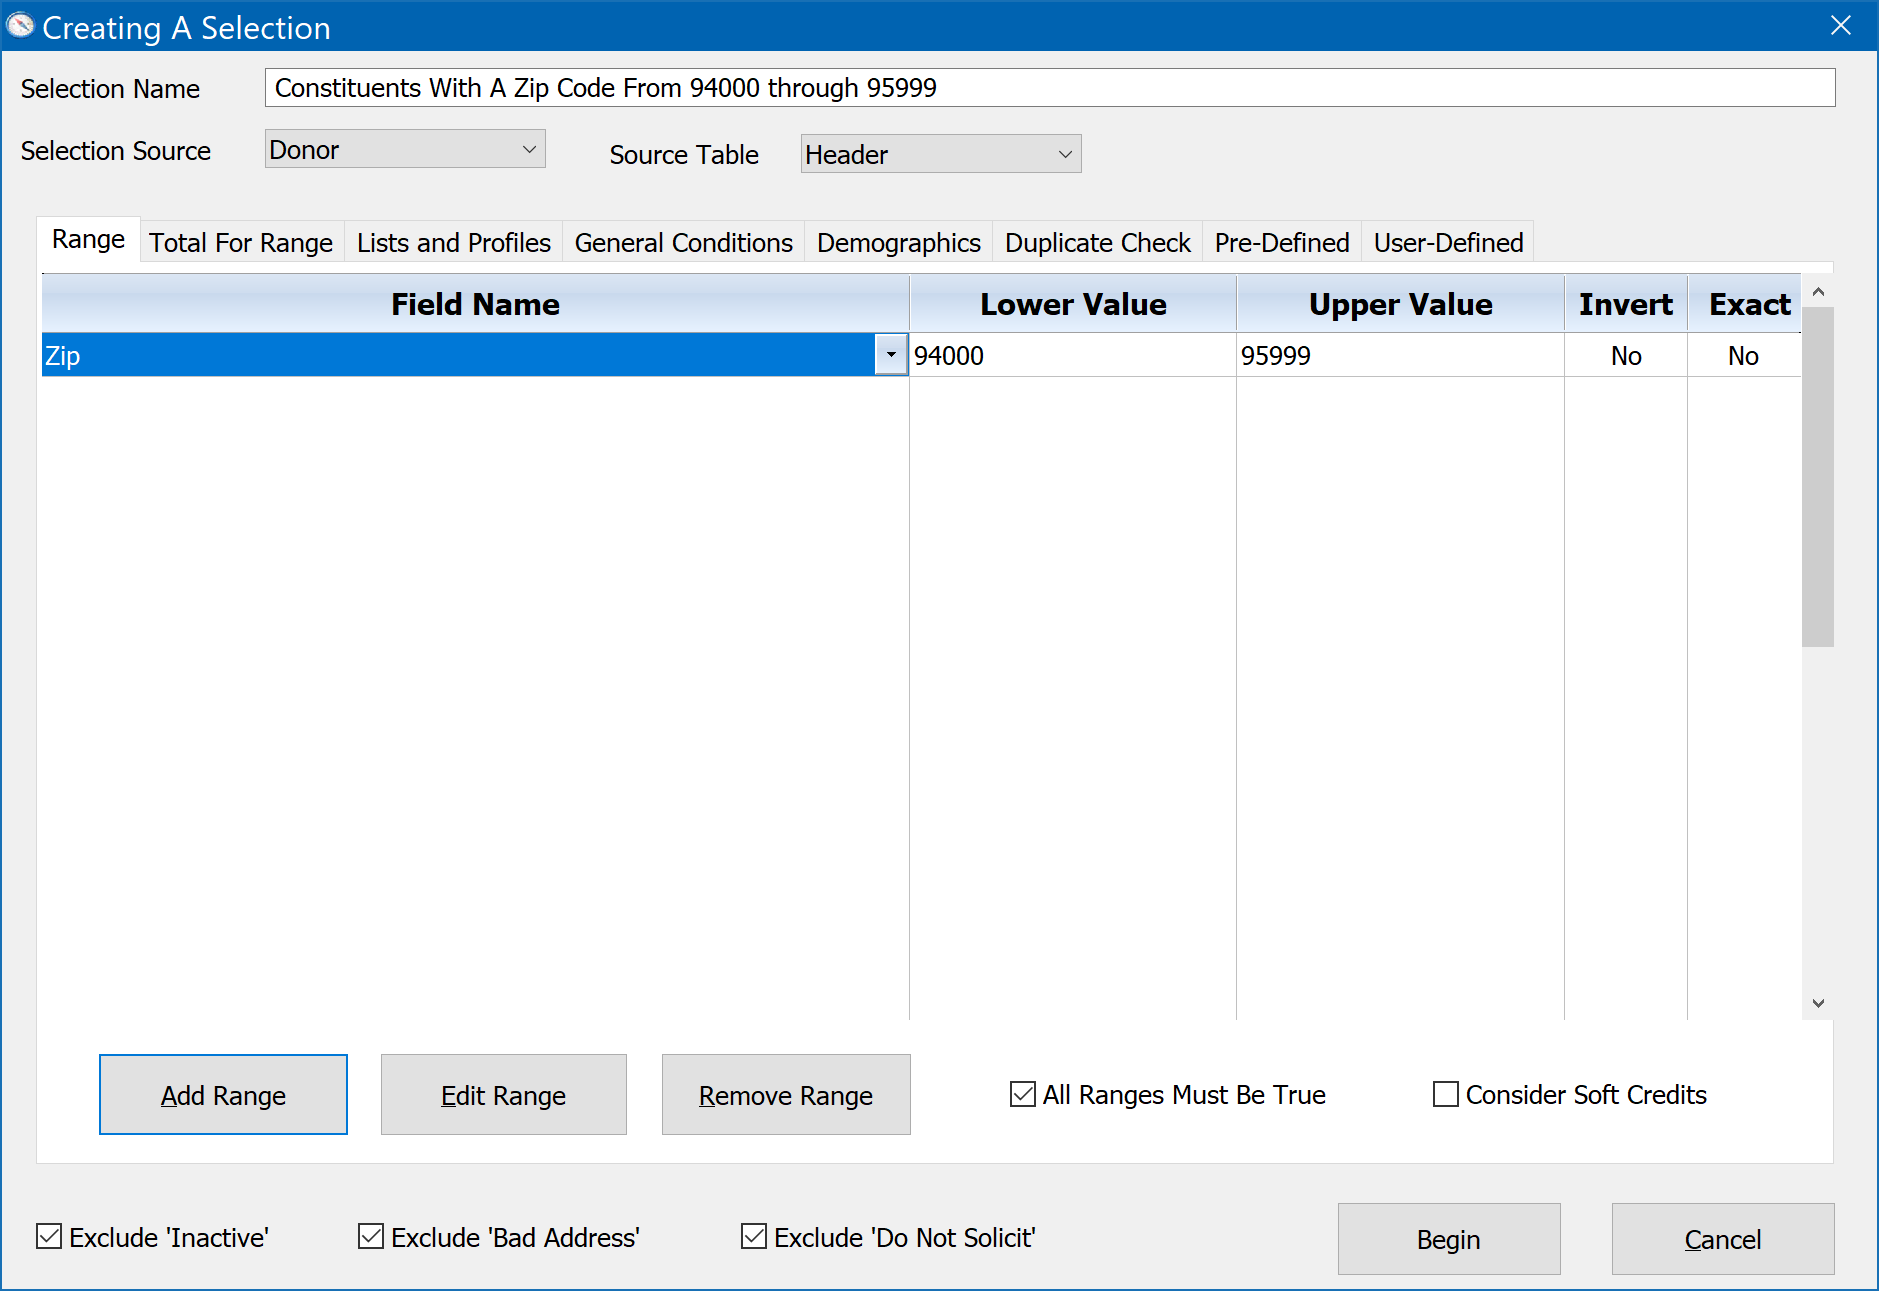
6. Click the Begin button to run the selection.
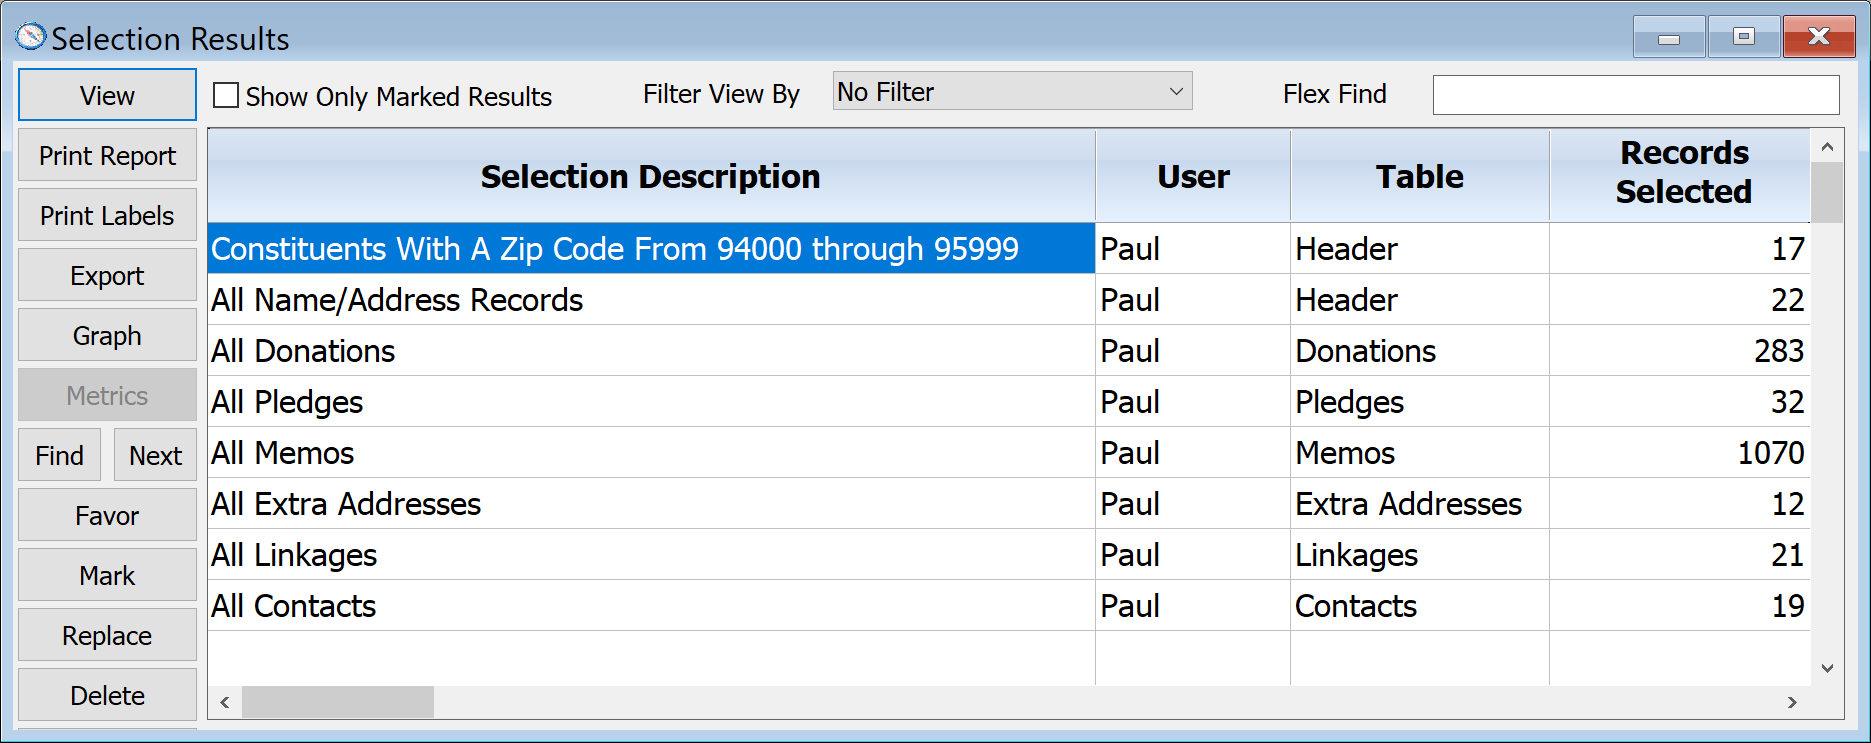
When the selection has been completed, the Selection Results window will appear. Each time you run a selection, a new entry will be added to the top of the selection results window.
At this point you have many options for using your new selection result. The most common options are shown as buttons to the left of the Selection Results window. One of the most common next steps is to view the names of the people in your newly created selection result. You may do so by clicking the View button of the Selection Results window. You may also print the result using one of the many predefined DonorQuest report layouts (and any custom ones you create) by clicking the Print Report button.
At anytime you may return to the Selection Results window to do other things with your selection (and indeed with any existing selection) by clicking the Results button on the DonorQuest toolbar which looks like this:
Using The ReSelect Feature
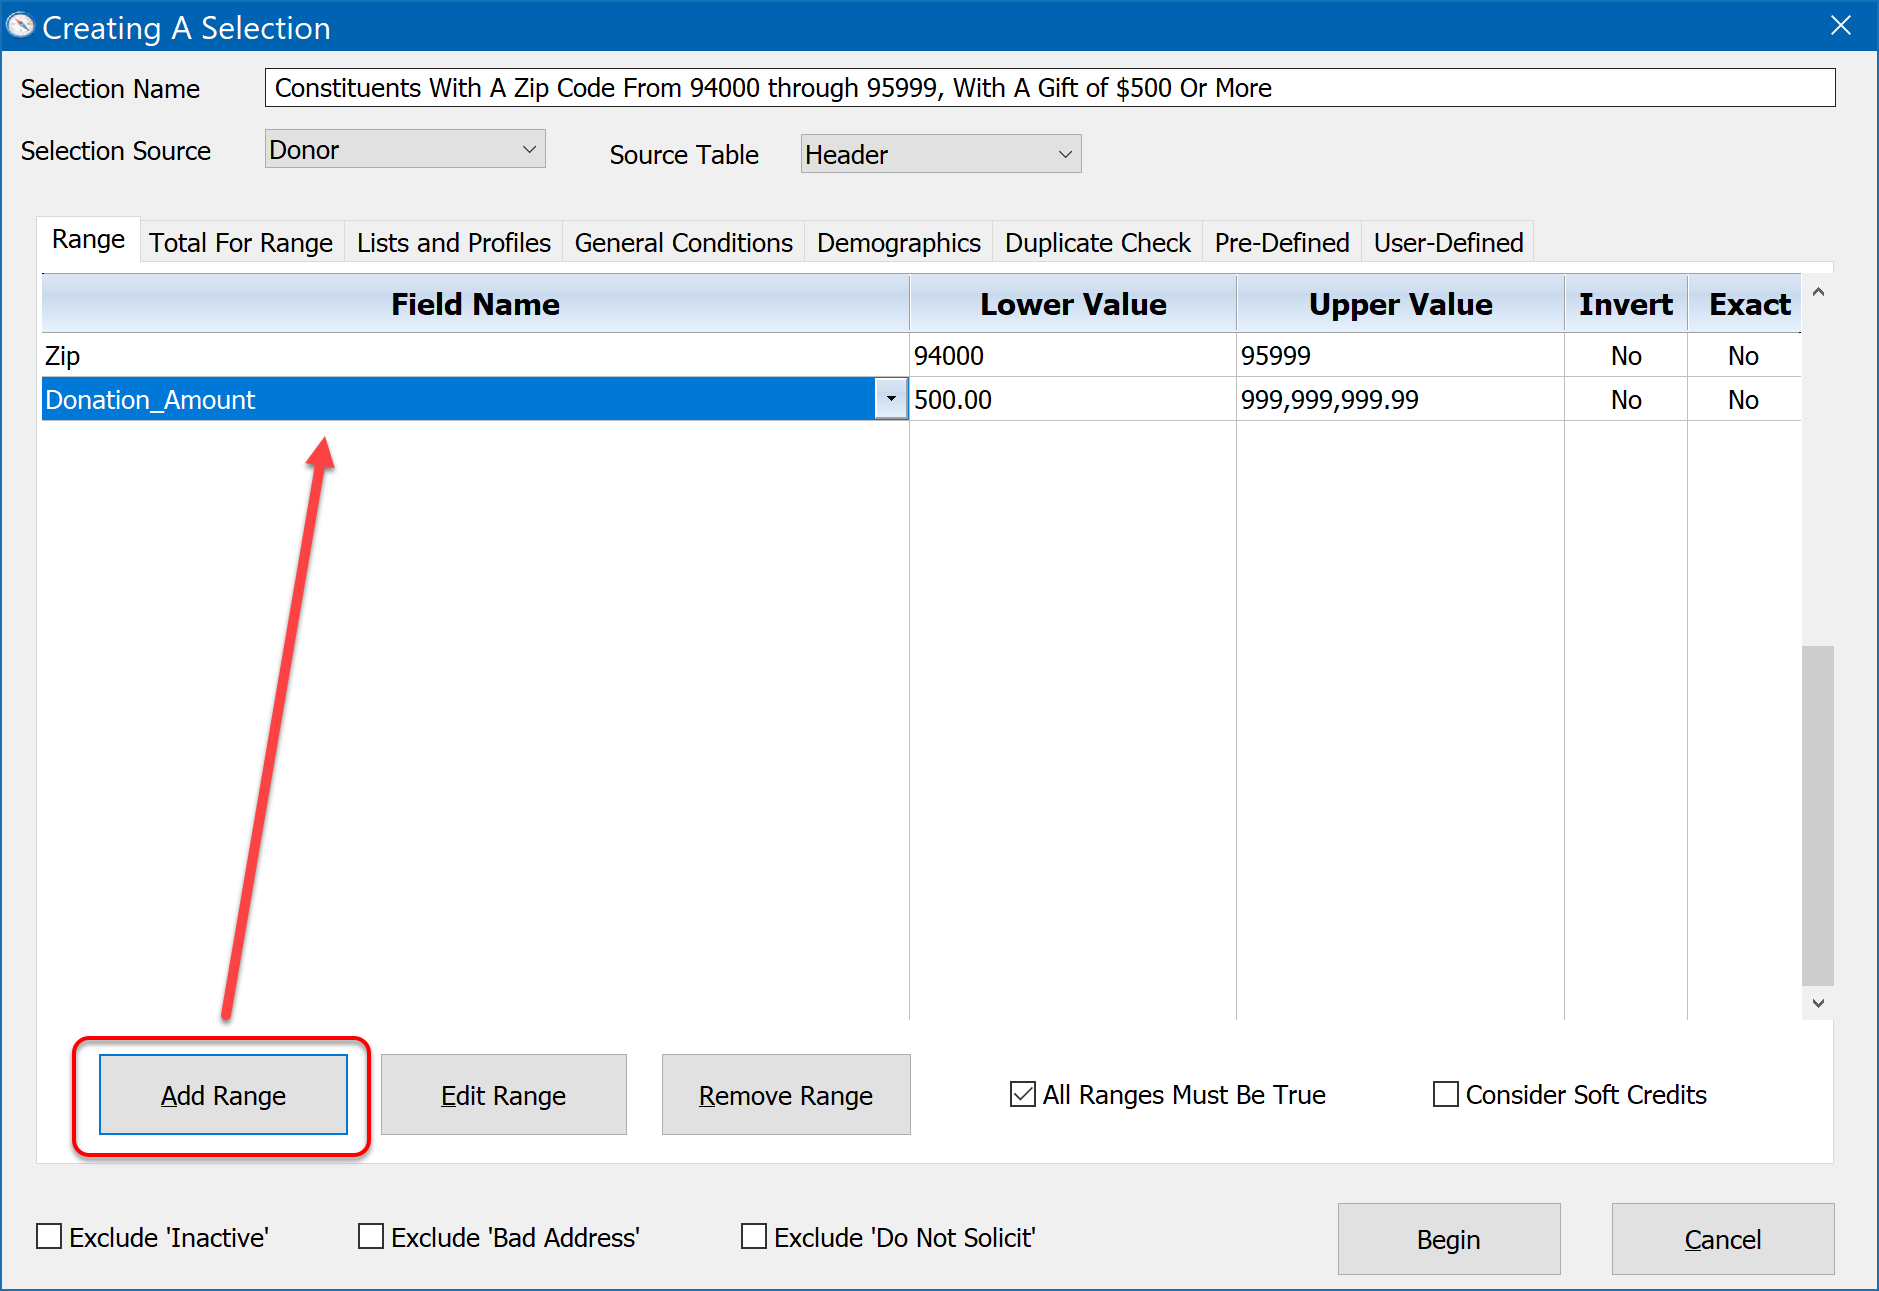
Sometimes after viewing or printing a result you realize you need an additional filter condition. For example, in our zip code range selection we may decide that we really only want donors in the zip code range who have one or more single gifts of $500 or more. All we have to do is click the ReSelect button of the Selection Results window. We will then be taken back to the Creating A Selection window, with the previous filter condition(s) just as we left them for the particular selection. All we have to do is add another Range filter condition by clicking on the Add Range button, choosing Donation Amount from the drop-down list for the Field Name column, enter a range of $500 on up, and edit the Selection Name like this:
Note that the field drop-down menu shows the fields in the order in which they are displayed in the data entry forms by default. If you would prefer them to be in alphabetical order by table, then do a right-mouse-click in the white space below the last entry in the Field Name column to toggle that. This preference can also be set under User, Change Your Personal Settings.
It is very important to understand that since a donor may have multiple donations, the Range tab will actually explore all of a donor's donations, looking for just one donation with an amount of $500 or more. The General Conditions tab behaves the same way. Because of this, there is a possibility that different donations for the same donor may independently satisfy the conditions you might use on the two tabs. For example, if you said a donor must have a donation of $500 or more using the Range tab, and you also used the General Conditions tab to say the donor must also have a donation credited to your annual campaign, it could be two entirely different donations for the donor which are found to satisfy both conditions. The same is true when you reference Pledge, Memo, or other fields from related tables for which a donor could have multiple related records (multiple donations, pledges, memos, etc.)
Because of the independent traversal of related donations when running a selection of donors (with Header as the Source Table), it is essential that you place all the conditions which must apply to a single donation on just the Range tab or the General Conditions tab, but not both.
If you really need to use the flexibility of both the Range and General Conditions selection tabs together, and need them to operate in lockstep on each donation, yet you want a Header-based result (names and addresses without duplication for mailings and such), then first run the selection from the Donations table. When you get the result, click on the Selections menu, and choose Convert To Header Orientation As A New Result.
Now begin the above revised selection by clicking the Begin button. This will recreate our selection with the updated conditions and selection name. Note that since a donor may have many gifts, the Range filter will automatically search all of them, requiring that just one meet the range condition for Donation Amount. This means that a donor could have a hundred donations, and it only takes one exceeding $500 to qualify the donor. Also, if we had changed the Source Table for the selection to be Donations instead of Header, DonorQuest would have selected just the actual gifts of each donor which meet the $500 requirement (and who also lives within the zip code range), so if you were to print the result using a report such as the, "Donations - Donation Detail Report", only the gifts of $500 or more would show on the report for the donors in the zip code range.
Inverting A Range
In the Range filter, any range you specify may be inverted by double-clicking in the Invert column. When you invert a range, you are asking for the opposite of it. In our zip code range example, if we had double-clicked on the Invert column for the zip code range, we would be asking for donors who are not in the zip code range 94000 to 95999.
Exact Comparison
In the Range filter, if you turn on the Exact Comparison for a condition, you are saying that on the boundaries of the range, you want to consider all characters. This applies only to character fields, like Last Name. For example, if you asked for last names Adams through Schmidt, and you turned on exact comparison, the last name Samson would qualify, as would Schmidt, but Schmidter would not qualify because on an alphabetical list Schmidter would come after Schmidt. With exact comparison off, any last name starting with Schmidt would qualify as being in the range.
All Range Conditions Must Be True
If this checkbox is turned on, then every condition of the Range filter must be true for a record to qualify. If this checkbox is not checked, then only one of the Range filter conditions must be true for a record to qualify. So in the above example, with the checkbox on, in order to qualify a donor must both live in the zip code range and have one or more donations of $500 or more. If you were to turn off the checkbox, then a donor would only have to live in the zip code range, or have one or more gifts of $500 or more to be included.
Consider Soft Credits
This Range filter option applies only to conditions applied to donation fields. If it is checked on, then when checking to see if at least one of the gifts for a donor meets the range condition, DonorQuest will also consider any soft credit donations which have been credited to the donor from the actual (hard) giving of other donors.