
The Select button on the DonorQuest toolbar opens the Creating A Selection window, which looks like this:
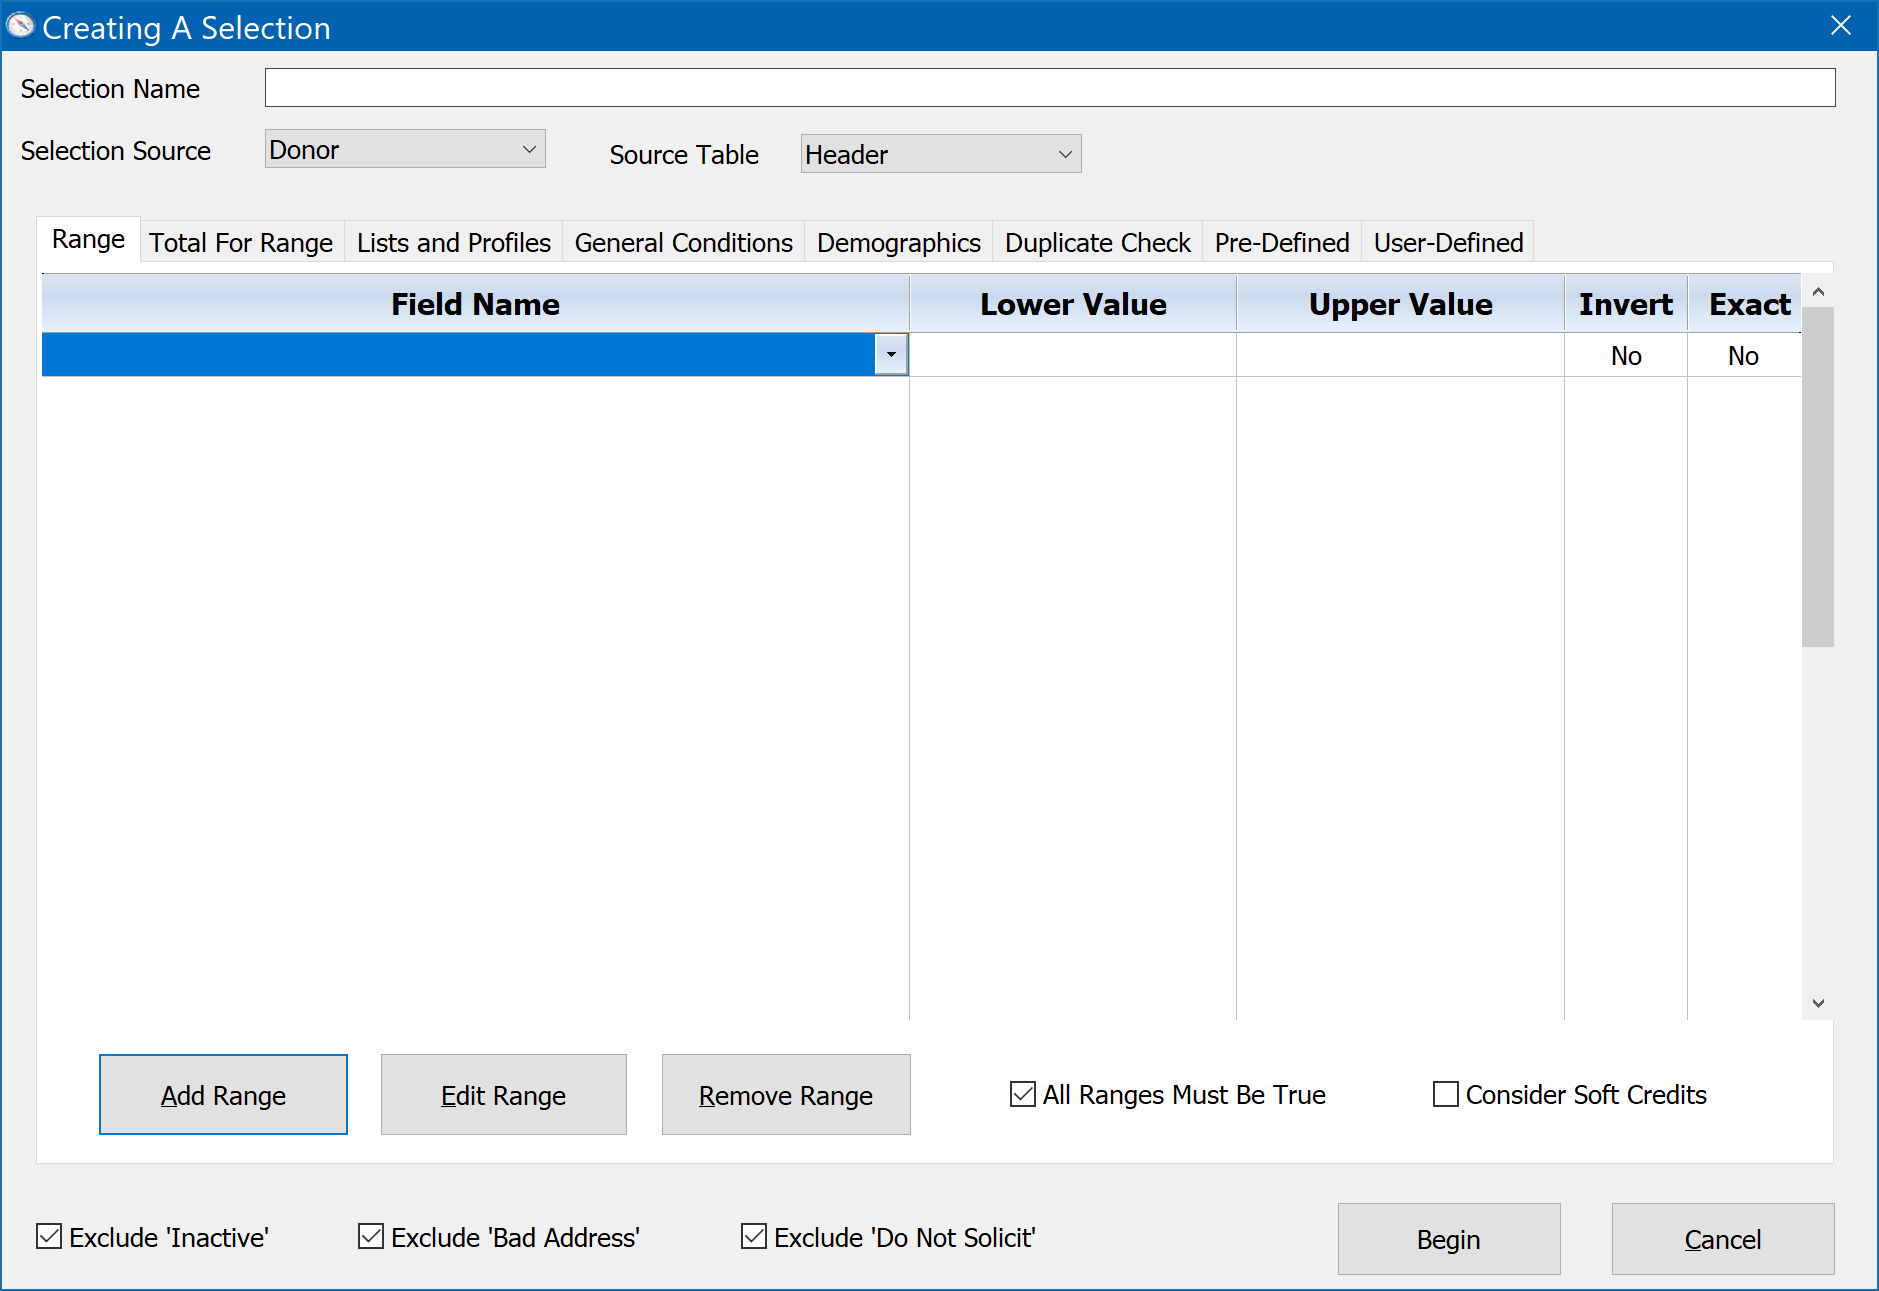
There are different types of filters you can use in creating a selection. The Range Filter is the one you will probably use most often, since it is the broadest type of filter, allowing you to select donor information based on range values for any DonorQuest field -- including any custom fields you create. The various types of filters are shown in tabs across the Creating A Selection window. We will explore each of these in separate topics. For now we will cover the more general options of the Creating A Selection window (though do take note of the very important special behavior of the Range and General Conditions tabs discussed briefly here under the Source Table option).
The Selection Name
The first thing you will enter when creating a new selection is a Selection Name. The name of the selection should be meaningful since it will serve as a label for the selection which other users may rely on to know what the selection is about. What you type here does not affect how records are selected, it is simply a description which stays with the selection, and which also prints in the title lines of any reports you use with the selection. Other users can see selections you create, as you can see theirs. The point is to share and not duplicate effort, and having a meaningful name for each selection helps with this.
The Selection Source
The selection source specifies which of the three DonorQuest datasets will be accessed during the selection. All active donors and prospects are maintained in the donor dataset, so that is normally what you will use for the selection source. However, it is also possible to base the selection on the archive or buffer datasets. The archive dataset is where inactive donor and prospect accounts are stored, and the buffer dataset is simply a temporary holding area where you may have placed copies of existing donor and prospect accounts.
The Source Table
Each dataset has seven tables, each storing a different aspect of a donor's account data. The header table stores the main biographical information for all donors and prospects (name, address, list codes, etc.), and it is normally what you will use for the source of a selection if you are running a mailing list or other constituent-centered report. However, if you wish to select specific donations, pledges, memos, etc., then you should set the source table accordingly. For financial reports in which you wish to filter by specific donations (for a range of time, specific campaigns, etc.) you would choose Donations for the Source Table. Basically, anytime you need to pick and choose which donations go into making up a report, you use Donations for the Source Table. If you're mainly after biographical (name/address) information (to use for a mailing for example), then you choose Header. If you need to filter by pledges, memos, etc., you would choose one of those tables as the Source Table.
While some precomputed donation totals are stored in the Header table for convenience and they are shown on the few Header reports designed to include yearly totals, they are only monetary calendar and fiscal year totals. For totals involving subgroups of donations totaled by anything other than Calendar or Fiscal year, you would again use Donations for the Source Table of the selection, and allow the Report Layout you choose to use with the Selection Result to do the totaling for you on just the donations you selected.
The various types of selection filters all work together, allowing you to express multiple filter conditions for a single selection which must all be true across all the filter tabs for a record to qualify. But there is one very important behavior you need to be aware of. When the Header is the source table, and you reference a donation field on the Range and General Conditions tabs, DonorQuest will actually explore all donations for each donor, looking for just one donation which satisfies your donation-specific condition. If at least one donation is found, then the donor will qualify to be in the selection result. So for example, if on the Range tab you used a Donation Amount range of from $100 to $500, DonorQuest would visit each donation for each donor until it either found a donation with an amount between $100 and $500, or it ran out of donations to explore. The General Conditions tab behaves the same way. Because of this, there is a possibility that different donations for the same donor may independently satisfy the conditions you use on the two tabs. For example, if you said a donor must have a donation between $100 and $500 on the Range tab, and you used the General Conditions tab to say the donor must also have a donation credited to your annual campaign, it could be two entirely different donations for the donor which are found to satisfy both conditions. The same is true when you reference Pledge, Memo, or other fields from related tables for which a donor could have multiple related records (multiple donations, pledges, memos, etc.)
So, if running a Selection from the Header table, and you want to say that a donor must have at least one donation which is between $100 and $500, and that same donation must have also been credited to your annual campaign, then you must place both of those conditions on the Range tab.
Now if you are instead running the Selection from the Donations table, then the focus shifts to qualifying specific donations instead of donors, and there is no automatic exploration of all related donations for each donor by the Range and General Conditions tab. Because of this, you can spread donation-specific conditions across the Range and General Conditions tabs, and know that a single donation must pass all conditions to be selected. Likewise, conditions which must all apply to a single pledge, memo, or other related table record may be expressed across the Range and General Conditions tab, provided the Source Table is also set to the same table you are focusing your filter conditions on (Pledges, Memos, etc.)
If you really need to use the flexibility of both the Range and General Conditions selection tabs together, and need them to operate in lockstep on each donation, yet you want a Header-based result (names and addresses without duplication for mailings and such), then first run the selection from the Donations table. When you get the result, click on the Selections menu, and choose Convert To Header Orientation As A New Result.
Basic Exclusions
You may also optionally choose to exclude certain donors from your selection before going into more detail with the specific filter options. For example you might be doing a selection for the donors for which you are going to mail a solicitation. In this case it is easy to simply check the box for Exclude 'Do Not Solicit'. When this box is checked in the Creating A Selection window, the corresponding checkbox in a donor record must not be checked in order for the donor to qualify. This simply means that putting a check in the Exclude 'Do Not Solicit' box will exclude any donor who has a check in the Do Not Solicit field of their account (found on the Constituency tab of the Main Information Form). This concept works similarly for the Exclude 'Bad Address' and Exclude 'Inactive' options. Note that when beginning a new selection, these exclusion options are on by default to protect you from accidentally doing a solicitation mailing to constituents with a bad address, or those who have been designated as inactive, or who do not want to receive solicitations.
At this point you may enter more specific filtering information, using one or more of the filter tabs. The filter tabs work together, so that any conditions you enter in any of them must all be true for a record to qualify and be included in the Selection Result.