This topic only applies to the installed version of DonorQuest, not the online (cloud) version. With the online version of DonorQuest, everything on the backend is taken care of for you automatically. You no longer have to worry about hardware configurations, backups, upgrades, etc. Our online product may also be used with Apple Macs and tablets computers, as well as Windows computers. And whether you have a few thousand donors or literally millions of donors it is fast - very fast.
This is an advanced setup topic for system administrators who need to support using the installed version of DonorQuest on a Local Area Network (LAN). If DonorQuest is already installed and you are a beginning user, you should move on to the topic for configuring your organization's information.
Note that the installed (in-house) version of DonorQuest is designed to be run on a single PC, or on a high-speed wired local area network only -- either peer-to-peer, or with a traditional file server. However, it should NOT be run across a VPN (Virtual Private Network) on a remote (cloud-based) server, or through a network in which any connection point relies on wireless connectivity. If you need remote access or support for wireless connectivity, then you should be using the online version of DonorQuest instead of the in-house version.
Peer-to-peer in-house wired network usage allows you to use an ordinary (inexpensive) windows computer as a file server, avoiding the premium Microsoft charges for a their server software. DonorQuest is happy to run in either configuration, managing as many simultaneous users as you need on the various workstations in your office. All DonorQuest needs is a shared network folder to function in multi-user mode. Whether that share is provided by a traditional (expensive) file server, or an ordinary PC makes no difference. If you are using one of your workstations to actually house your DonorQuest database, then it is effectively the file server and should be thought of as such when references are made to the file server in this document.
If you are running DonorQuest on a local area network, there is actually no software at all installed on the workstations (unless you are using one workstation as a file server - then the DonorQuest installation will physically exist there). The main program file, DQWin.exe, is launched across a network share on each workstation. While the DonorQuest client is loaded into a workstation's main memory while it runs, there are no DonorQuest program files which exist on the various workstation's internal storage (magnetic hard drive or SSD). Everything is on the server, both program and data. The nice thing about this centralized configuration is that performing a DonorQuest software upgrade simply consists of updating the DonorQuest installation on the server. There is no software to update on the workstations. The only thing resident on each workstation is a simple desktop shortcut used to launch DonorQuest. Enabling a new workstation to run DonorQuest is simply a matter of creating a desktop shortcut on the workstation which references the DQWin.exe application file in the shared DonorQuest folder on the server (the DonorQuest folder is usually named \DQuest\ but may optionally have been given a different name during the initial DonorQuest installation).
For example, a workstation shortcut with the following properties:
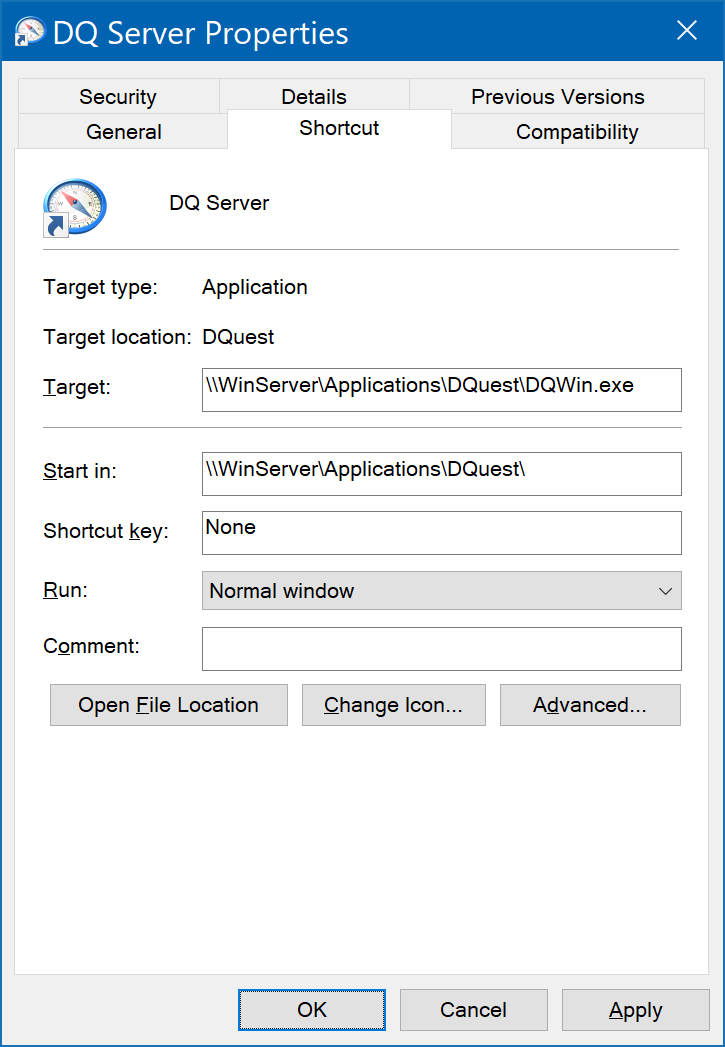
...will launch DonorQuest across the network share on a server named WinServer, in the shared folder \Applications\DQuest\ You may create the DonorQuest shortcut on a new workstation by first opening the Windows File Explorer on the workstation and navigating to the shared DonorQuest folder located on your file server. There you should highlight the DQWin.exe file, do a right-mouse-click, and choose Send To, Desktop (create shortcut). That's it!