To create a new label layout, you will need to first find an existing label layout which is somewhat close to what you would like to create, and use it as a starting point. As an example, let's look at the most commonly used label layout provided with DonorQuest, the "Avery 5160 (1" x 2 5/8") - Address Using Sal1." Click on File, Print/Setup, Mailing Labels. You should see the DonorQuest Mailing Labels dialog, shown here:
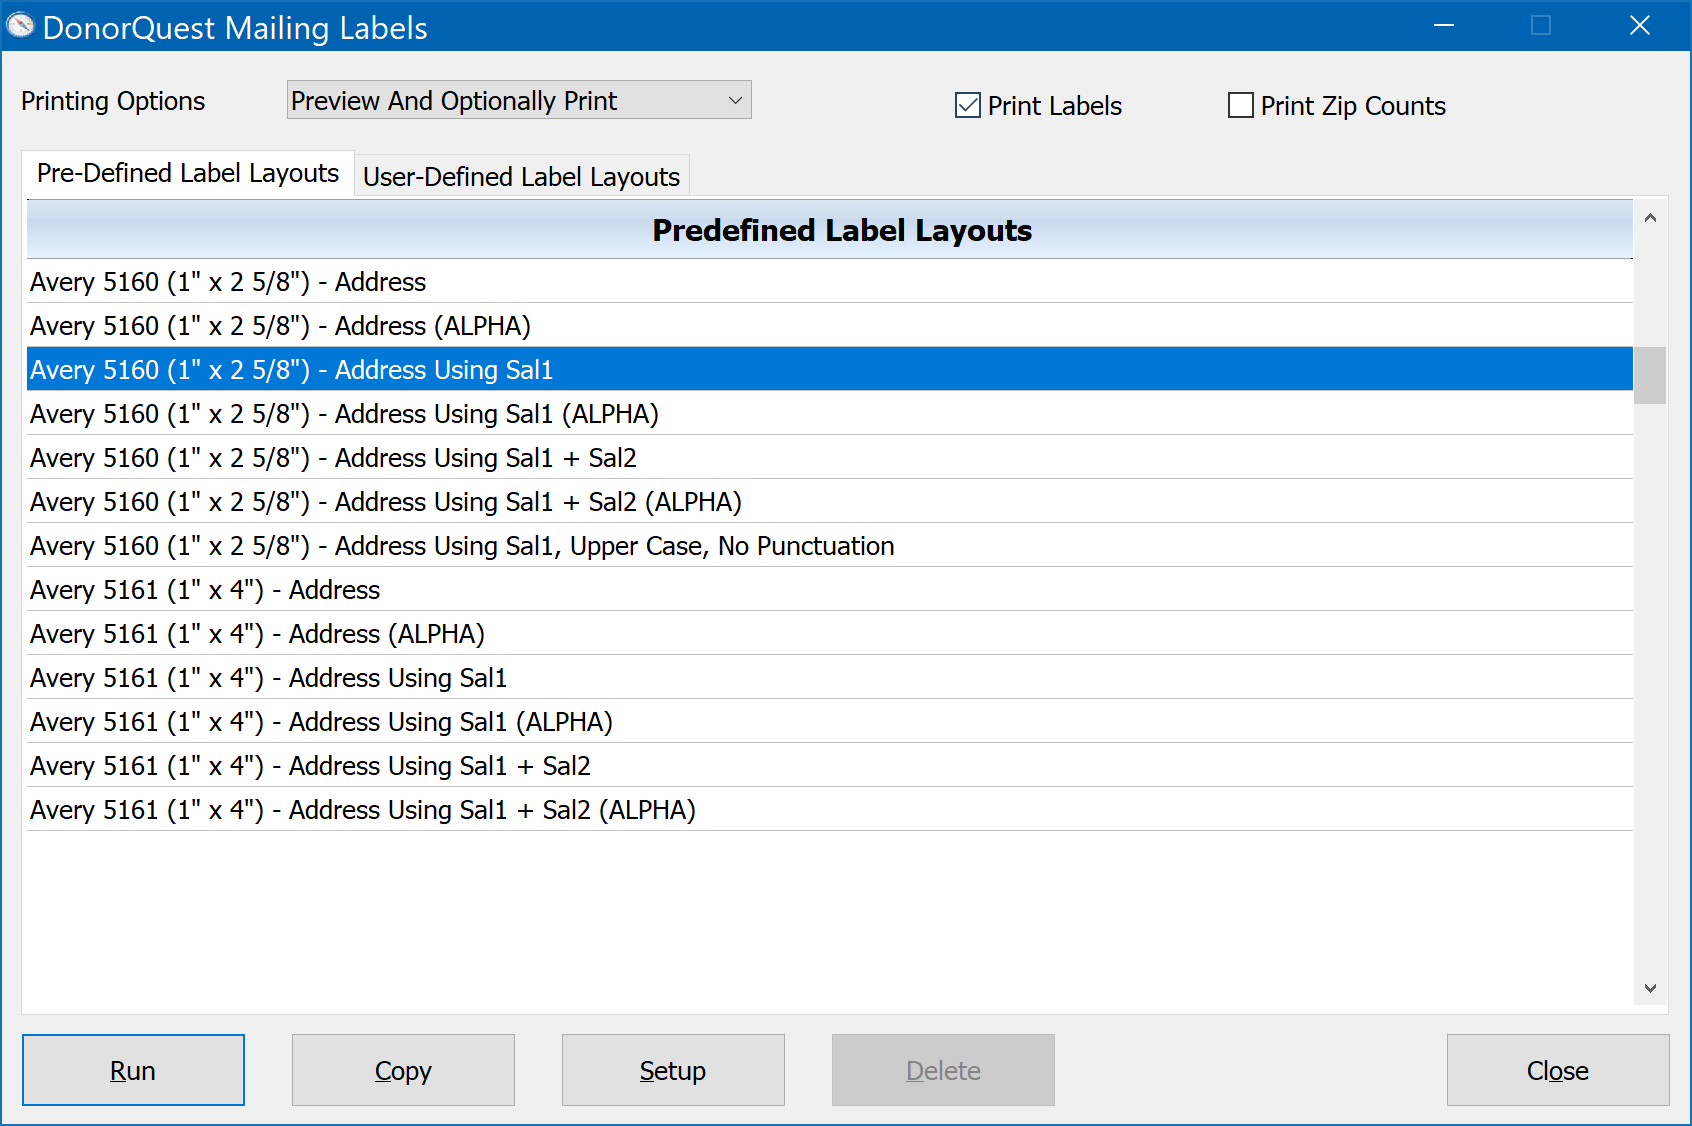
This is the same label layout we previewed in the Printing Labels topic. At this point we could copy this predefined layout using the Copy button to begin creating our own custom version of it. But if we just want to take a look at how a label is defined without copying it, we can do this by clicking the Setup button. We will get a notice telling us this is a predefined layout and can not be changed. Go ahead and click OK on the message. You should then see the Label Setup dialog, which looks like this:
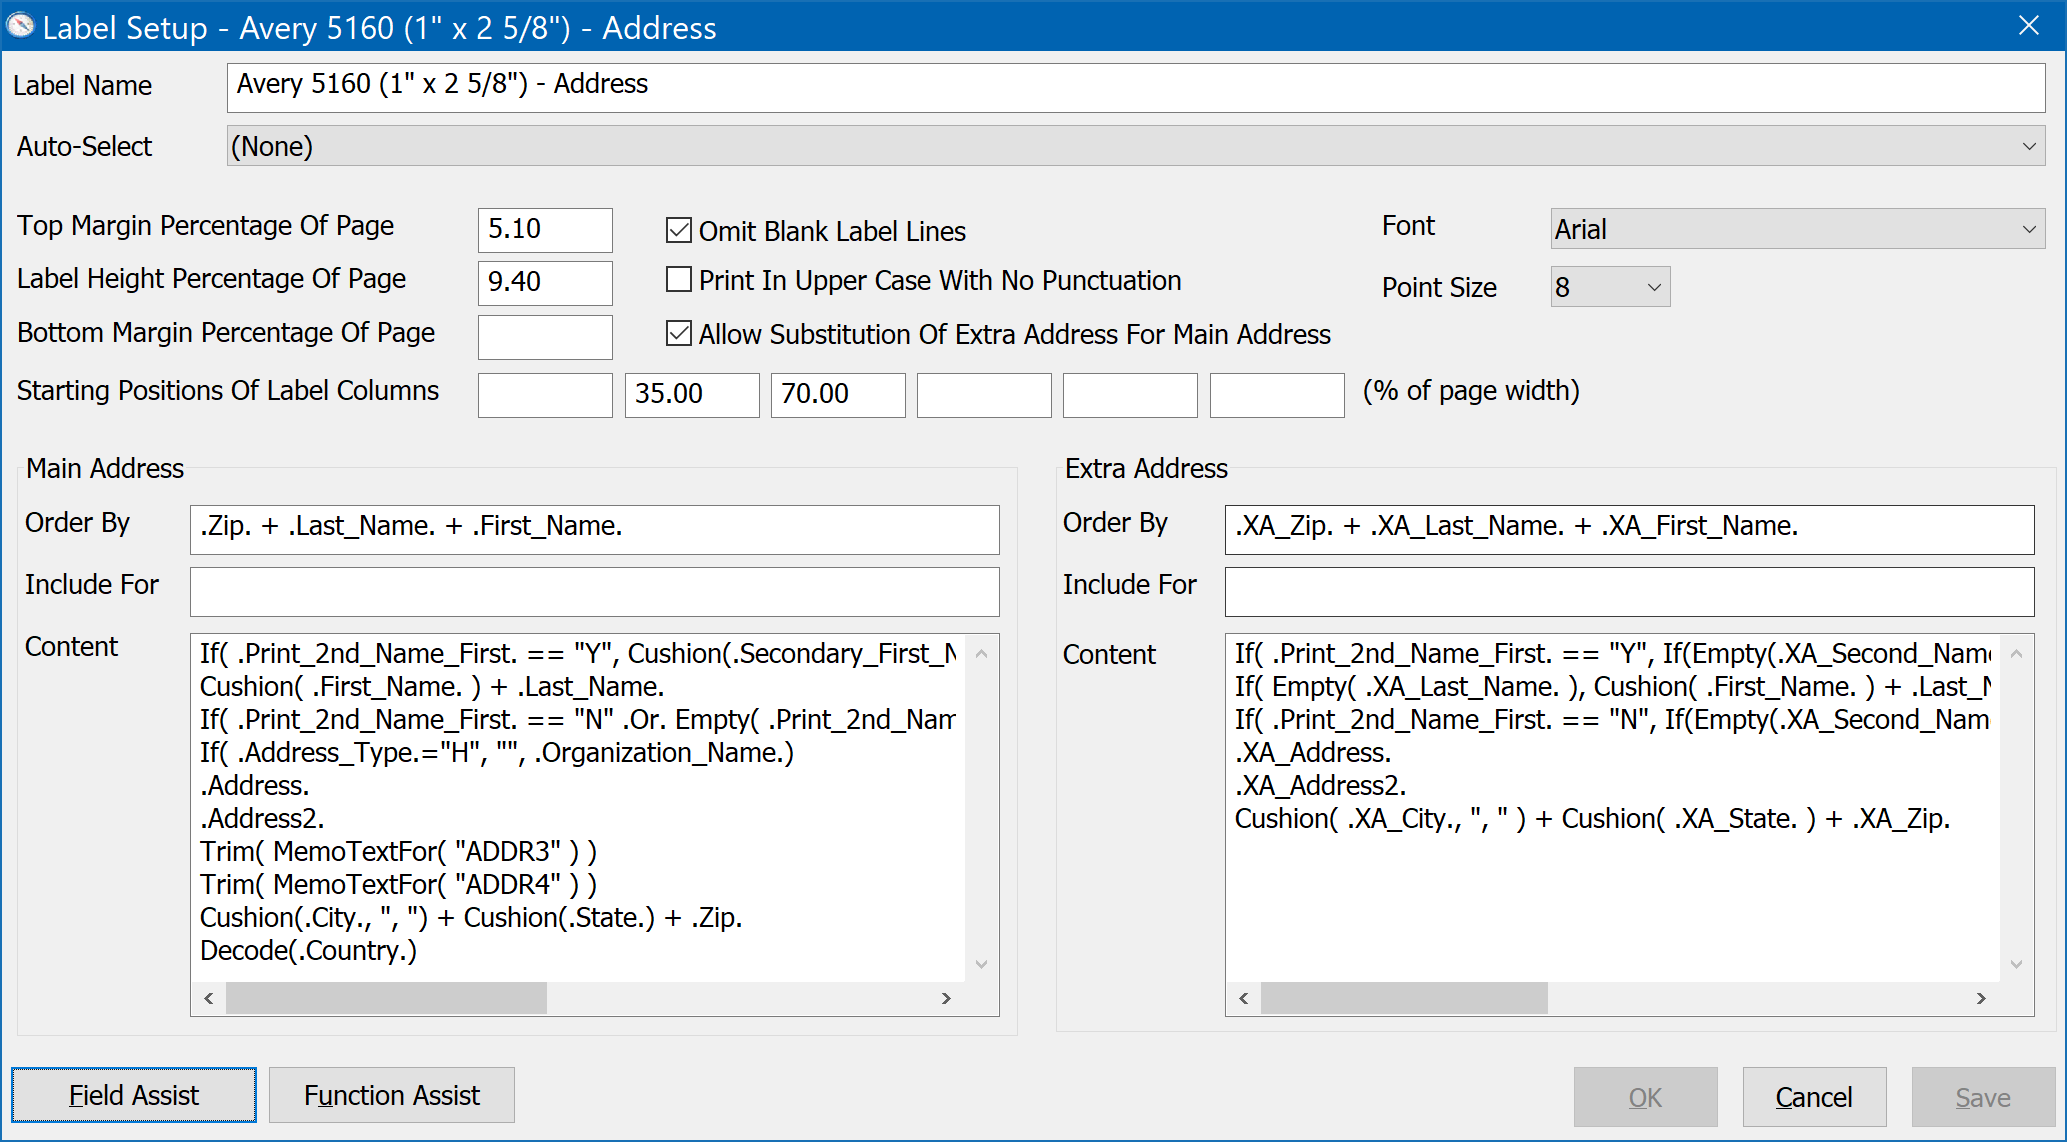
Label Name
This is simply the name of the label as it appears on the menu and in the DonorQuest Mailing Labels dialog (shown above).
Auto-Select
The Auto-Select ties into the Pre-Defined and User-Defined selection filters in DonorQuest. These types of selection filters are self-contained, requiring no input from the user. They accomplish a specific filtering action. When you link to one of these for a label layout, the selection is automatically run prior to printing the labels, and the result of the selection is then used to print the labels.
Top Margin Percentage Of Page
Most sheets of labels have the first row of labels offset from the top of the actual page. That is, there is some space at the top of each page of labels before the first row of labels actually begins. This space is intended to compensate for the inability of most printers to begin printing at the very top of each sheet of labels. However, if there is too much blank space before the first row of labels, printing may begin too far up on the page before the first row of labels. When this is the case, the Top Margin Percentage of Page value should be set to a number large enough to allow your printer to "skip past" the blank space preceding the first row of labels. If your labels begin to low on the page, causing the text to begin to low on the first row of labels, then you should decrease this number to compensate and move the labels up on the page. Use this setting in conjunction with the Bottom Margin Percentage of Page and Label Height Percentage Of Page to align the labels correctly from top to bottom.
Label Height Percentage Of Page
The Label Height Percentage Of Page is a value that represents the vertical percentage of the page that each label requires. For example, the Avery 5160 labels supplied with DonorQuest have a Label Height Percentage Of Page of 9.40. This is because these labels are 1 inch tall and there are 10 rows of them. This means that the labels take up a total of 94 percent of the available vertical space on the page. When you combine this with the Top Margin Percentage Of Page (5.10 percent) and the Bottom Margin Percentage of Page, this adds up to 100.00 percent. Since 10 label rows add up to 94 percent of the page height, a single label takes up 9.40 percent of the page. Only one number is needed for the label height, because all 10 labels are a uniform height.
Bottom Margin Percentage Of Page
Some sheets of labels have the last row of labels offset from the bottom of the page. That is, there is some space at the bottom of each page of labels after the last row of labels ends. This space is intended to compensate for the inability of most printers to print to the very bottom of each sheet of labels. However, if there is not enough blank space allotted after the last row of labels, printing may actually end past the last row of labels. When this is the case, the Bottom Margin Percentage of Page value should be set to a number large enough to allow your printer to "push up" the labels on the page. If your labels end too high, with the information on the last row of labels not printing fully, then you might decrease this number to compensate and allow more lines of text to print on the last row of labels. Use this setting in conjunction with the Top Margin Percentage of Page and Label Height Percentage Of Page to align the labels correctly from top to bottom.
Starting Positions Of Label Columns
DonorQuest can support anywhere from one to six-across labels. The six starting position values specify at what position (in percent of page from left to right) each label column begins. You can see above that the Avery 5160 labels supplied with DonorQuest are three-across, with the first column of labels starting right at the left margin (with no starting position specified), and the second and third columns starting at 35% and 70% from the left, respectively. Since there is no fourth, fifth, and sixth starting positions, DonorQuest knows these are three-across labels.
Omit Blank Label Lines
During the course of printing, a donor may be encountered who has absolutely no data in the particular field or fields that comprise one or more lines of the mailing label. This results in a blank line being left on the mailing label. An example would be those donors who have nothing in the Address2 field. If the Omit Blank Data Lines check box is on then such blank lines will be omitted, and there will be no vertical gaps in the lines of text on a label. This checkbox should normally be set on.
Print In Upper Case With No Punctuation
If printing labels for a mailing, the Post Office prefers all addresses to be in upper case with no punctuation to make it easier for their automated systems to read the labels. However, labels printed this way do not look as nice for obvious reasons. This checkbox provides an easy way to comply with the Post Office's preference, without having to store the addresses in upper case in the actual database, so that the mixed case version of addresses are still available for form letters and such.
Allow Substitution Of Extra Address For Main Address
In DonorQuest, each donor has one main address, and any number of extra addresses. One or more of these extra addresses may be triggered to print based on both the date range set in the extra address itself, and additionally by any condition set in the Extra Address Include For expression. If one of a donor's extra addresses prints, you would normally want to prevent the donor's main address from printing. If the Allow Substitution Of Extra Address For Main Address option is turned on, then if any extra address for the donor prints, the donor's main address will not print. The labels that are supplied with DonorQuest are shipped with this option turned on.
Font
This is the font for the label layout. All labels will be printed using this font when the layout is used.
Point Size
This is the point size for the font of the label layout. All labels will be printed using this point size when the layout is used.