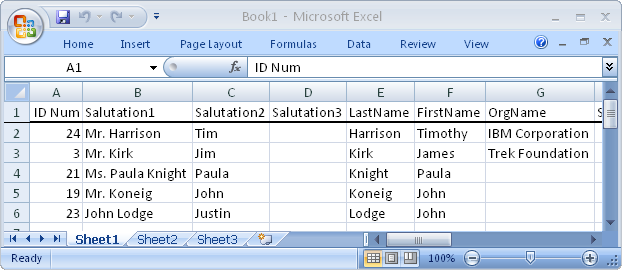
Very commonly, you will want to export data directly to Excel. DonorQuest has the ability to do this directly without the need for an intermediate file which you then have to import to Excel. So, for the example shown in the previous topic on exporting directly to a file, if we simply change the Export Mode to "Direct To New Excel Spreadsheet" (or Direct To Calc for the online version of DonorQuest), then when we click on the Begin Export button, Excel (or Calc) will open automatically with a new spreadsheet containing our zip code selection, and the columns specified in the Mailing House field group. It should all look like this:
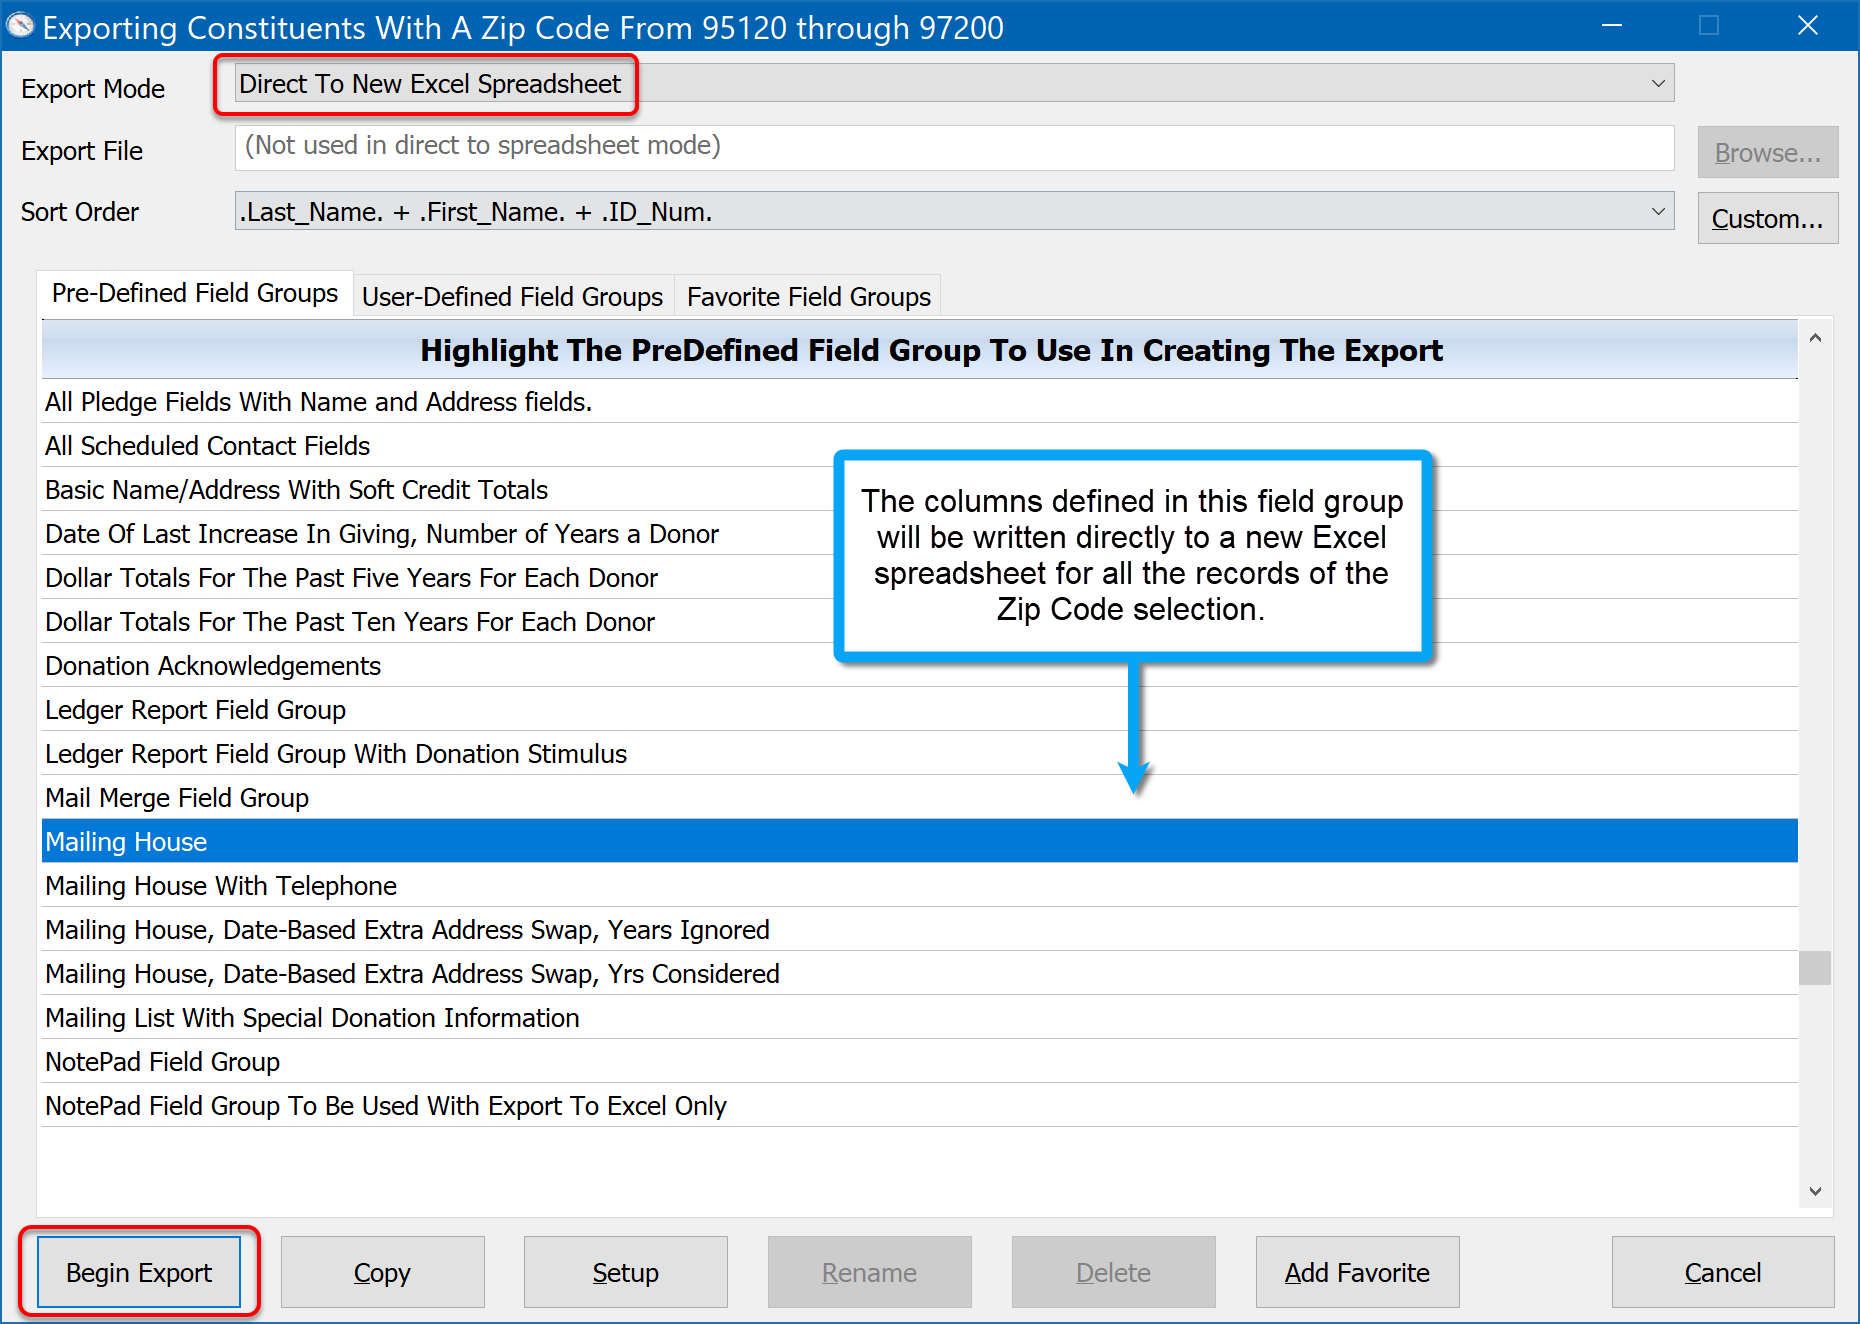

Note that due to the overhead involved in communicating directly with Excel, this method of export should only be used for smaller exports of a few thousand records or less. For large exports, the direct to file method is preferred.
Creating A Custom Field Group
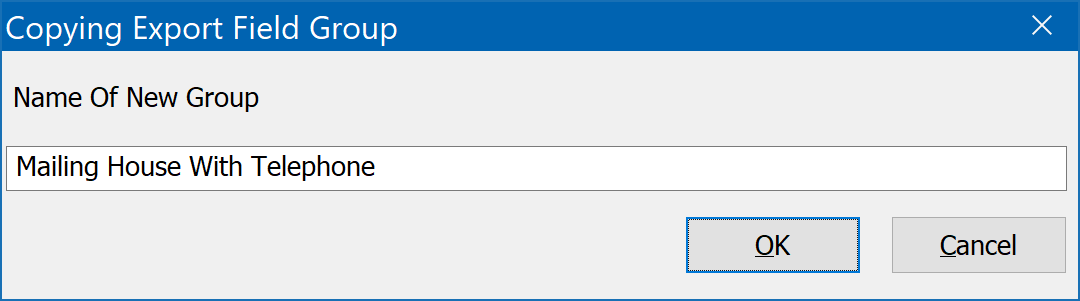
Let's say that the pre-defined field group, "Mailing House", is very close to having all the columns you need, but you would like to include the primary telephone number. You can accomplish this by creating a custom field group, using the Mailing House group as a starting point. To do this, go to the point of exporting as shown in the above example with the Export dialog open. Highlight the Mailing House field group again, but this time click on the Copy button of the Export window, and enter the following for the name of your new custom field group:
Click OK. You will see the new field group appears under the User-Defined Field Groups tab of the Export window. Now click on the Setup button. This time DonorQuest will open the field group setup window with no limitations. You may add the telephone field by clicking the Append button, and simply choosing it from the pop-up field menu.
You may use the Move Up and Move Down buttons if you have a preference as to where you want the telephone to appear in the left-to-right column order of the export. When you are ready, click OK on the field group setup to save the changes to our new custom field group:

Finally, click on the Begin Export button of the Export window, with the settings still set for Excel. You should see Excel open again with the telephone field now included, like this: