DonorQuest 7.6 includes some significant enhancements as outlined below. If you are upgrading from a version of DonorQuest earlier than 7.5 (the previous release), you should also consult the various "What's New..." documents, available under the, "What Was New In Previous Releases" topic of this User's Guide. The version of DonorQuest you are currently running is always shown in the upper-left corner of the main DonorQuest window.
Here's an overview of the new features in DonorQuest 7.6:
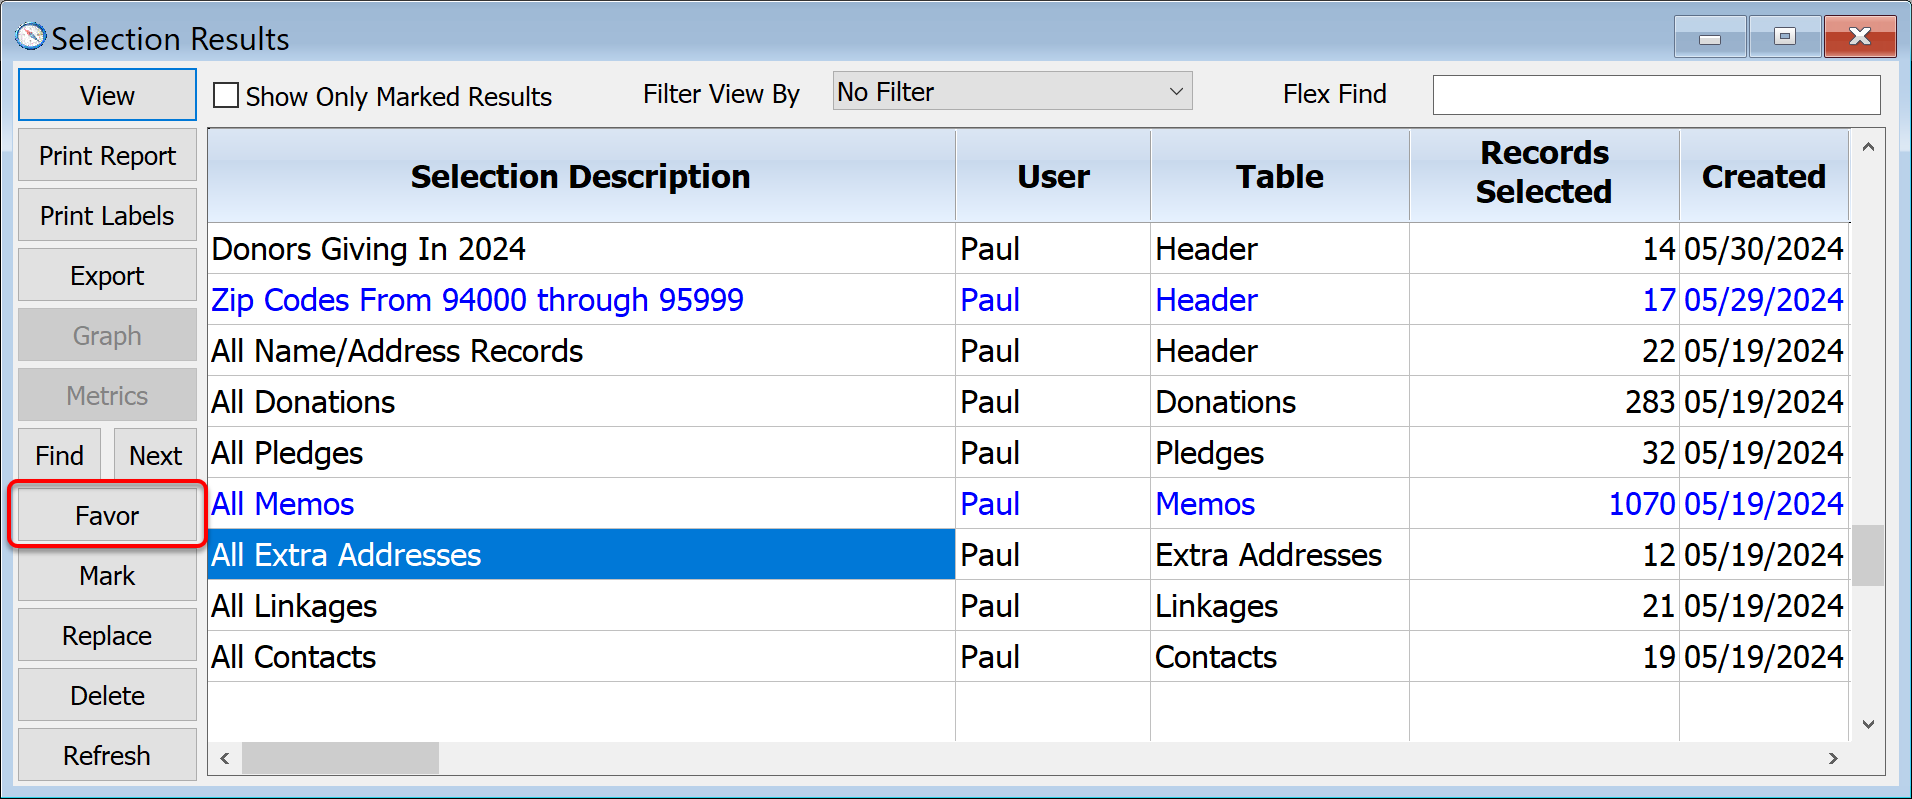
Ability To Favor Selection Results
As you may know, DonorQuest allows thousands of Selection Results to exist, and they are in a single window shared by all users. Now within the Selection Results window, there is a new button which allows you to personally mark a selection result that you would like to have quick access to without having to search for it. Essentially, you will be able to maintain a personal list of the Selection Results you use most frequently, and this list is tied to your DonorQuest user account, so each user can have their own list. When you favor a Selection Result, it will turn blue and remain blue between sessions until you unfavor it, as shown here:
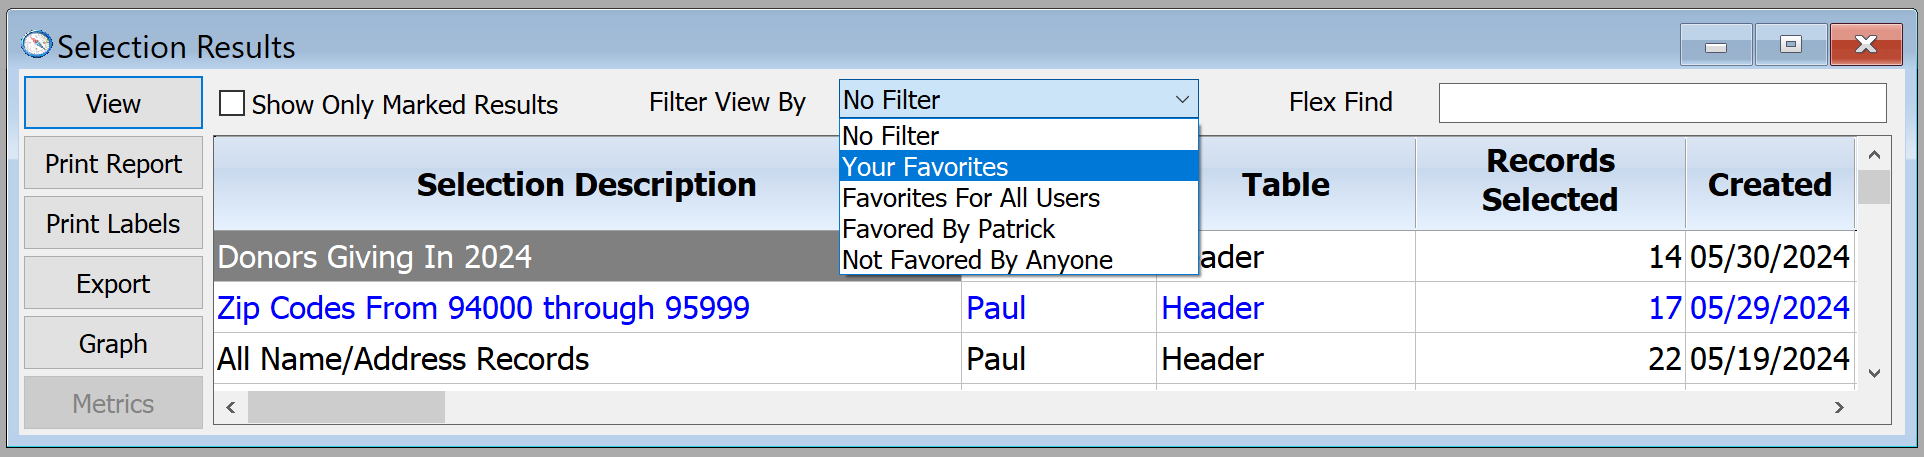
Ability To Filter Selection Results Window
The Selection Results window now has a new, "Filter View By" option allowing you to filter the results which are shown. You may choose to see only your favorite selections, favorites for all users, favorites for a specific user, or all the results not favored by anyone, as shown here:
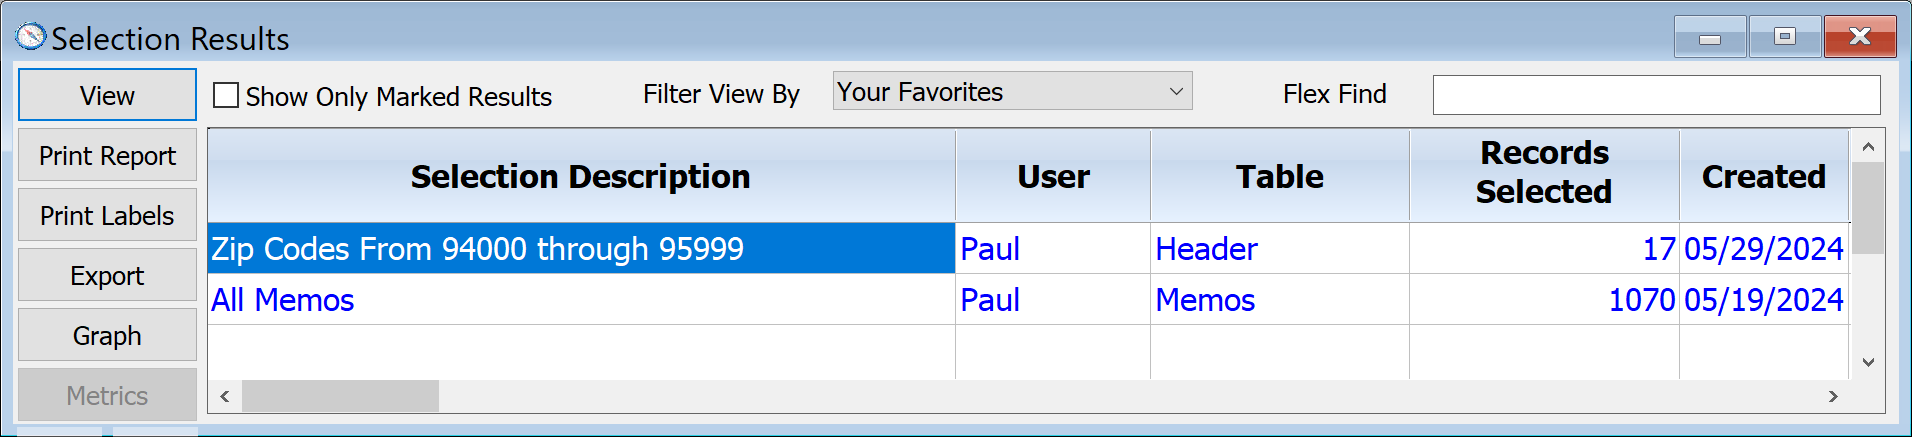
Here is how the display would look showing, "Your Favorites" when user Paul is logged in:
Flex Find Added To Selection Results Window
The Selection Results window now has a new, "Flex Find" option (shown above) allowing you to filter the results based on keywords or phrases which occur in the Selection Description, User Name, or Table columns. This serves as a complement to the Find and Next buttons which also allow you to search for keywords and phrases in selection descriptions, but do not filter the display.
First Letter Search In All Columns Of All Data Grids
Now you may do simple searches on any column of any data grid. Simply move the highlight to the column you wish to search and type a letter or number. This is a very simple search, only looking at the first letter of data values in the column you're searching. It's not meant to replace any of the advanced forms of searching, such the Flex Find or the Progressive Search of the Main Information window, but rather it is a quick way to navigate the grid windows which do not have an explicit way of searching reserved for them. For example, if you are looking at a donor who has a lot of donations, and you would like to browse through any donations with a Stimulus code of SPRING, simply place the highlight in the Stimulus column and repeatedly press the "S" key. The donation display will scroll as the highlight moves from row to row, jumping from one Stimulus code starting with "S" to the next.
Titles And Suffixes Now Included In Salutation 1 Auto-Fill
The auto-fill formula built into DonorQuest for Salutation1 (the formal salutation) now includes the primary and secondary donor's title and suffix if present. As always, you may override the auto-fill as needed on a case-by-case basis, and DonorQuest will keep your changes.
Auto-Fill For All Salutation Fields Now Customizable
While DonorQuest still has the built-in formulas it uses to auto-fill Salutation 1 and Salutation 2, and they work well for most organizations, now those formulas may be replaced with your own, and you may even set an auto-fill formula for Salutation 3 now. To customize the Salutation auto-fills for your organization, click on Configure, Program Settings, which looks like this:
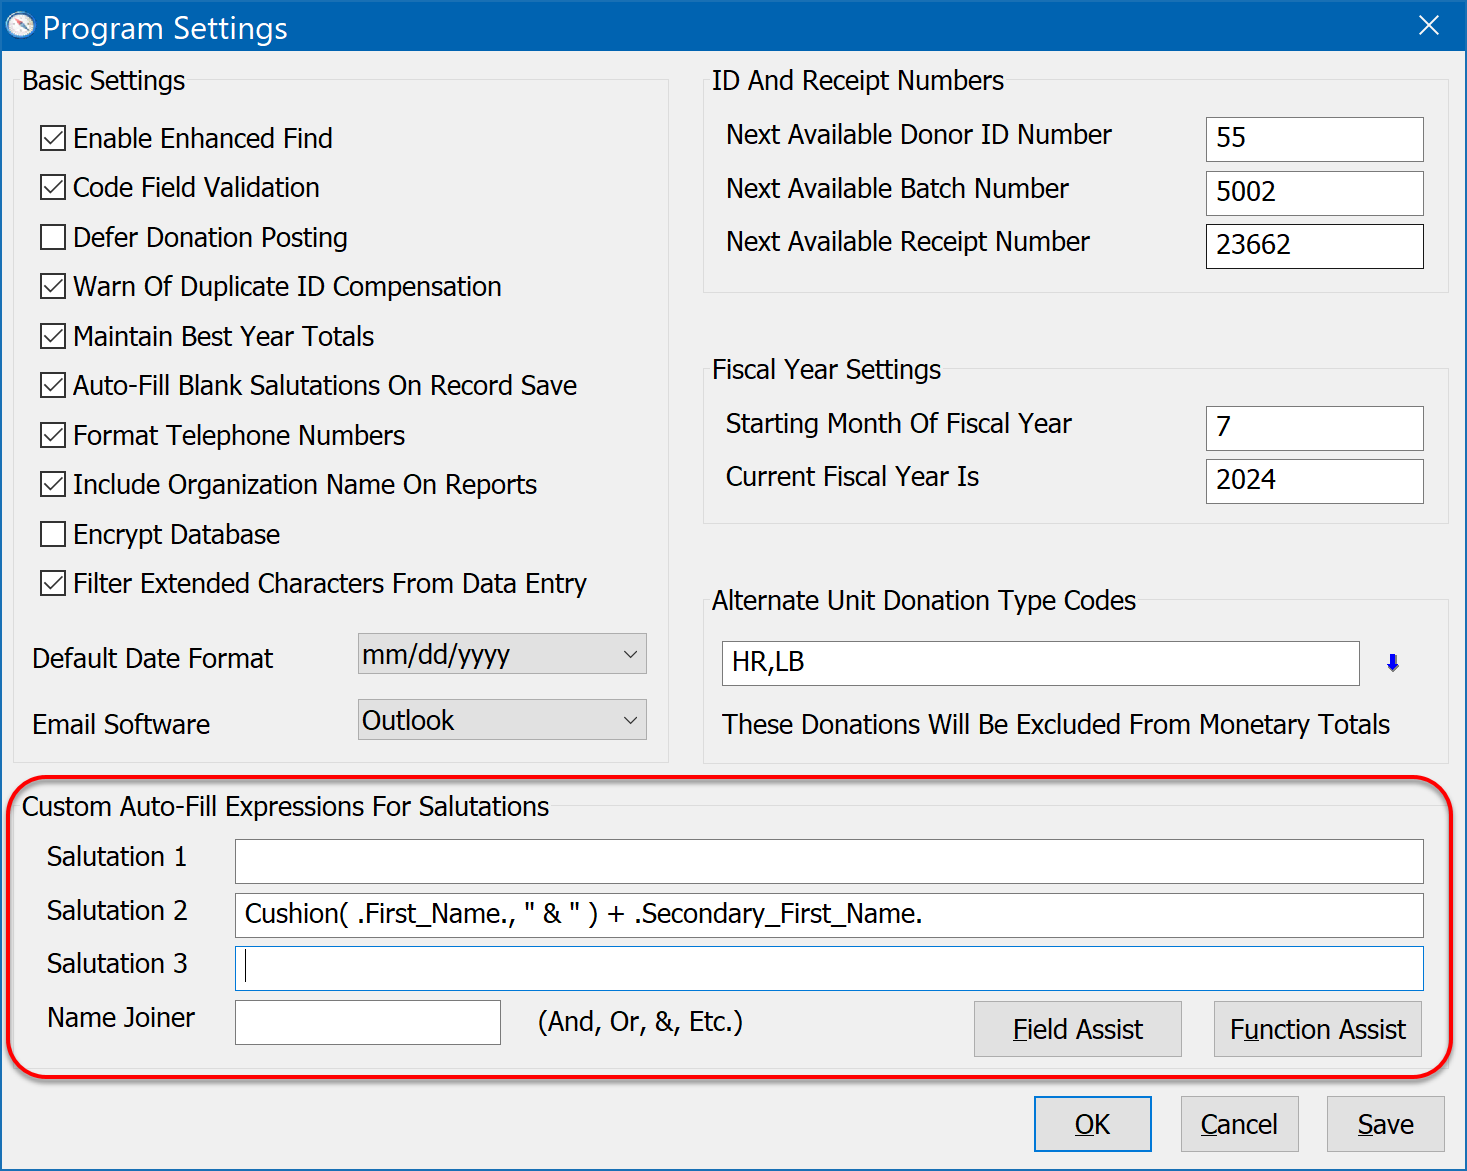
Notice that we have a single formula for Salutation 2 auto-fill, and we left the formula for Salutation 1 blank so that DonorQuest will use its internal formula for that. The new "Name Joiner" option allows you to specify the joiner to be used between the primary and secondary donor. Normally "And", "Or", or "&" is used here. If left blank then DonorQuest will default to using the "&" symbol with its internal auto-fill formula for Salutation 1.
Salutation Fields Now Auto-Filled During Import
DonorQuest will now auto-fill the salutation fields as new records are brought in during a data import. This will only happen for the Salutation fields not being assigned data from the import itself. Also, the checkbox must be on for, "Auto-Fill Blank Salutations On Record Save" under Program Settings (shown above).
Easier Now To Make Big Changes To Your Custom Window Preferences
It has always been possible to adjust column positions in the various spreadsheet-style windows in DonorQuest by clicking and holding down the left mouse button on a column header and dragging left or right. You could also do a right-mouse-click on any column title and turn on or off the display of a column using the resulting pop-up menu. While this is fine for simple on-the-fly customizations, making wholesale sweeping changes was cumbersome using this method. Now there's a new way to easily edit your window display preferences. When you click on User, Change Your Window Column Preferences, you will see the following:
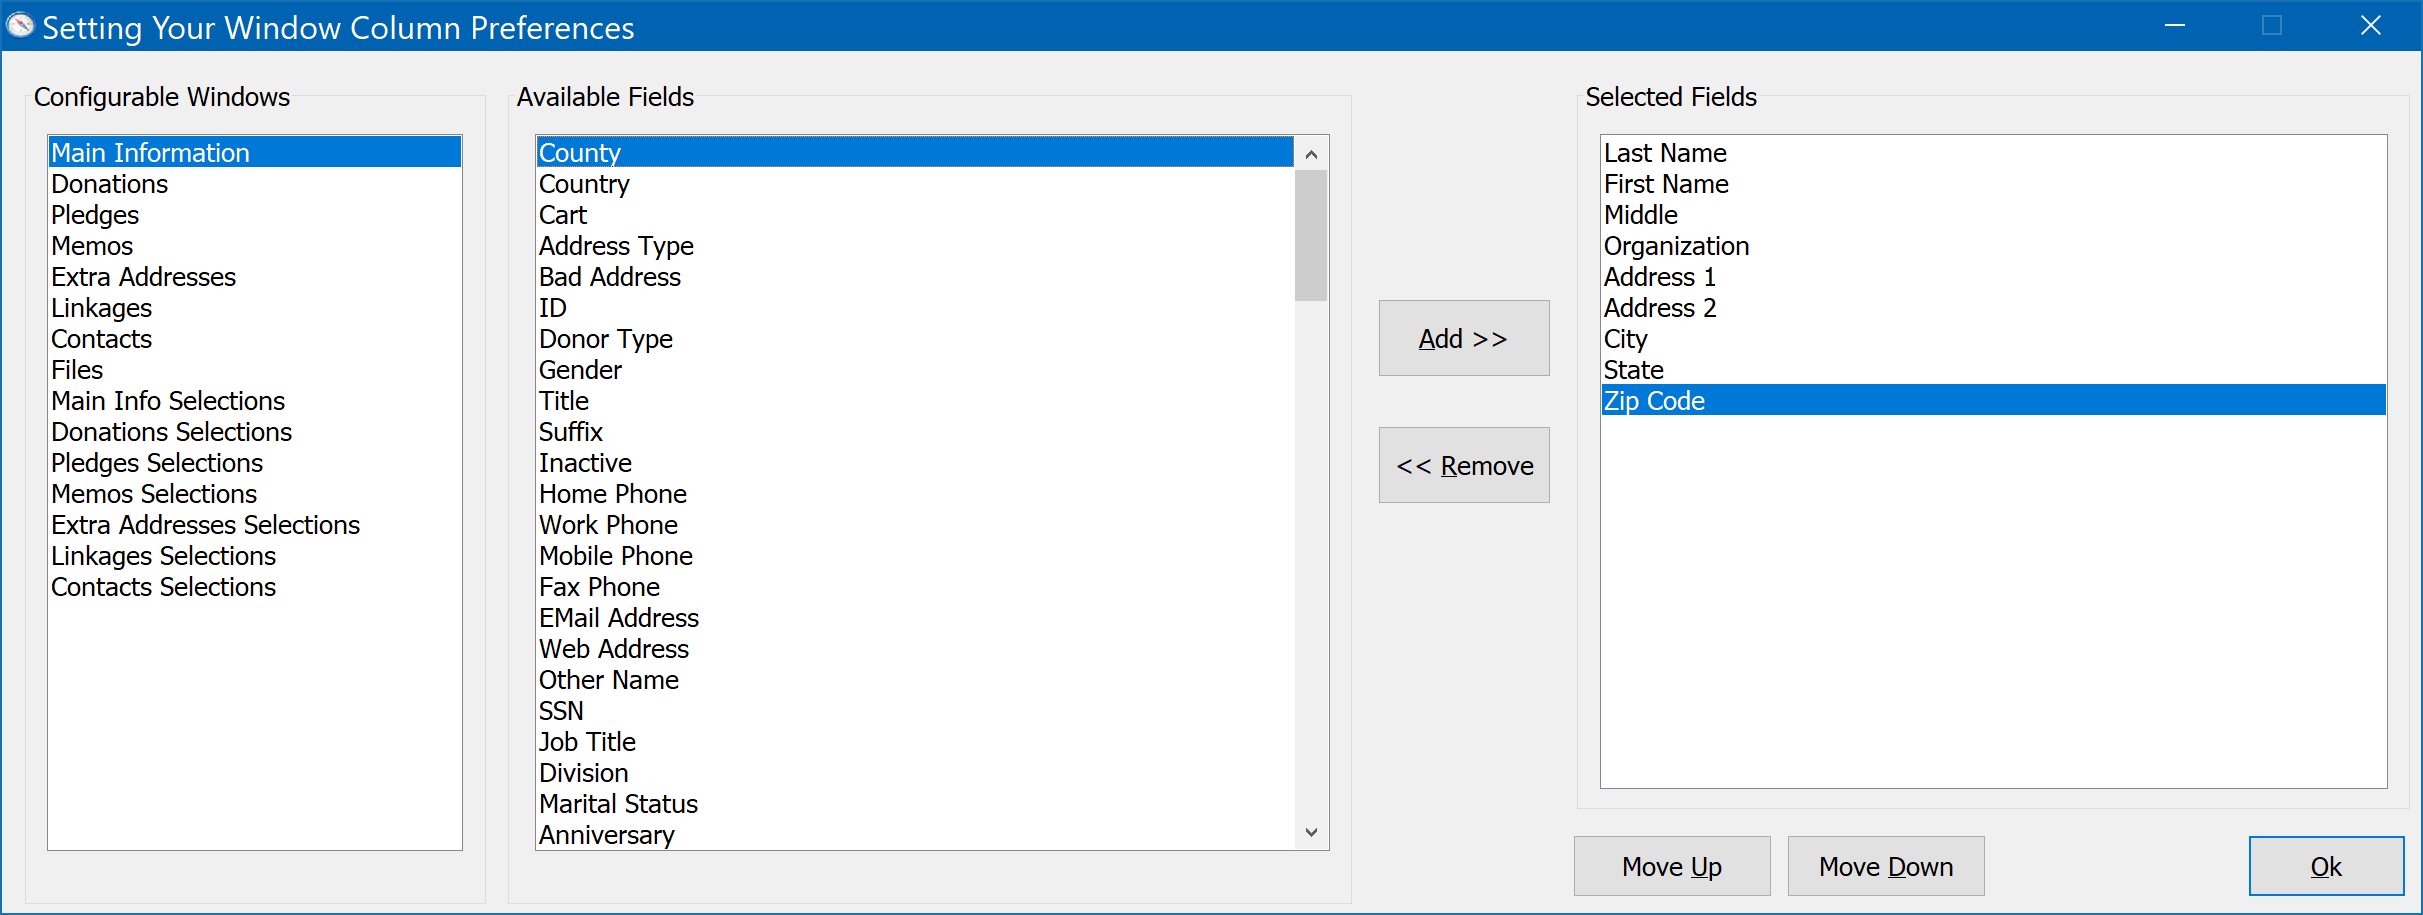
The, "Configurable Windows" pane shows all of the windows in DonorQuest which allow customization. As you scroll through the window names, you will see the, "Available Fields" pane update to show all of the available fields (columns) for the currently highlighted window. The, "Selected Fields" pane shows the fields (columns) which will actually be displayed for the window. You can use the Add>> button to move Available Fields to Selected Fields. The <<Remove button will take the currently highlighted field in the Selected Fields pane and move it back to the Available Fields pane, effectively taking it off the actual display you will see for the corresponding window. The "Move Up" and "Move Down" buttons directly below the Select Fields pane will move the currently highlighted field up or down, corresponding to a left or right movement for the column which will show the field contents when you use the window. Any changes you make here are for your DonorQuest account only and do not affect other users. Changes are saved immediately, so you may simply click the OK button when you're done making changes.
New DonorQuest Icon
Last but not least, DonorQuest now has a new icon which looks like this:
June, 2018